Hired-Hand RollSeal Rollup Curtains: ROLLUP CURTAIN SYSTEM Rev 12-07 User Manual
Page 23
Part No. 4801-5169 Rev 12-07
Rollup Curtain System
Page 23
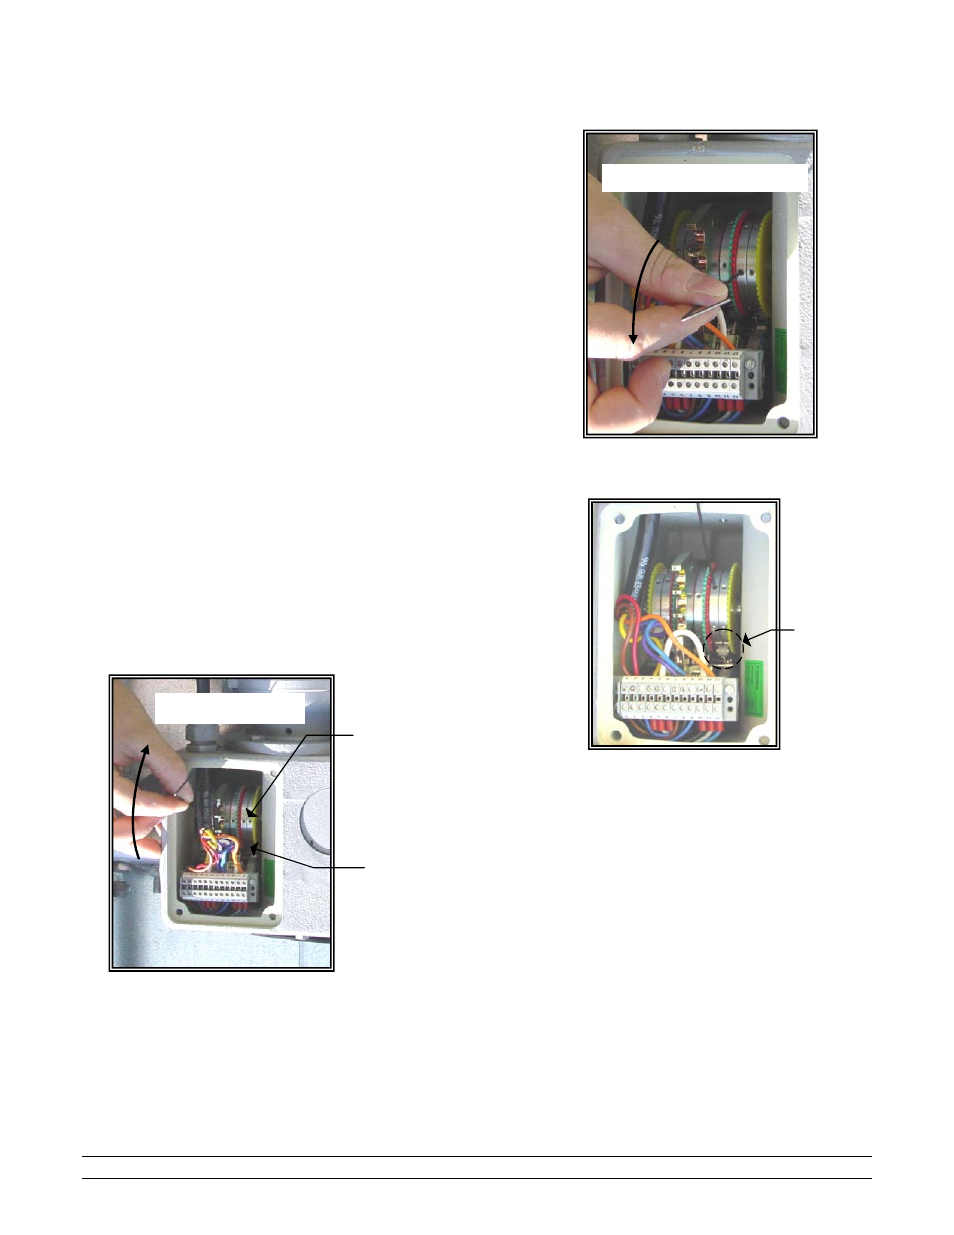
Figure 18
– Left Limit Switch Roller
Limit
Switch
Roller
Figure 17
– Manually Close Curtain
Setting
Rings
Hex
Adjusting
Screws
Figure 19
– Manually Open Curtain
3. Run the curtains to the bottom position by using a Crank or
Drill [Item 14 Figure 13] or by manually turning the one of
the three Left Adjusting Screws with the Allen Wrench
from the Vinyl Seal as illustrated in Figure 16. NOTE: If
turning the drive with drill and adaptor, run to end position
carefully (very slowly). Maximum drive speed is 1400 rpm.
NOTE: Electrical power must be applied and Limit
Switches must be properly wired for curtains to operate by
moving the Setting Rings.
4. With the curtain at the bottom limit, turn the Left Limit
Switch’s 3 Setting Rings until the Limit Switch Roller
[22] snaps into place in the Switch Groove [21]. See
Figure 17.
5. When the three switch grooves [21] are in line, the three
Adjusting Screws in the adjusting rings [9, 11, 13] are
also in one line. Tighten the screws in the setting rings
[9, 11, 13] using a 1.5 mm hex wrench. Torque to 1.3 to
1.5 in.-lb.
6. Open the Curtain. See Figure 19.
7. Turn the 3 Setting Rings of the Right Limit Switch like in Step
4.
8. Tighten screws in setting rings [15, 17, 19] to 1.3 to 1.5 in.-lb.
9. Verify the operation of the Limit Switch Settings by operating
the curtain from the controller.
10. Replace the tools in the Vinyl Seal and replace the Limit Switch
Cover [6] and Seal [30].
Curtain Moves Down
Curtain Opens