Maple Systems MAPware-100 User Manual
Page 4
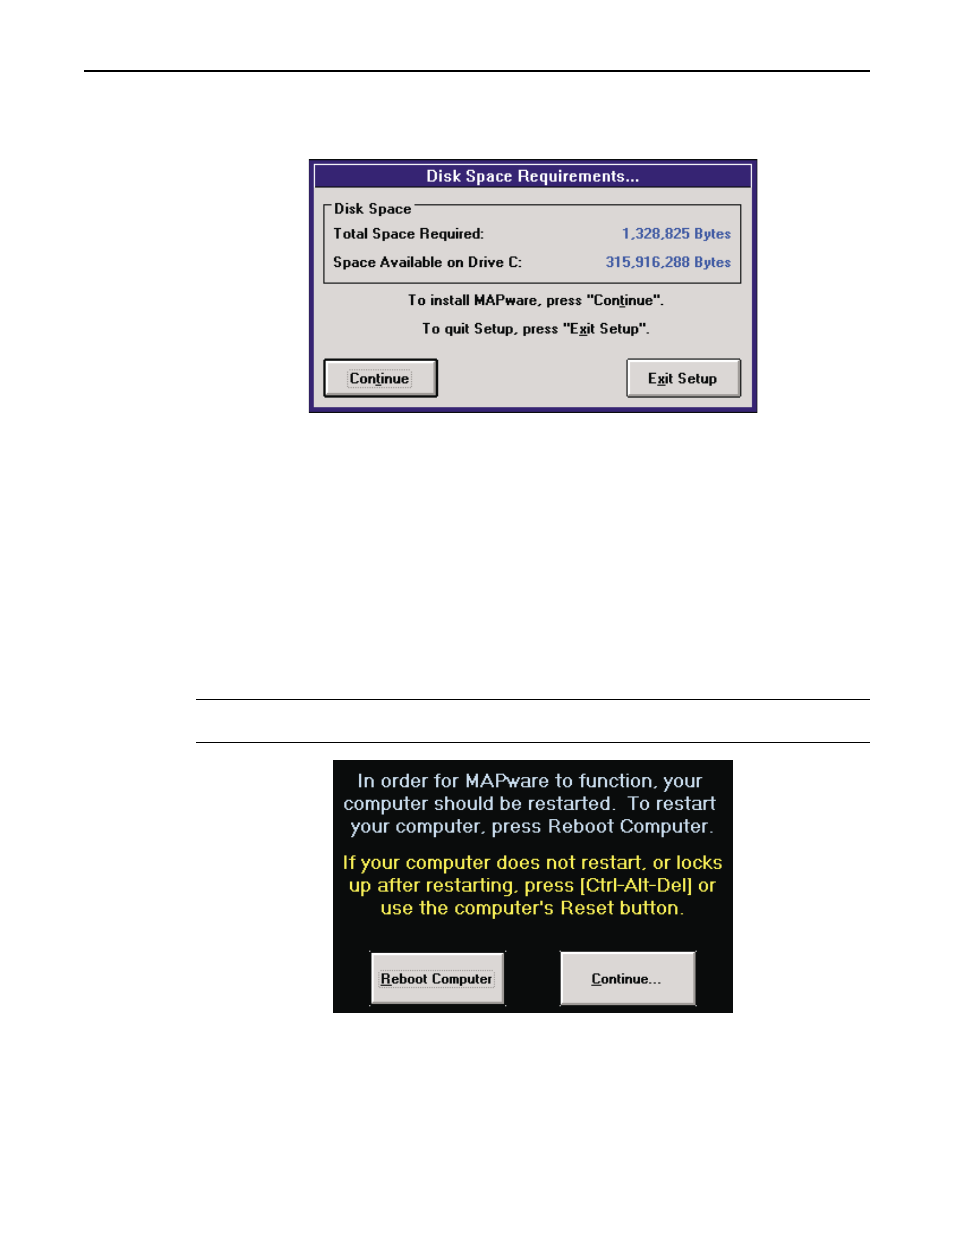
10. Setup will then show you total space required and space available for installation of
MAPware 100. Choose the Continue button. If adjustment is needed select Exit
Setup.
11. The MAPware 100 Setup will now start to transfer files to selected areas on the hard
disk. It will create the subdirectory specified in step 8. It will also place files into the
WINDOWS and WINDOWS\SYSTEM subdirectories. A dialog box will indicate the
files being transferred and the percentage of the file transfer complete. A MAPware
100 program group and program items will be created. You can run MAPware 100
from this program group or move the icon to another group later. Finally, MAPware
100 makes use of Display Specific Fonts (DSF). In order for MAPware 100 to use
these fonts, they are transferred into the WINDOWS\SYSTEM subdirectory and your
Windows WIN.INI file is updated.
12. Once the installation is complete, you are asked if you want to restart the computer or
continue with the current Windows session. MAPware 100 will not operate correctly
until the computer is restarted. Choose the Reboot Computer button.
Note: In rare cases, your computer may not restart properly. If this happens, simply reboot
your computer.
13. A new Windows Program Group entitled Maple Systems MAPware 100 has been
created which contains MAPware 100 and MAPware Setup. Remove the floppy disk
and store it in a safe place.
MAPware 100 User's Guide
3
1010-0089, REV00