WEATHER GUARD 1280 User Manual
Page 5
5
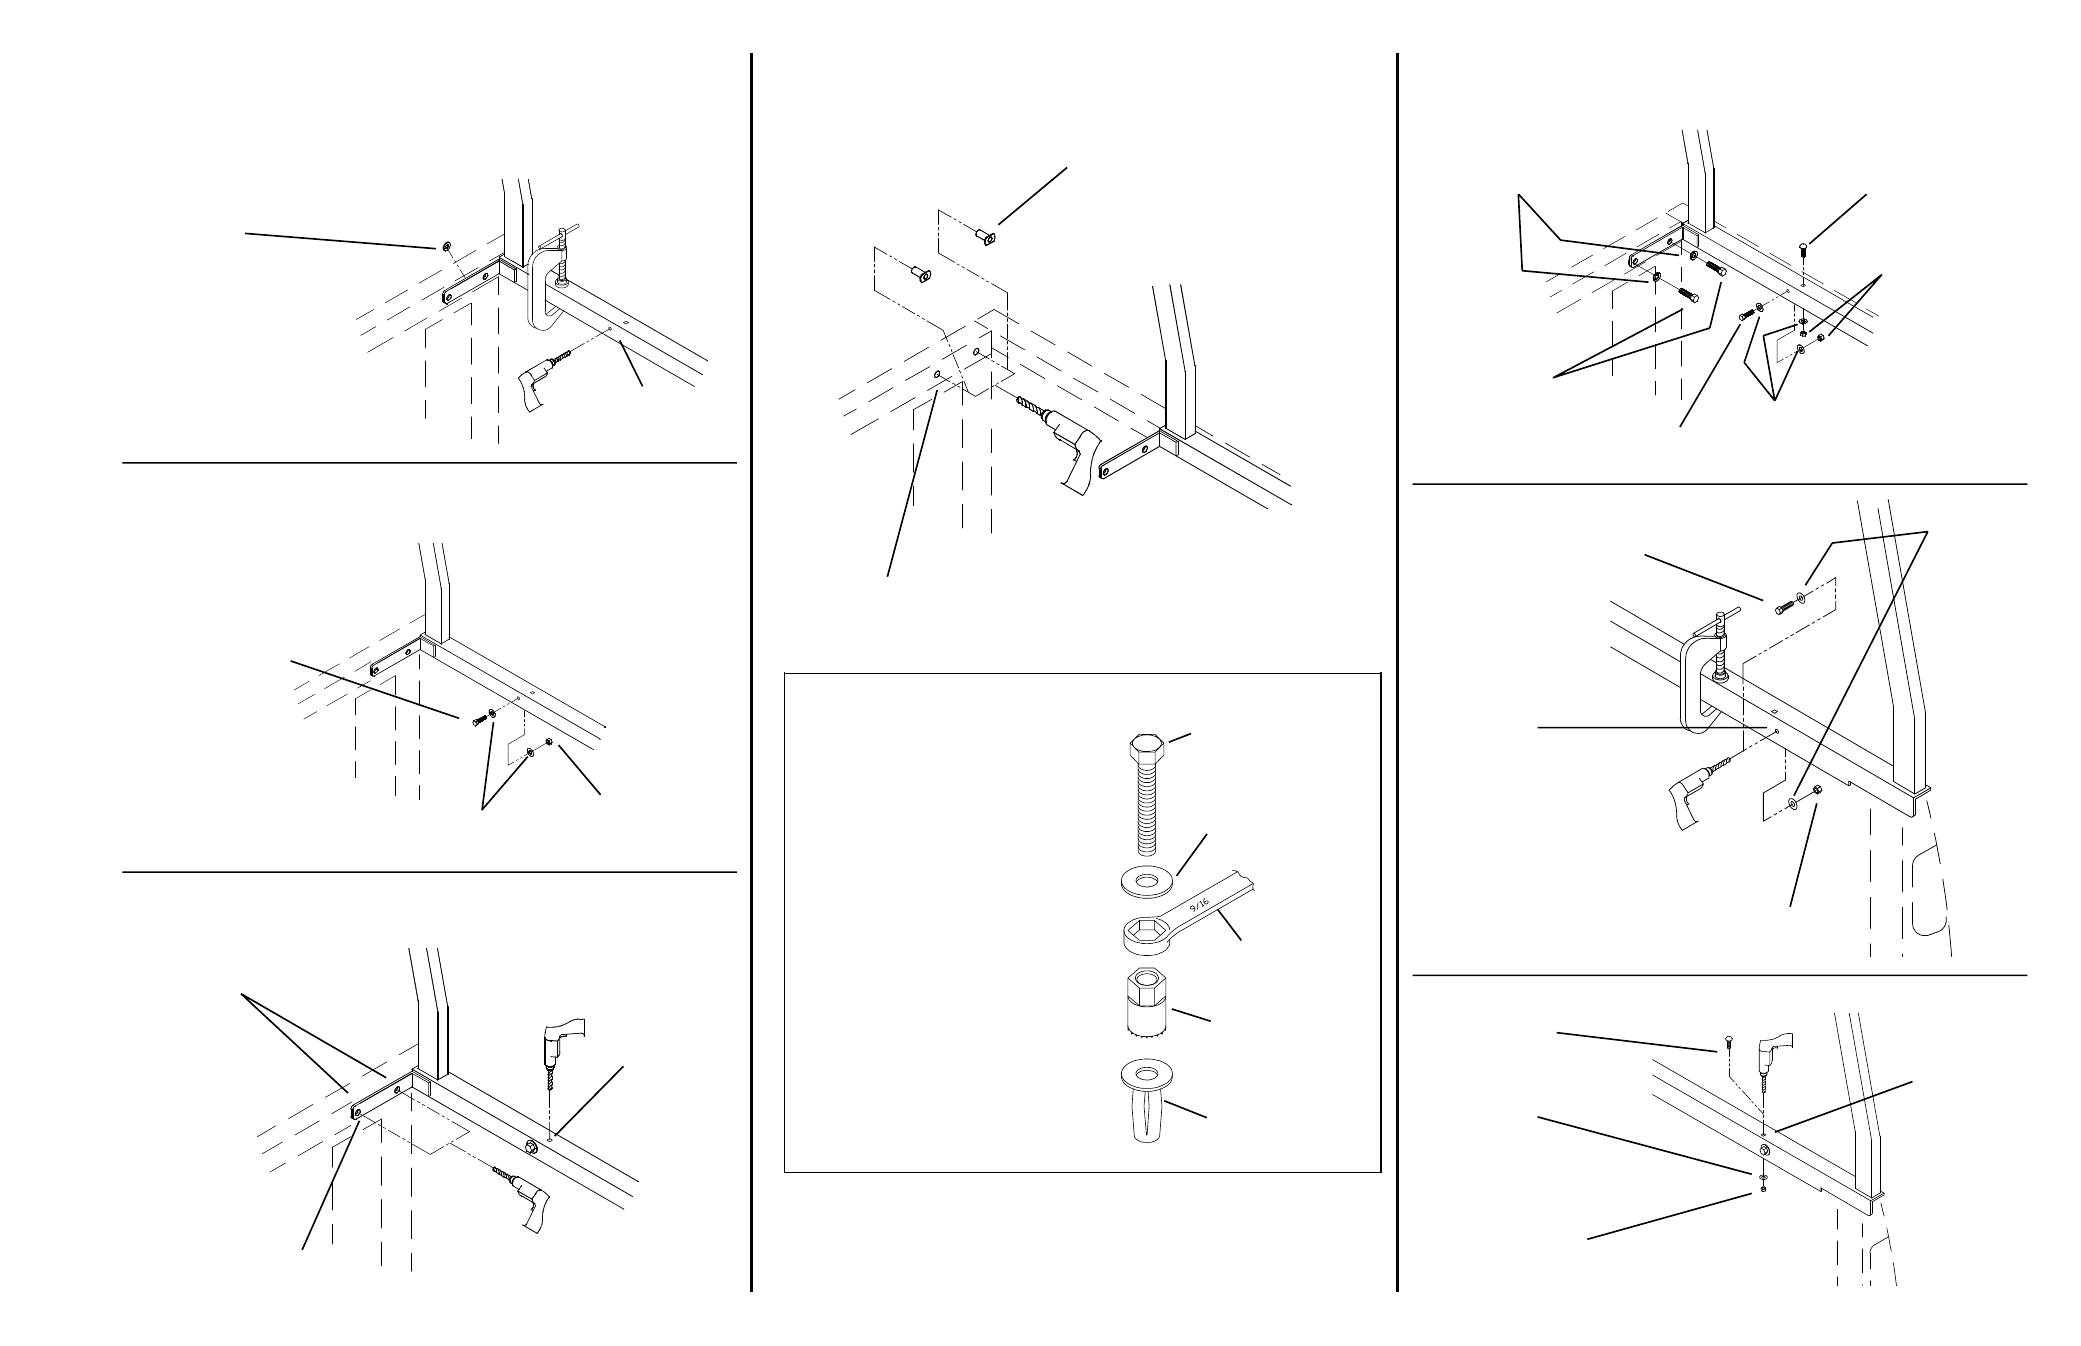
STEP 8. Tape Washer, Clamp, and Drill Front Side
STEP 9. Unclamp, Remove Flat Washer, and Fasten Side
STEP 10. Drill Front and Top
STEP 11. Unfasten Side, Move Rack out of the Way,
Redrill Front Holes, and Install Blind Fasteners
STEP 12. Install Front, Top, and Side Fasteners
STEP 13. Clamp, Drill, and Fasten Rear Side
STEP 14. Remove Clamp, Drill, and Fasten Rear Top
INSTALLATION PROCEDURE USING BLIND FASTENERS
Black
Oxide
Bolt
Flat
Washer
9/16
Wrench
Installation
Tool
Blind
Fastener
Place a drop of oil on the
black oxide bolt before
assembling as shown at
right. Place the Blind
Fastener in the hole and
use a 1/2 or 7/16
wrench to tighten black
hex bolt until the blind
fastener is fully seated.
When setting black hex
bolt, it will start out hard.
As the Blind Fastener
bulbs out it will get
easier, until it bottoms
out or sets. Make sure
the Blind Fastener and
Installation Tool do not
turn during installation.
Drill
1/4" dia.
Hole
Tape a 5/16" Flat Washer
between front of Mounting Base
and bed
1/4-20 x 1-1/4"
Hex Hd. Bolt
1/4" Flat
Washer
1/4-20 Nylon
Lock Nut
Drill
1/4" dia.
Hole
Drill (2)
1/4" dia.
Hole
Centered in
3/8" dia. holes
5/16-18
Blind Fastener
Drill (2)
1/2" dia.
Hole
1/4-20 x 1-1/2"
Carriage Bolt
5/16-18 x 1-1/2"
Hex Hd. Bolt
5/16" Lock
Washer
1/4-20 x 1-1/4"
Hex Hd. Bolt
1/4" Flat
Washer
1/4-20 Nylon
Lock Nut
1/4-20 x 1-1/4"
Hex Hd. Bolt
1/4" Flat
Washer
Drill
1/4" dia.
Hole
1/4-20 Nylon
Lock Nut
1/4-20 Nylon
Lock Nut
1/4" Flat
Washer
Drill
1/4" dia.
Hole
1/4-20 x 1-1/2"
Carriage Bolt
PERFORM THE FOLLOWING STEPS TO THE DRIVER SIDE
& PASSENGER SIDE (Passenger Side Shown)