Harrington Hoists and Cranes (N)ER Hoist - ((N)ER2) User Manual
Page 15
15
001H, 003S, 003H, 005L, 005S, 010L,
010S, 015S, 020L, 020S, 025S
020C, 030C, 050L
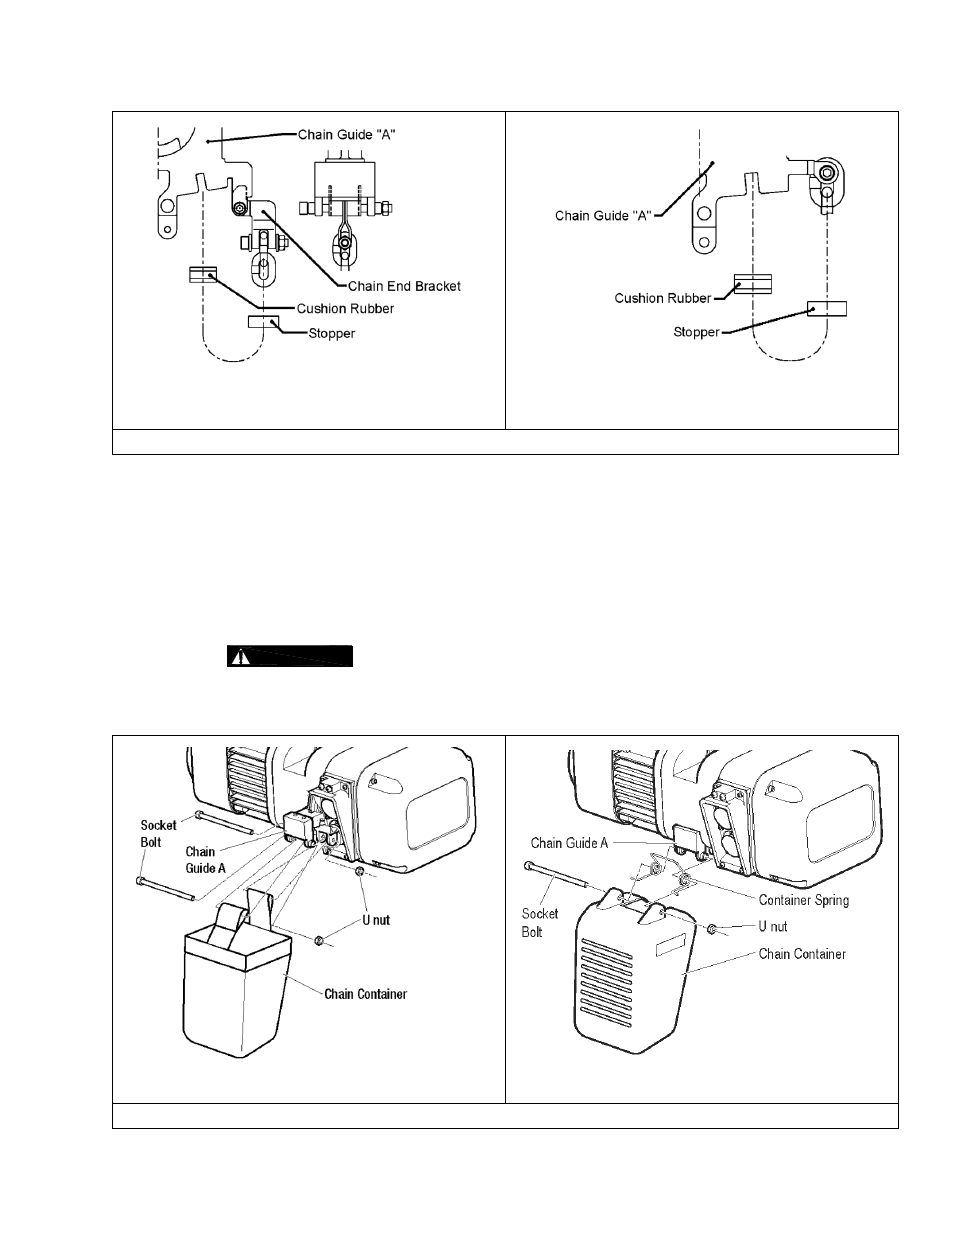
Figure 3-3 Attachment of Chain to Hoist Body
– No Chain Container
3.2.3
Optional Canvas or Plastic Chain Container - When the optional canvas chain container is selected,
fully unfold and install it on the hoist body as shown in Figure 3-4. When installing the optional plastic
chain container, pass the socket bolt through the holes in this order: the chain container, the bucket
spring, the chain guide A, the bucket spring, and the chain container. Be sure to mount the bucket
spring in correct direction as shown in Figure 3-4. The free end of the chain is not attached to the hoist
body and the chain stopper is installed on the third link from the free end. To place the chain into the
chain container, feed the free end of the chain into the container. Take care to avoid twisting or
tangling the chain. NEVER put all the chain into the container at once. Lumped or twisted chain may
activate the down limit switch and stop the hoist during lowering.
3.2.4
Each chain container indicates the maximum length of the load chain that can be
stored in the container. The amount of chain the container must hold is equal to the lift on the hoist.
DO NOT use a chain container with a storage capacity less than the lift length on the hoist. If all of the
chain cannot be stored in the container, the limit switch will not operate properly.
Canvas Chain Container
Plastic Chain Container
Figure 3-4 Attachment of Chain Container to Hoist Body