Warning, Installing bracket onto wall, Installing bracket onto synergy wall system – Salamander Designs FX200AV/L/BK User Manual
Page 4
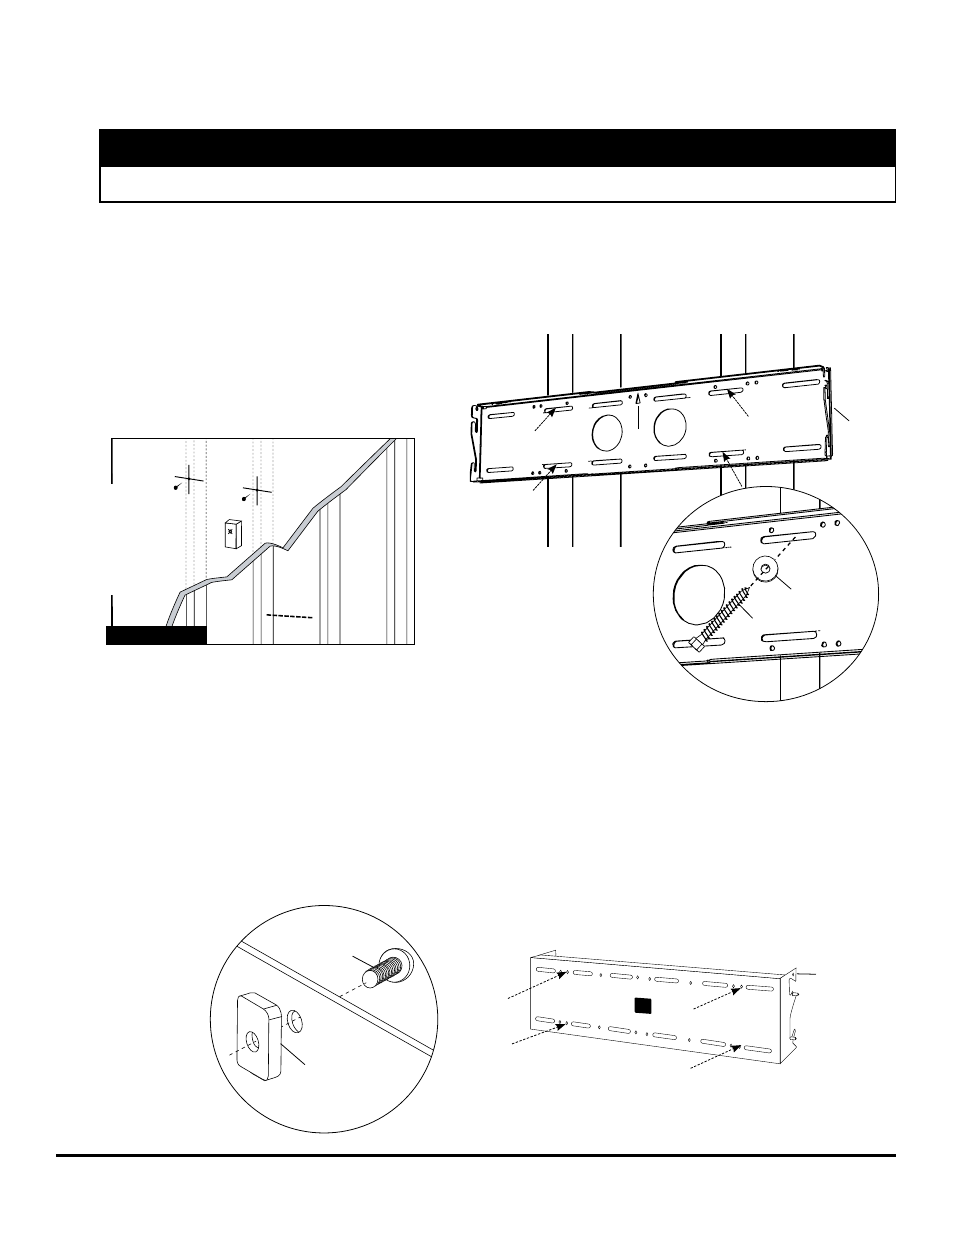
3. Attach the wall bracket (C) using the 4 lag bolts (M) and
4 metal washers (N). Make sure wall bracket is level to
secure vertical installation and then fully tighten lag bolts (M).
DO NOT OVER TIGHTEN to prevent splitting of stud.
Salamander Designs Ltd.
www.salamanderdesigns.com
800-535-5659
©2005 Salamander Designs Ltd.
Doc No. 501-400 / v10.09 / 4 of 5
1. Using a stud finder locate CENTERS of two adjacent
wood studs, typically 16” apart and mark with a
nail or pencil as shown in diagram A.
Marks must be horizontally level.
2. Pre-drill a 2.5” deep hole at the desired height in
each stud using a 3/16” drill bit. Use the wall
bracket to mark the location of the lower set of holes
in each stud. Drill a second set of 2.5” deep holes
using the 3/16” drill bit.
NOTE:
It is best to use a nail or awl to verify center of
stud location. The holes will be covered by the wall
bracket.
3A
.
Installing Bracket Onto Wall
Skip this step if you will be mounting your TV onto a Synergy cabinet. See Synergy Mounting Instructions.
3B
.
Installing Bracket Onto Synergy Wall System
WARNING!
Wall or mounting structure must support four times the combined load of all attached components and equipment
.
C
UP
Wood
Stud
If installing the mount onto a Quad Wall, follow the assembly instructions for the PM/SQK (Wall
Adapter, Sold Separately) before proceeding.
1. Take the wall bracket (C), and assemble 4 button head screws (F) with the 4 flat nuts (O) through the outer set of holes on
each side of bracket as shown. Thread the screws to the nuts enough to ensure the flat nuts does not fall off.
O
F
CAUTION:
C
16” Apart
NOTE:
Center of wall
bracket (C) is the
same as center
of TV panel.
Diagram A
M
N