Salamander Designs CA/DRM15U User Manual
Rack mount kit, Chameleon
2x
(301-360)
3/4” Mounting Screw
12x
(300-520) - Flat Nut
1x
5/32” Hex Key - (400-080)
1x
1/8” Hex Key - (400-070)
Limited Warranty
For five full years Salamander Designs Ltd. will repair or
replace, at our option, any product defective in materials
or craftsmanship. Salamander Designs Ltd. will not be
responsible for any damage to or destruction of other
equipment consequential to our equipment failure. Defective
product must be given Return Authorization and is to be
returned to the factory prepaid, in the original carton and
packing material. Any damage incurred in a shipment not
in original packaging shall be the responsibility of the owner.
Warranty repairs will be returned prepaid, via UPS within
the continental U.S.A. only.
www.SalamanderDesigns.com
800-535-5659
Doc No. 500-455/v11.10 ©2010 Salamander Designs Ltd.
12x
(300-518)
3/8” Button Head
Screw
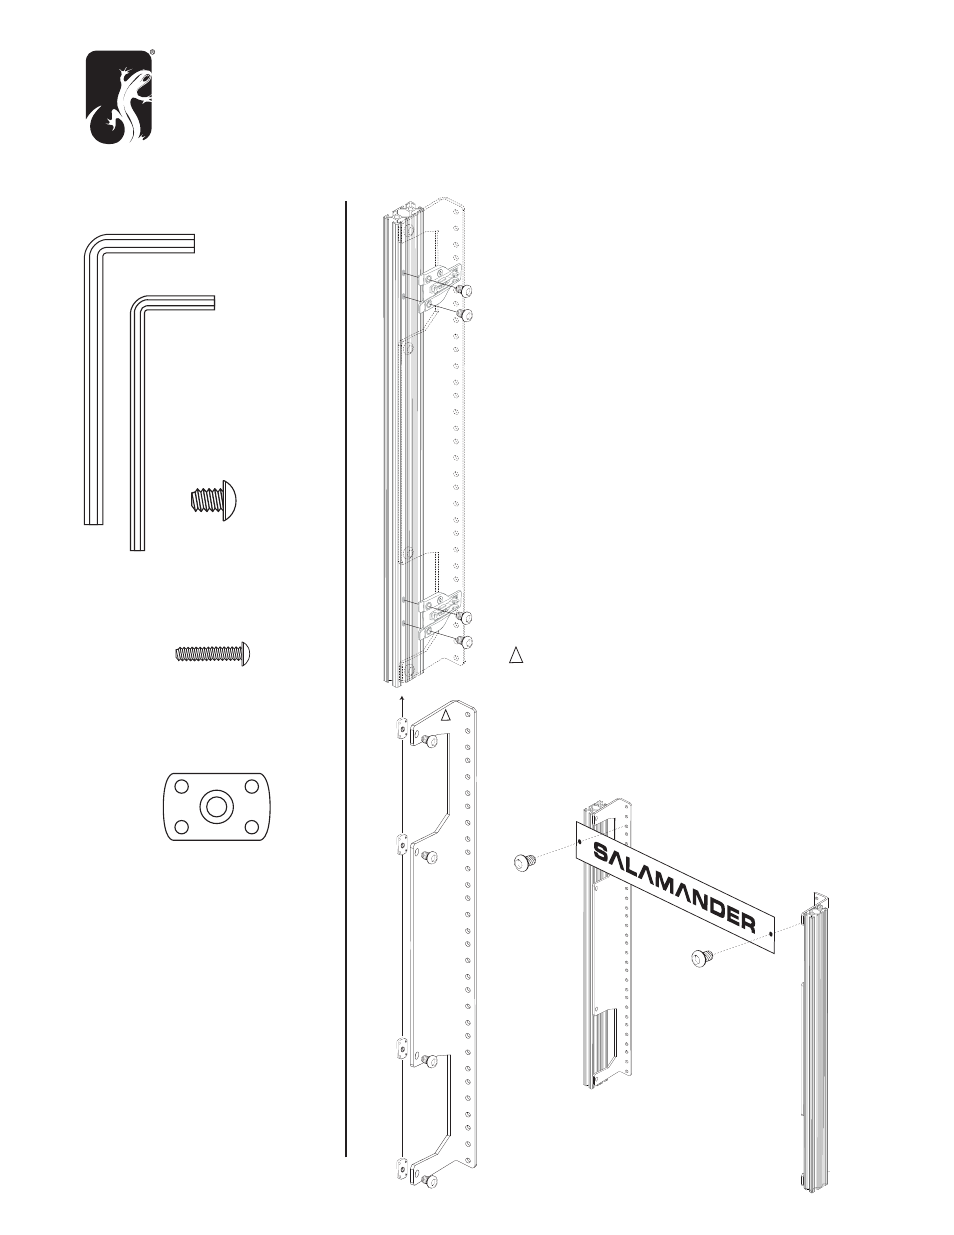
CHAMELEON
RACK MOUNT KIT
OPTION: INSTALLING GEAR FORWARD
Rack rails may also be installed with the flange forward
in applications the door is not desired and additional cabinet
depth is needed.
Note: The most efficient method to access the vertical extrusions
for this installation is to place the empty cabinet on it’s back
and remove the feet and bottom panel, it will also be necessary
to remove the 2 side panel screws, hinge bases, and any
installed shelf pegs.
A. Place the 3/8” Button Head Screw (300-518) in the
holes shown and loosely screw to Flat-nut (300-520).
B. Slide Rack Mount Rail into position with the Flat Nuts sliding
into the channel as shown. After bracket is in position tighten
all screws with hex key.
Note: 15U rack mount rails have a triangle that must
be located at the top of the rail when installed.
C. Re-attach door hinge bases.
D. For 15U, Install header panel at the top of the rack rails.
300-518
300-520