Salamander Designs SA/UPT2 User Manual
Synergy media tray 2 - sa/upt2, Parts
©2006 Salamander Designs Ltd.
Doc No. 500-432 / v11.06
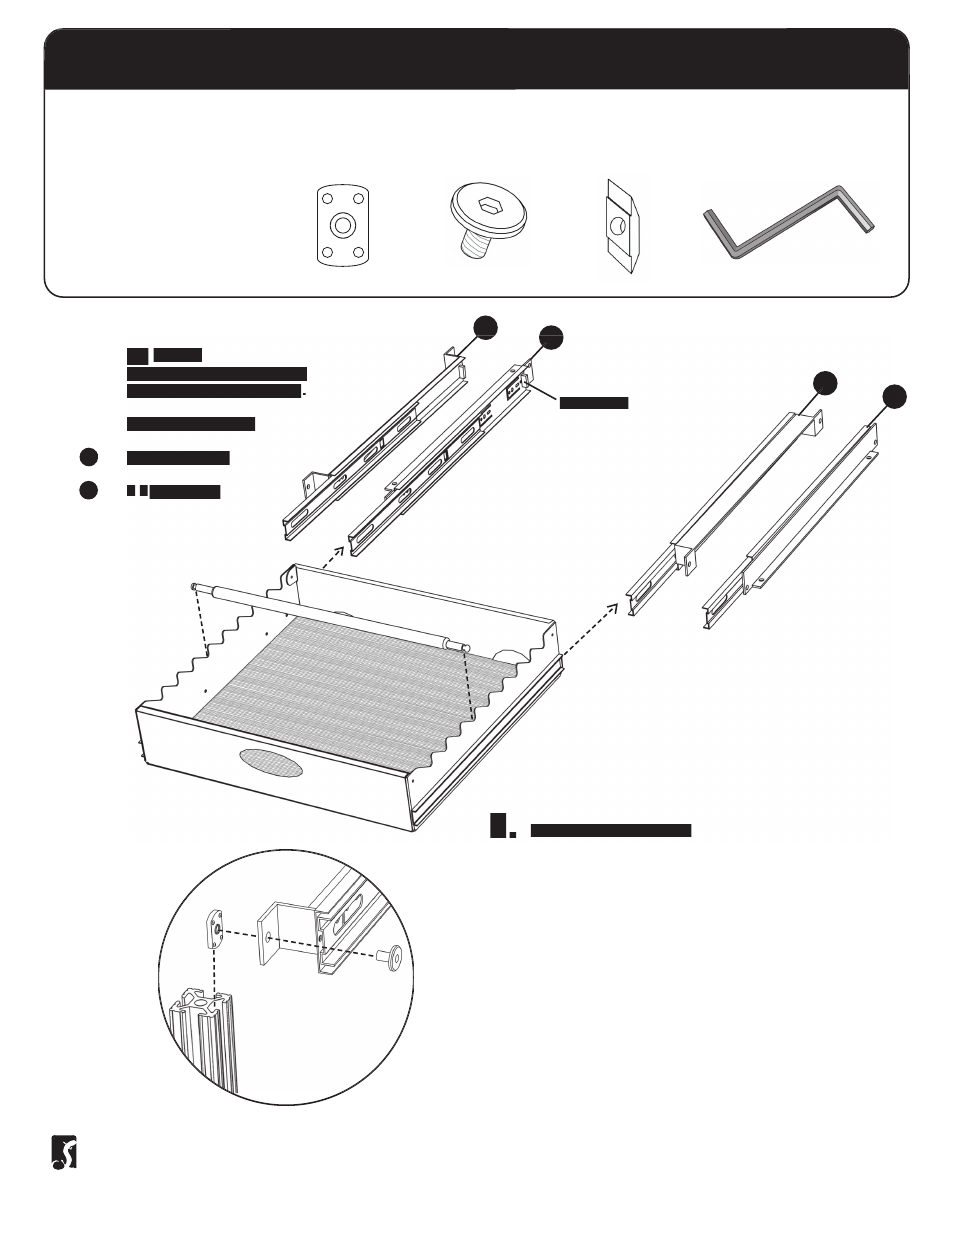
Loosely assemble hardware to slides as shown.
Note: Use Drop-in Nut (300-565) if unit is assembled,
see enclosed instructions.
Limited Warranty
Five full years Salamander Designs Ltd will repair or replace, at our option, any product defective in materials or craftsmanship. Salamander Designs Ltd. will not be responsible for any damage to or
destruction of other equipment consequential to our equipment failure. Defective product must be given Return Authorization and is to be returned to the factory prepaid, in the original carton and packing
material. Any damage incurred in a shipment not in original packaging shall be the responsibility of the owner. Warranty repairs will be returned prepaid, via UPS within the continental U.S.A. only.
Final Assembly
Place mat on the bottom of tray.
Use media organizer to keep CD’s and DVD’s
organizer
organizer
upright.
Place Tray
Firmly fi t the media tray into slides until it clicks in place.
You can use a level to align media tray at desired position
and secure slides in place using hex key.
4x
Flat Nut
300-560
Parts
1 - Media Tray
(303-315)
1 - Media Organizer
(303-320)
1 - Rubber Liner
(303-560)
1 - Large Slide
(303-530)
1 - Small Slide
(300-640)
4x
Drop-in Nut
300-565
4x
Connector Bolt
303-815
SYNERGY MEDIA TRAY 2 - SA/UPT2
1x
Z - Hex Key
400-170
Arrange
If installing media tray behind a door,
arrange slides according to diagram
Note: Rubber Stop Position.
A
Door Hinge on Right
Door Hinge on Right
A
A
B
Door
B
A
A
B
3.
4.
1.