Mesh screen attachment – Kasco Marine Pond Aerator & Water Circulator User Manual
Page 9
9
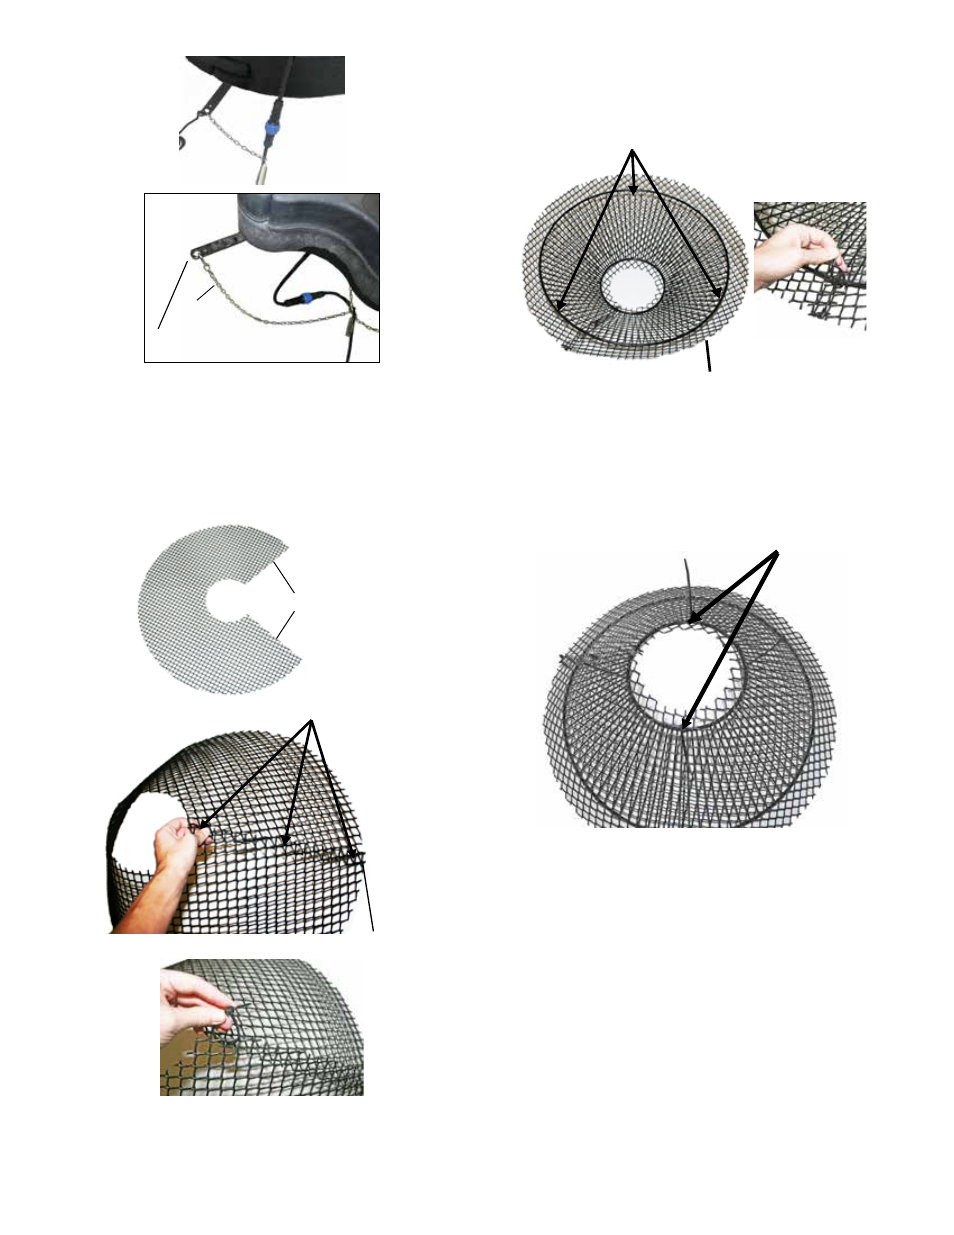
to the top ring of the screen in (3) equally spaced
locations using cable ties.
Attach 3 cable ties
to top ring equally spaced
2 inch overlap
3. Flip mesh and screen assembly over and use
remaining cable ties to secure mesh to small bottom
diameter of the stainless steel ring.
Attach 2 cable ties
to bottom ring equally spaced
4. Clip off excess cable tie material once mesh is
secured into place. Go back to assembly instructions
to continue with connecting the bottom screen to the
float.
Installation Instructions
Before installing 3 phase units (2.3, 3.3, 5.3) into the
pond, please refer to 3 phase startup procedure.
STEP ONE
Use the ropes to position the Aerator in the desired
location in the pond/lake. Anchor the ropes or secure
them to the shoreline so the ropes are free of slack, but
not tight. To prevent twisting of the unit due to torque,
you should place the anchor at least 3 feet from the
1 chain strain relief
Bottom Float Bracket
Chain
3 chain strain relief
Mesh Screen Attachment
1. Take flat mesh pattern and wrap into cone shape
by overlapping both vertical edges by approximately
1 inch and aligning top and bottom edges of mesh.
Secure mesh vertical seam at the top, bottom and
middle using (3) cable ties.
Overlap vertical edges
1 inch overlap
Attach 3 cable ties
2. Insert existing stainless steel screen centered inside
mesh cone with approximately 2 inches of mesh
overlap to the top ring of the screen. Attach mesh