Setup instructions – General Tools and Instruments DCiS1 v.1 User Manual
Page 6
SETUP INSTRUCTIONS
CHARGE THE BATTERY
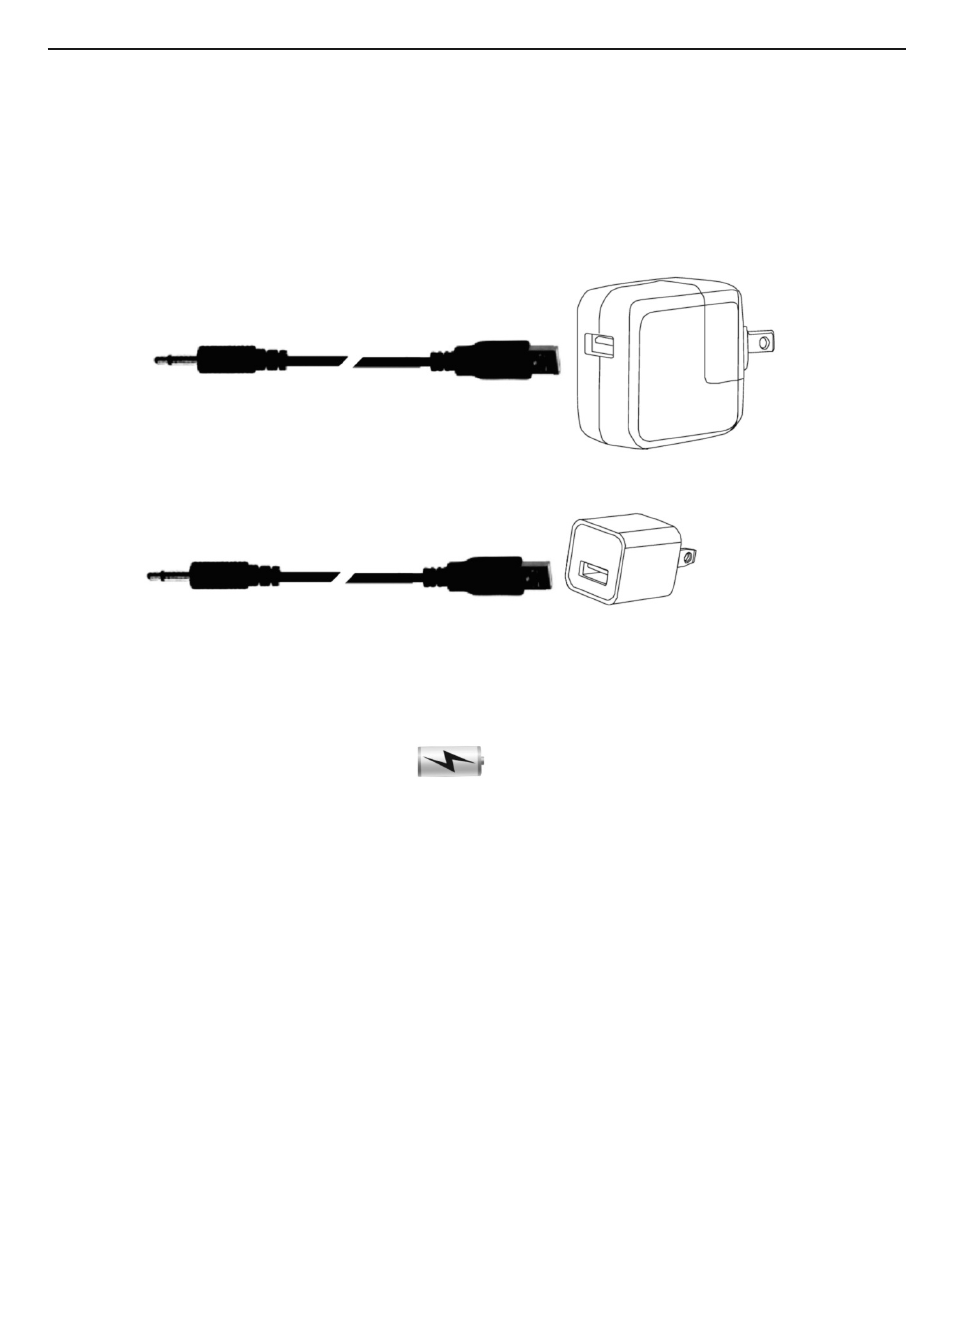
To charge iBorescope’s battery, insert the USB plug end of the provided
charging cable into the charging port on your iPad Power Adapter or
iPhone/Android Power Adapter (see figures below). Insert the other end of the
cable into the DC5V jack (Fig. 1, Callout 3) on iBorescope.
USB charging cable
iPad Power Adapter (not included)
USB charging cable
iPhone/Android Power Adapter (not included)
Alternatively, you can charge iBorescope (very slowly, via a trickle charge) by
inserting the USB plug end of the cable into a USB port of any computer.
While iBorescope is charging, the
light on the right side of the grip
(Fig. 1, Callout 4) will glow orange. To determine whether the unit is fully
charged, you must disconnect the charging cable. If the unit is fully charged,
the orange light will extinguish. If not, the light will remain orange. If the battery
is very low on charge, the LOW LED at the left of the orange light will
illuminate.
Once your iBorescope’s battery has fully charged, you can disconnect the USB
charging cable from the unit and begin using it as a battery-powered
instrument. A fully charged battery will power the instrument for about 3 hours.
It takes about 7 hours to fully charge a depleted iBorescope battery. While you
wait, you can 1) download the app for the instrument (see next section) and
2) begin learning how the unit works while connected to a source of charging
current.
6