General Tools and Instruments DCiS1 v.1 User Manual
Page 12
4. Touch the left side of the Wi-Fi row to enter the Wi-Fi Networks screen.
iBorescope’s hot spot should appear in the list of available networks. Touch
the iBORESCOPE row, and then the Connect soft button at the right of the
next screen. When “Connected” appears in the iBorescope row, your Android
device is ready to receive wireless transmissions of probe video. Be aware
that while you are connected to the ad hoc iBorescope WiFi network, your
device will not have Internet connectivity.
The first time you try to connect to the hot spot, you may be prompted to enter
the app’s password (the default password is 12345678). Thereafter, you will not
be asked for a password; the iBORESCOPE row will already have a check mark.
5. Touch the Home
or
button on your device to exit the Wi-Fi networks
screen.
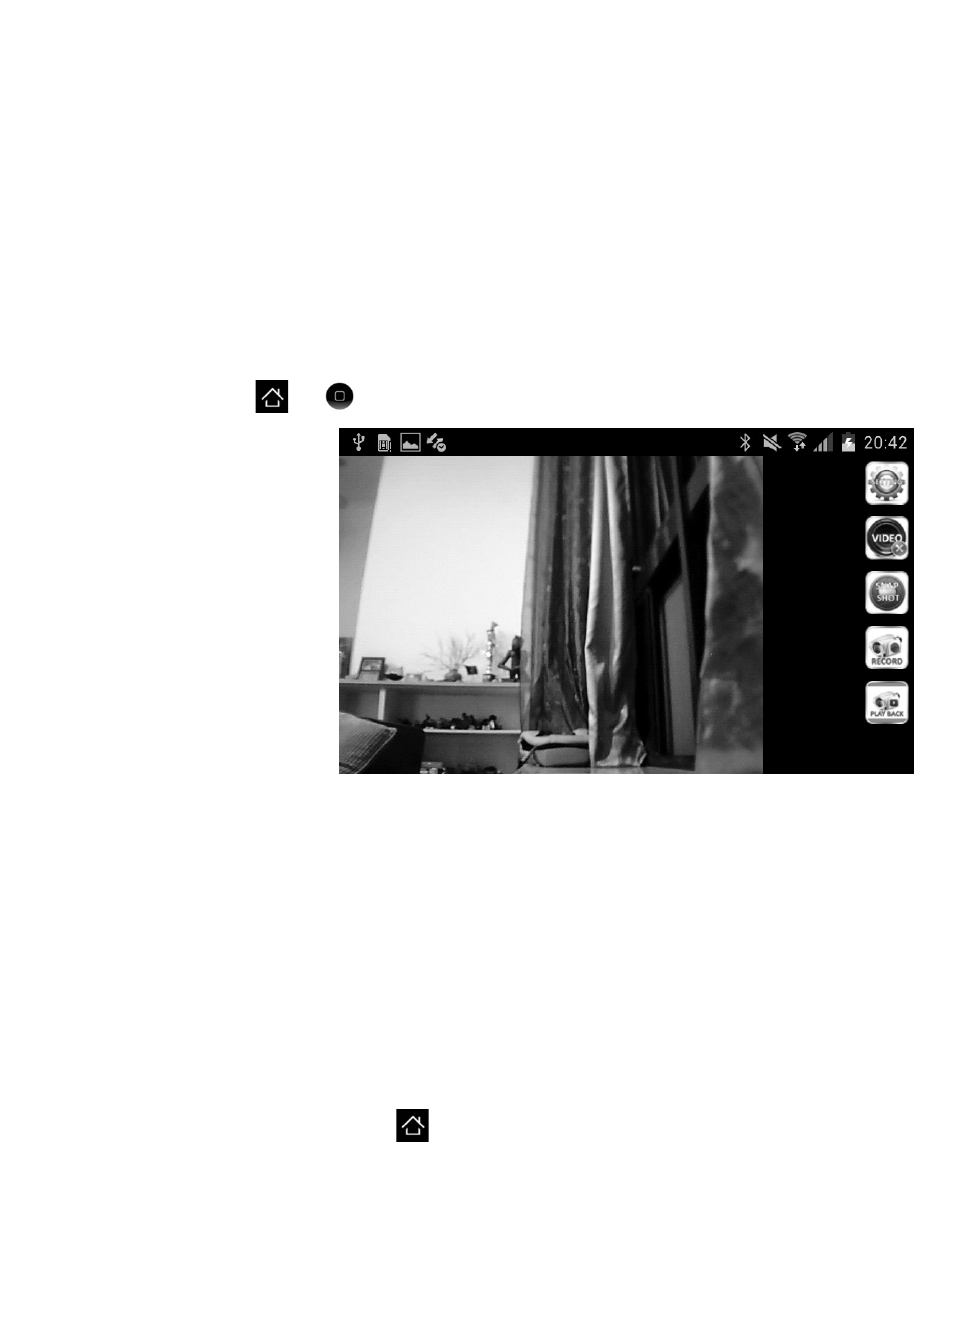
6. Locate the iBORESCOPE
icon among your apps
and touch it. The screen
at right will appear,
with live video in the
main viewing area.
TAKING AND
VIEWING PHOTOS
To save a still image (also called a screen grab) of live video or paused video,
touch the SNAP SHOT soft button at the right side of the app. The familiar
sound of a camera shutter confirms that a picture was taken. All photos you
take are immediately and permanently stored as .jpg files in a dedicated
“iBORESCOPE” subfolder of the “sdcard” folder of your Android device. Any
photos you take will be saved to this folder even if no SD card is installed in
your device, or an SD card is installed and it is full. If an SD card is missing or
full, when you touch the SNAP SHOT button an on-screen prompt will advise
“Image Saved in Album!”
To view your pictures, touch the
button on your device to exit the
iBORESCOPE app. Locate your iBorescope subfolder and open it. The files of all
of the photos you have taken on that phone using the iBORESCOPE app are
stored as tiles. Touch any tile to view the corresponding photo. Use pinch
motions to expand or shrink any displayed image as desired.
12