Installation, How to install seismic spring isolation mounts – Fulton Pulse HW (PHW) Fully Condensing Hydronic Boiler User Manual
Page 13
Questions? Call (315) 298-5121, or visit us online at www.fulton.com
SECTION 2
PHW-IOM-2013-0214
INSTALLATION
2-7
!
WARNING
The discharge from the safety relief
valve must be arranged to ensure
no danger of scalding personnel, or
equipment damage.
Provisions must be made to properly
pipe the safety relief discharge
away from the boiler to the point of
discharge.
The hydronic system should never be
fl ushed while the boiler is attached
to the system since the debris could
accumulate in the boiler and block
water from passing through the heat
exchanger.
Ensure all labels on the boiler are
legible. All connections and safety
devices, both mechanical and
electrical, must be kept clean, with
ease of access for inspection, use and
maintenance.
Do not store or use gasoline or other
fl ammable vapors and liquids or
corrosive materials in the vicinity of
this or any other appliances.
NOTE: Do not attempt to move the boiler laterally while it is supported
on the isolators. If it is necessary to move the boiler remove the weight
from the isolators by raising the boiler before moving. Failure to follow
this procedure could result in bent or broken leveling bolts or springs, or
damage to the neoprene bottom spring cap.
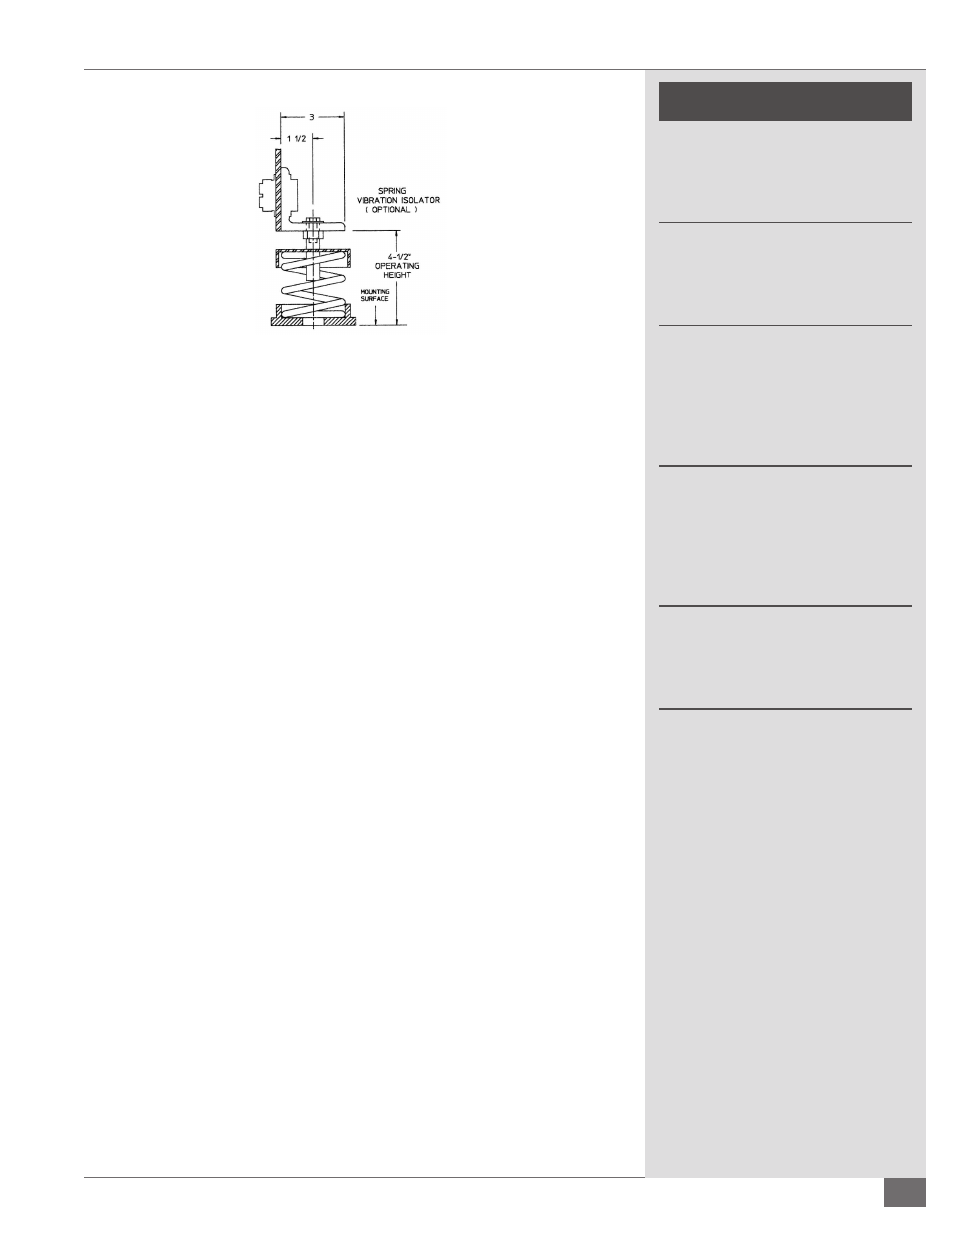
How to Install Seismic Spring Isolation Mounts
Adhere to the following for installation of Seismic Spring Isolation Mounts (see
Figure 5):
1. Thread the leveling bolt 1/2” into the top of the load cap.
2. Remove the lock nut and one washer from the top of the leveling bolt.
Locate leveling nut as far down on leveling bolt as it will travel.
3. Coordinate the location of each isolator.
4. Place a one inch shim next to each bracket between the boiler and the
housekeeping pad or structural fl oor. If an operating clearance of other
than one inch is desired, use an appropriate size shim.
5. Raise the boiler and slide the spring isolator under the equipment
mounting bracket with the leveling nut and one washer on the under side
of the bracket.
6. Lower the boiler onto the spring isolators taking care not to overload any
one isolator and taking care not to push the boiler sideways.
7. Install second washer and lock nut one inch down from top of leveling
bolt.
8. Turn the leveling nut in a counter-clockwise rotation until the boiler
just touches the shim. The shim may now be removed. Proceed with
adjustment of the other three isolators.
9. Tighten the lock nuts on the leveling bolts, thus bolting the spring to the
boiler and locking the leveling bolt against turning.
FIGURE 4 - INSTALLING SPRING ISOLATION MOUNTS