Operating the visual accelerometer – PASCO PS-2128 Visual Accelerometer User Manual
Page 8
Visual Accelerometer
Model No. PS-2128
7
®
Operating the Visual Accelerometer
1. a) For standalone use: Remove the case and install the batteries.
(See “Replacing the Batteries” on page 6 of this manual.)
OR
b) For use with DataStudio or Xplorer: Connect the receptacle
end of the PASPORT extension cable into the pin connector on
the top of the Accelerometer. Connect the plug on the opposite
end of the cable to either the USB link or the Xplorer.
2. Press in the black push button to turn on the Visual Accelerometer.
3. Move the scale switch to “Manual Scale.” Use the Full Scale
switch to select a full scale value (1, 5, or 20 m/s/s). (For more
information on scaling options, see “Selecting an Acceleration
Scale” in this manual.)
4. Use the provided thumb screws to fasten the Accelerometer to the
top of a PAScar, Dynamics Cart or GOcar.
5. Place the Visual Accelerometer in the desired orientation for your
experiment and push in the black button to zero the Accelerometer.
6. Move the cart and watch the display lights illuminate as you
accelerate the car in any direction.
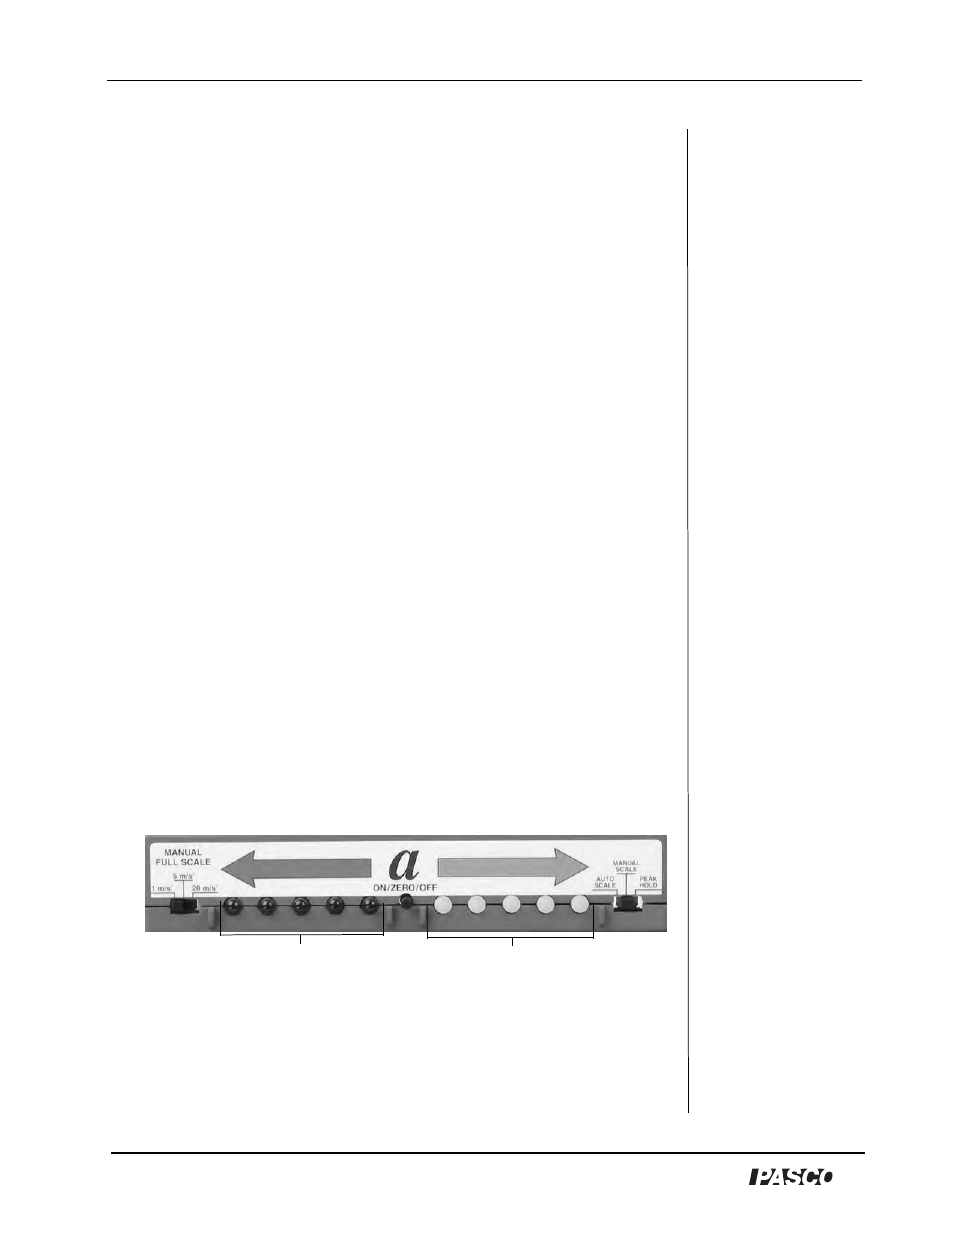
The Visual Acceleration Scale
On the side of the Visual Accelerometer is the visual scale, the green
and red light-emitting displays for showing the amount of horizontal
acceleration.
Each light display represents a one-fifth (1/5) division of the maximum
on either the positive or negative scale.
positive scale (green)
negative scale (red)
Figure 4