Appendix, Setup and lap pad – Liquid Controls LCRII Install E3650-E3651 Series User Manual
Page 38
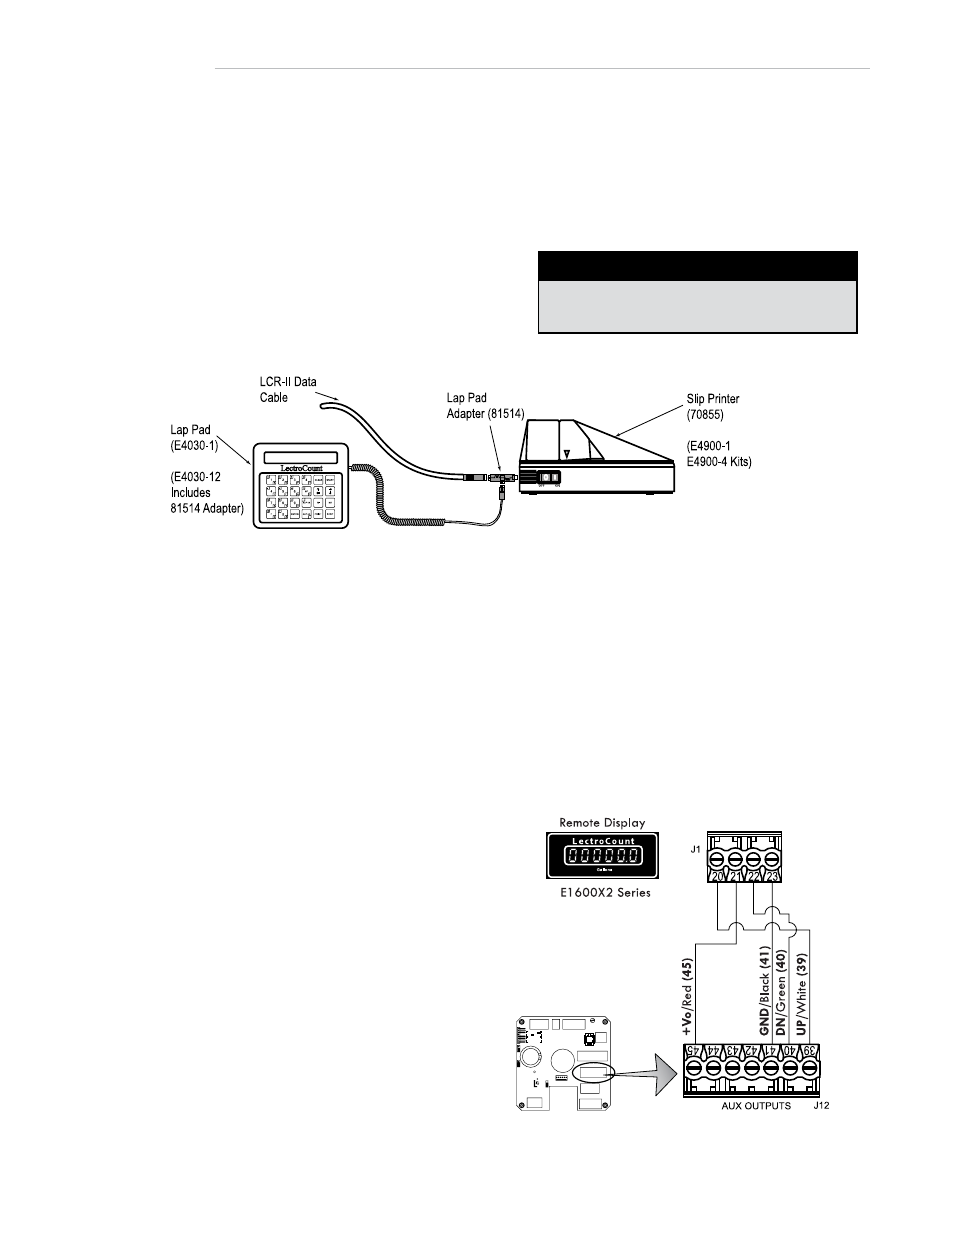
Lap Pad Connection
setup and lap Pad
Before the LCR-II the register can be setup and calibrated, the initial settings must be entered. To do this, you will
need to use a lap pad. The lap pad is connects to a 9-pin female connector on a lap pad adapter. The lap pad adapter
connects to the printer and data cable.
Instructions for the setup and calibration of the LCR-II are in manual EM100-11, LectroCount LCR-II Setup &
Operation.
obsolete Products - e1600x2 1" large Remote display
Auxiliary ouputs 4 & 5 can also be used for the, now obsolete, E1600X2 1” Large Remote Display.
To wire an e1600x2 1" large Remote display to
the lCR-II:
1. Attach cable glands and/or conduit connectors to the
display and the LCR-II port(s).
2. Thread the wires through a piece of weatherproof conduit
cut-to-length from the display port to a LCR-II port.
3. Run the weatherproof conduit between the display and
the LCR-II housing, pull the wires through the ports, and
tighten the connectors.
4. Connect the four display terminals to four terminals on
the j18 terminal block of the LCR-II CPU board.
• Remote display terminal 20 to LCR-II terminal 39
• Remote display terminal 21 to LCR-II terminal 45
• Remote display terminal 22 to LCR-II terminal 40
• Remote display terminal 23 to LCR-II terminal 41
Lap Pad Data Communication
To operate the lap pad, terminal j10 must have the
jumper in the RS-232 position.
38
Appendix