Post installation, Environmental sealing guidelines, Weights & measures seals – Liquid Controls LCRII Install E3650-E3651 Series User Manual
Page 31
31
environmental sealing Guidelines
The LCR-II includes sensitive electronic components, including a micro-controller that can be damaged by the
presence of moisture. Therefore, it is essential that all conduit ports, the cover, and the shaft seals be adequately
sealed by the installer to ensure watertight integrity. The conformal coating on the board and a moisture-absorbing
desiccant inside the enclosure mitigates the problem of corrosion due to moisture, but these measures only protect
the board from small amounts of moisture trapped inside when the lid is closed in humid conditions. They are not
adequate in protecting the unit over time if a continuous leak is present in the enclosure.
1.
Conduit Entrances
The LCR-II housing has seven conduit entrances, five ½" NPT female threads and two ¾" NPT. Use only ½" or ¾" NPT male
threaded fittings on the conduit entrances. Pressed in Caplugs and straight (rather than tapered) threads are inadequate as
seals for these entrances. Acceptable fittings are either metal or plastic conduit, pipe plugs, or cable glands. Threads should
be treated with PTFE-based “pipe dope” or a minimum of two revolutions of PTFE tape prior to installation. Threads should be
engaged a minimum of four full turns. When using cable glands, be sure the gland is sized properly for the outside diameter
of the cable and the elastometric seal around the cable sheath is compressed onto the cable. Use only one cable per cable
gland unless the gland is designed for multiple cables. When using conduit or Liquid-Tite, make sure that the opposite end is
connected to an environmentally sealed device. If the conduit is not sealed at the other device, fill the interior of the conduit at
the LCR-II with a silicone rubber sealant, such as RTV, to prevent moisture from running down the conduit into the enclosure.
2.
Cover Seals
To seal the LCR-II cover properly, ensure that the O-ring surrounding the cover is fit snug inside the groove, and tighten the
cover screw securely.
3.
Shaft Seals
Units with internal pulsers have an O-ring around the pulse encoder drive shaft that extends through the bottom of the LCR
housing. If a drive shaft adapter was attached at installation, make sure the O-ring around the shaft is securely seated in the
counter bore of the casting, covered with the flat washer provided, and held in place with the cotter pin provided. The control
switch on the front of the LCR-II is also sealed with an O-ring and held in place by a bushing secured with three socket head
cap screws. When replacing a control switch in the field, make sure the O-ring is in place on the switch shaft before reinstalling
the switch bushing.
Any water or moisture damage to the LCR-II as result of improper sealing will not be covered under the product warranty.
Sealing the LCR-II is the Responsibility of the Installer
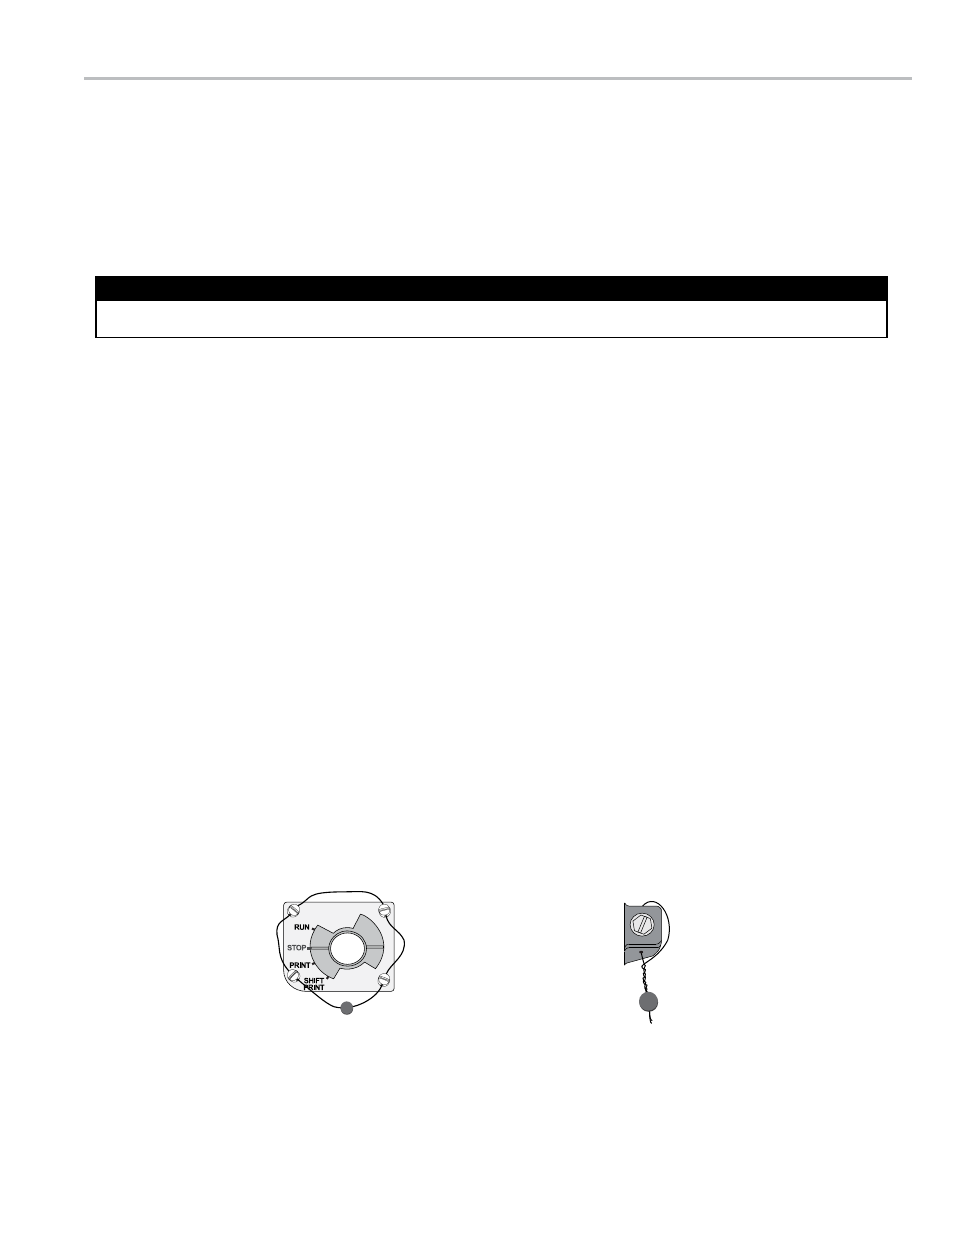
Weights & Measures seals
To detect possible intrusions into Weights & Measures approved calibrations on a LectroCount LCR-II, fillister holes
have been drilled into the switchplate screw and the latch. To seal according to Weights & Measures standards, a wire
is threaded through the fillister holes and closed with a lead seal.
sWITChPlaTe
laTCh
PosT InsTallaTIon