Servicing the drive components, Servicing the adjuster and adjuster drive assembly – Liquid Controls M-MA Meters User Manual
Page 14
servIcInG the drIve coMponents
servicing the adjuster and adjuster drive assembly
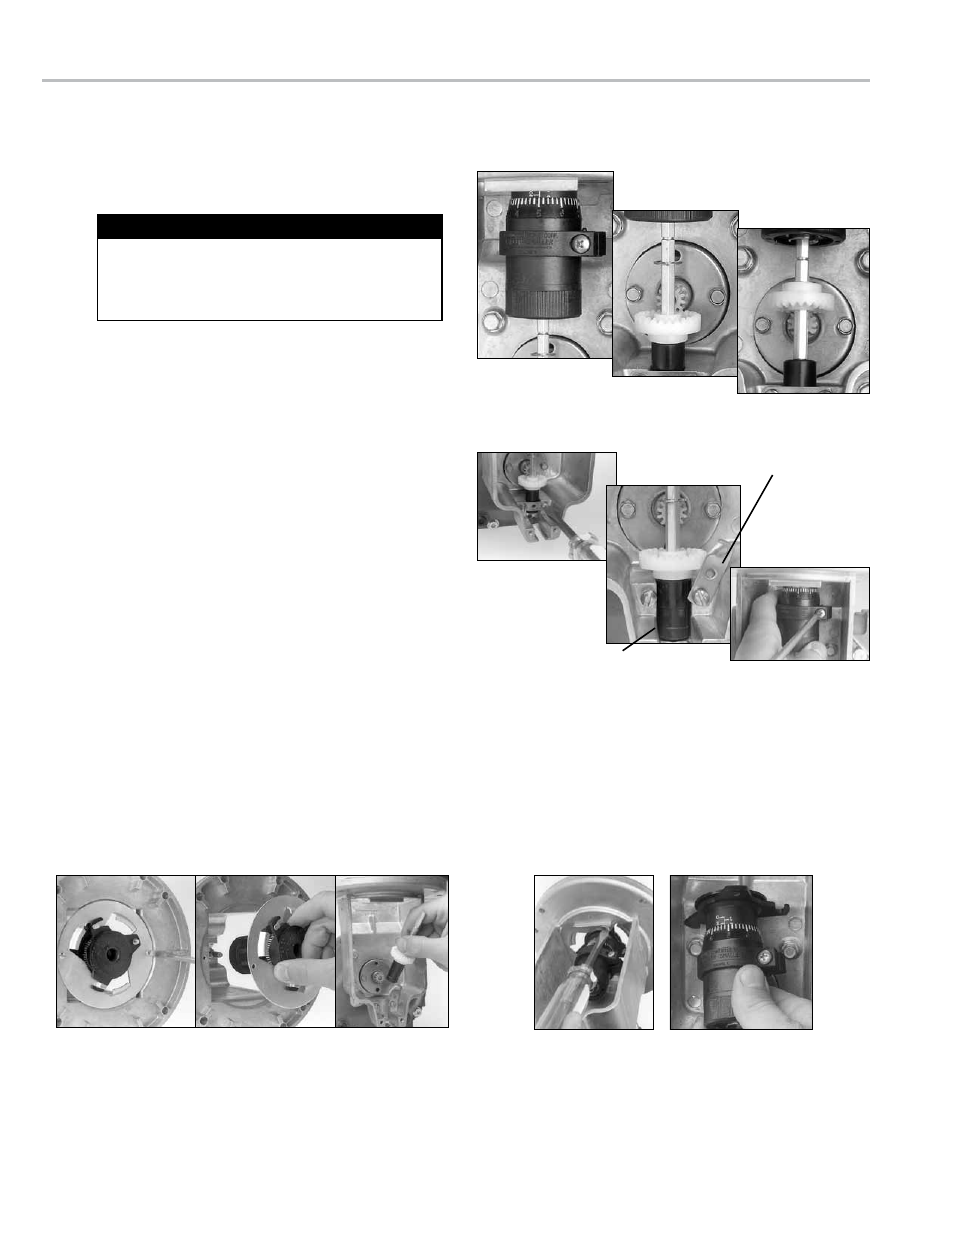
1. Record the adjuster micrometer setting and note the
adjuster drive gear position.
2. Use a standard screwdriver to loosen (or remove) the two
retaining spring screws.
3. Swing the retaining spring off the adjuster drive bushing.
4. Loosen the adjuster mounting clamp screw with a phillips
head screwdriver.
5a.
Removing the adjuster from the top of the meter.
1. Remove screws that secure adjuster mounting plate
to counter adapter.
2. Lift adjuster mounting bracket with the adjuster out of
the counter adapter.
3. Remove the adjuster drive assembly from the
housing.
5b.
Removing the adjuster from the front of the meter.
1. Remove the adjuster drive assembly from the adapter
and from the housing.
2. Remove the slotted head screw that secures the
adjuster to the mounting plate.
3. Slowly pull the adjuster out through the front of the
meter, rotating it from left to right to clear the adjuster
mounting plate
4. Pull the adjuster down to remove from the meter.
Removing the adjuster from the top
Removing the adjuster from the front
to remove the adjuster and adjuster drive assembly:
Adjuster Drive Bushing
Retaining Spring
Make sure to return the adjuster drive gear to its original
position when reinstalling or the meter counter will run
backwards. The gear will be set either below or above
the packing gland pinion.
Reassemble to the Original Position
14