Controlled Products Systems Group RANGER User Manual
Page 16
14
Figure 22
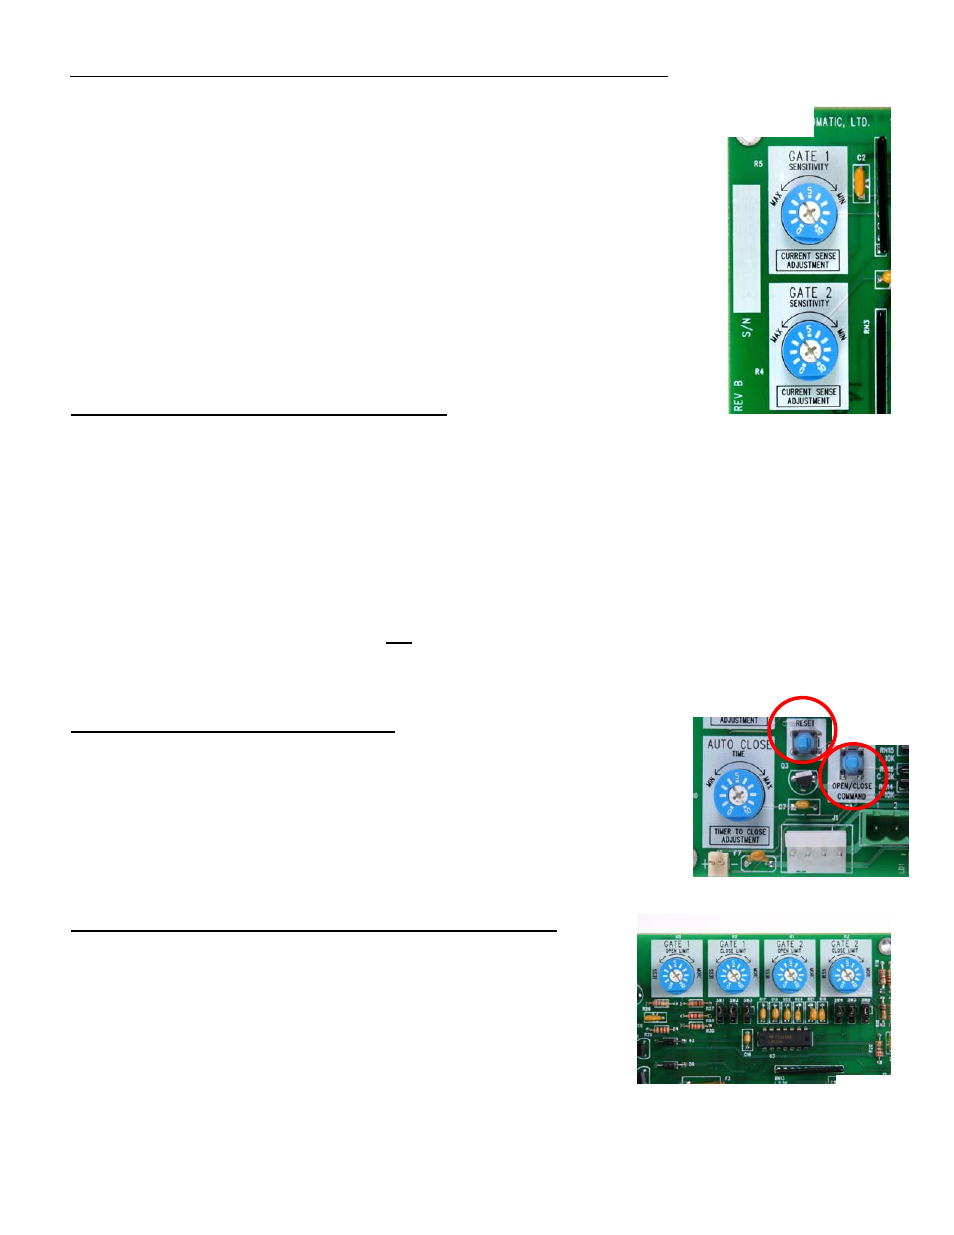
Figure 20
Figure 21
Understanding Sensitivity Adjustments and Entrapment Alarm
Gate 1 and Gate 2 sensitivity adjustments are located on the left edge of the control
board (see figure 20).
Sensitivity is the primary safety control designed into the control board. The
adjustment dials control the amount of pressure the gate can apply to an object,
before the gate will stop and reverse direction. If the gate senses an obstruction it
will reverse direction. If it senses a second obstruction before reaching the fully
open or closed position the gate will shut down. The entrapment alarm which is
preinstalled in the control box will sound.
Entrapment alarm will continue for 5 minutes then shut off. The entrapment alarm
can be reset by pressing the “Reset” button on the control board (see figure 21).
If two obstructions were detected and control board has shut down the “Reset”
button will have to be pressed to re-activate the opener.
NOTE: Press Reset button on control board to turn off Entrapment Alarm.
Adjusting Gate 1 and Gate 2 Sensitivity
Sensitivity factory setting is on position 10. Adjust the sensitivity by turning the dial to the desired level.
If gate stops and reverses for no obvious reason then increase pressure by slightly adjusting clockwise.
NOTE: If sensitivity is set too sensitive false sensing may be observed.
Important: If adjusting for a single gate once adjustment for that gate is set also set the other sensitivity
adjustment to the same setting.
Adjusting both Gate 1 and Gate 2 sensitivity adjustments to the same setting for a single gate installation will
prevent the possibility of false trigger and gate reversal.
NOTE: If operator is installed to auto close and the gate current senses when closing, the gate will
return to the open position and not auto close. This is a designed in safety feature required by
UL325. Transmitter can be used to close the gate and return operator back to normal operation.
Operating Gate for the First Time
Before operating gate verify that the gate path is clear and free of obstructions.
Be aware to stop the gate in case of an emergency simply disconnect the linear
actuator cable 8 pin plug from the control board.
Gate should be in the open position at this point.
Press the “Open/Close Command” push button (see figure 21). The gate should
begin to close. Allow the gate to travel to the factory preset stop position.
Understanding Close and Open Limit Adjustments:
(Gate open and close stop position)
Ranger control board limit adjustments are simple and easy to use.
Control board has 4 adjustment dials for adjusting the desired stop
positions (see figure 22).
If operator was installed correctly with the gate in the open position the
open limit is already set. You will have to adjust the close position by
turning the “Gate 1 Close Limit More or Less” adjustment until the gate
reaches the desired close position.