8 display elements devicenet – Burkert Type 8691 User Manual
Page 25
25
Electrical installation
→
Check that the seal is correctly positioned in the body casing.
→
Close the device (assembly tool: 674077
5)
).
note!
damage or malfunction due to penetration of dirt and humidity.
▶ To observe degree of protection IP65 / IP67, screw the body
casing in all the way.
Seal
body casing
Body casing
Connection housing
Fig. 22: Position of the seal in the body casing
The teach function can now be used to automatically determine
and read in the end positions of the valve (description of the teach
function see chapter “10 Teach function”).
For the bus variant DeviceNet, the teach function can also
be started via the bus protocol.
5)
The assembly tool (674077) is available from your Bürkert sales office.
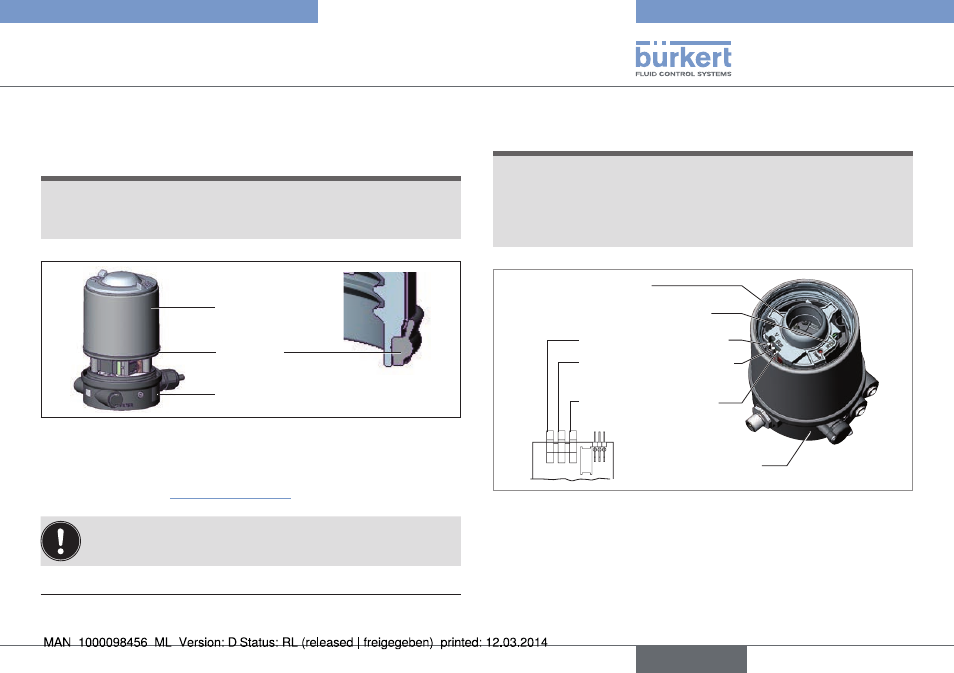
9.8 Display elements Devicenet
note!
Breakage of the pneumatic connection pieces due to rota-
tional impact.
▶ When unscrewing and screwing in the transparent cap, do
not hold the actuator of the process valve but the connection
housing.
Pilot valve LED (yellow)
Device status LED (two-
coloured: red/green)
Bus status LED (two-
coloured: red/green)
Status LED (yellow)
Top LEDs
Connection housing
Fig. 23: LED display, DeviceNet
The device status of the control head (transparent cap) is displayed
optically by colored high-power LEDs (Top LEDs). The assignment of
the green and yellow Top LEDs to the end position can be changed via
Explicit Messages (attribute address: class 150, instance 1, attribute 9).
english
Type 8691