Burkert Type 2731 User Manual
Page 24
replacement for control function a
→
Clamp the valve body in a holding device
(applies only to valves not yet installed).
NoTiCe!
damage to the diaphragm or the seat contour!
▶ When removing the actuator, ensure that the valve is in open
position.
→
Pressurize lower pilot air port of the actuator with compressed
air (5 bar): valve opens.
→
Loosen the body screws / body nuts.
→
Remove the actuator from the body.
→
Unscrew old diaphragm. If attachment is with a bayonet catch,
remove the diaphragm by rotating it through 90°.
→
Install new diaphragm.
→
Align diaphragm.
the marker flap of the diaphragm must be perpendicular to
the direction of flow (see “Fig. 16”)!
→
Place actuator back on the body.
→
Insert the body screws / body nuts
and lightly cross-tighten until
the diaphragm is between the body and actuator.
do not tighten the body screws / body nuts
yet.
→
Actuate the diaphragm control valve twice.
→
Without pressurization tighten the body screws / body nuts
to the permitted tightening torque (see “Tab. 11: Tightening
torques for diaphragms”).
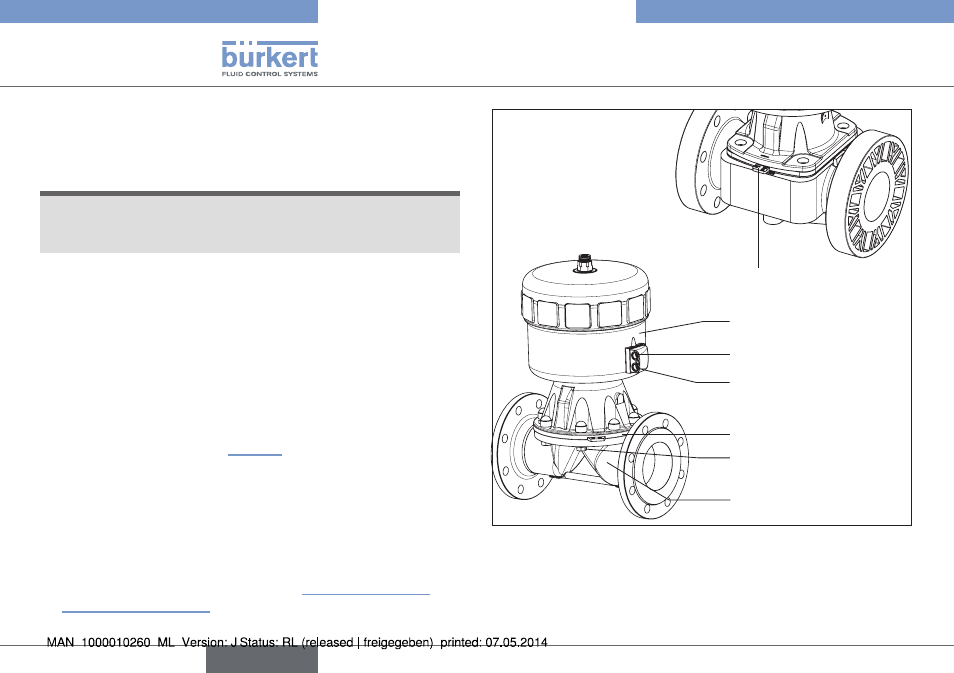
Actuator
Body screws / body nuts
Valve body
Lower pilot air port
Upper pilot air port
Diaphragm
Marker flap of the
diaphragm
Fig. 16: Repairs
replacement for control functions B
→
Clamp the valve body in a holding device
(applies only to valves not yet installed).
→
Loosen the body screws / body nuts.
24
Repairs
english
Type 2730 / 2731 DN 65-100