0 web interface – Alpha Technologies DSM3 for XM3 - Technical Manual User Manual
Page 22
22
745-814-B11-001, Rev. C (03/2014)
Use the following procedure to configure a static IP
address on a laptop or computer with the Windows XP
operating system:
1. Click the
Start button (lower left button on most
Windows
®
computers).
2. When the window pops up, click
Control Panel
(usually about half the way down the second
column).
3. Click
Network Connections.
4. Right-Click
Local Area Connection link to open
menu box.
5. Click the bottom option
Properties.
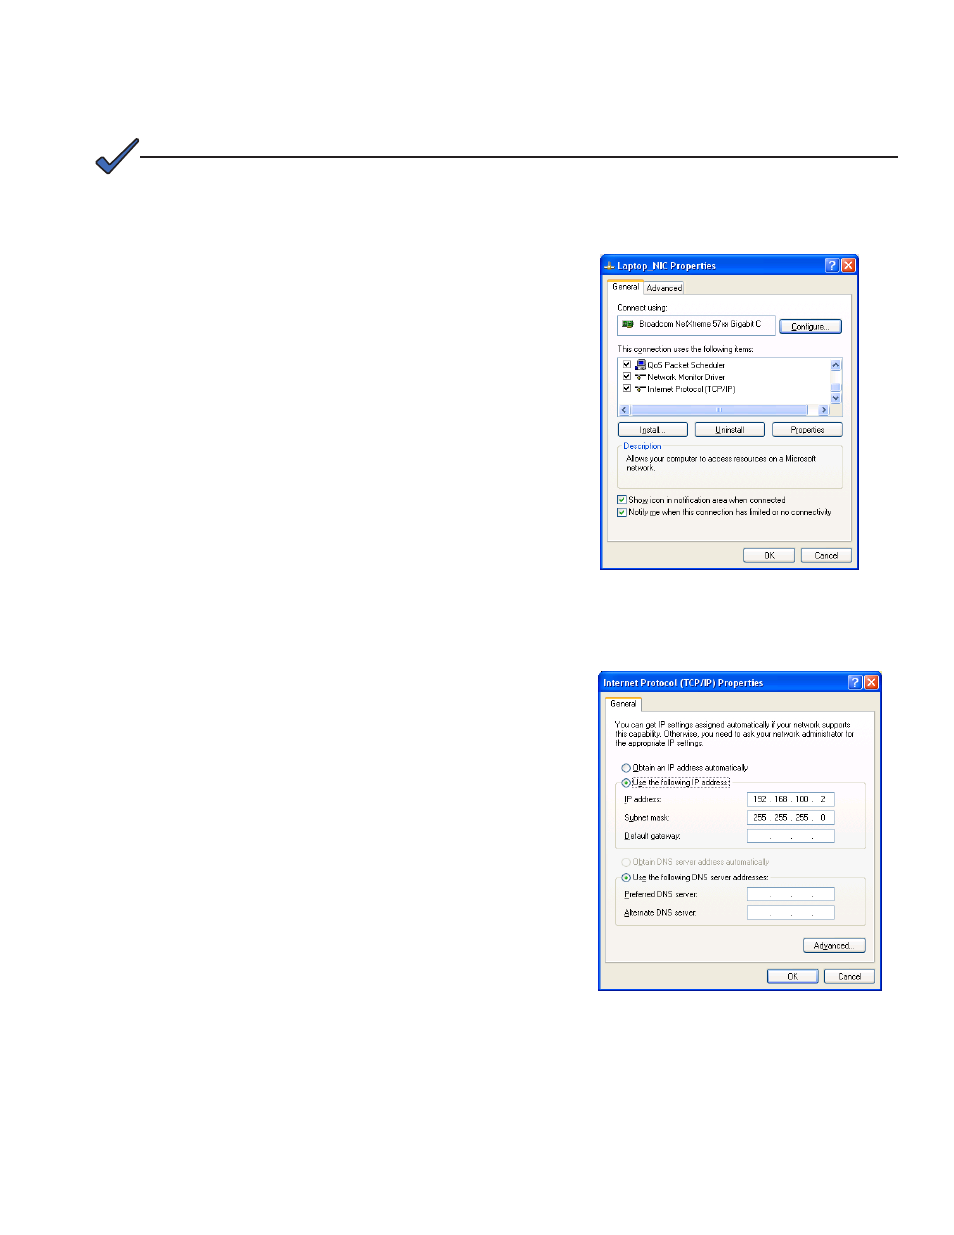
6. You will see a dialog box much like Fig. 4-2; select
Internet Protocol (TCP/IP) and then click the
Properties button.
7. The Internet Protocol (TCP/IP) Properties
dialog box will open (Fig. 4-3). Select "Use
the following IP address". Enter the values
as shown (i.e. IP address 192.168.100.2,
or DHCP assigned IP address, and Subnet
mask 255.255.255.0). Record the existing IP
address and Subnet mask in order to later
return the computer to its original state.
8. Click the
OK button and try to connect to
the DSM3 Series Communications Module
once again using 192.168.100.1 in the Web
browser.
9. To restore network settings, repeat Steps 1
through 6.
If you are unable to view the home page of the DSM3 Series using IP address 192.168.100.1, the network
configuration on the computer that is being used to connect to the DSM3 Series Communications Module
may require a temporary static IP address (192.168.100.2) to be configured.
NOTE:
Fig. 4-2, Local Area Connection
Properties Screen, Windows XP
Fig. 4-3, Internet Protocol (TCP/IP)
Properties Screen, Windows XP
4.0 Web Interface
4.1
Local Web Server Access