Rear panel features – Extron Electronics SW HDMI LC User Guide User Manual
Page 10
SW HDMI LC • Installation
4
Rear Panel Features
0.5A MAX
POWER
12V
INPUTS
1
2
OUTPUT
A S
Tx Rx
REMOTE/AUTO-SW
SW2 HDMI LC
3
1
4
2
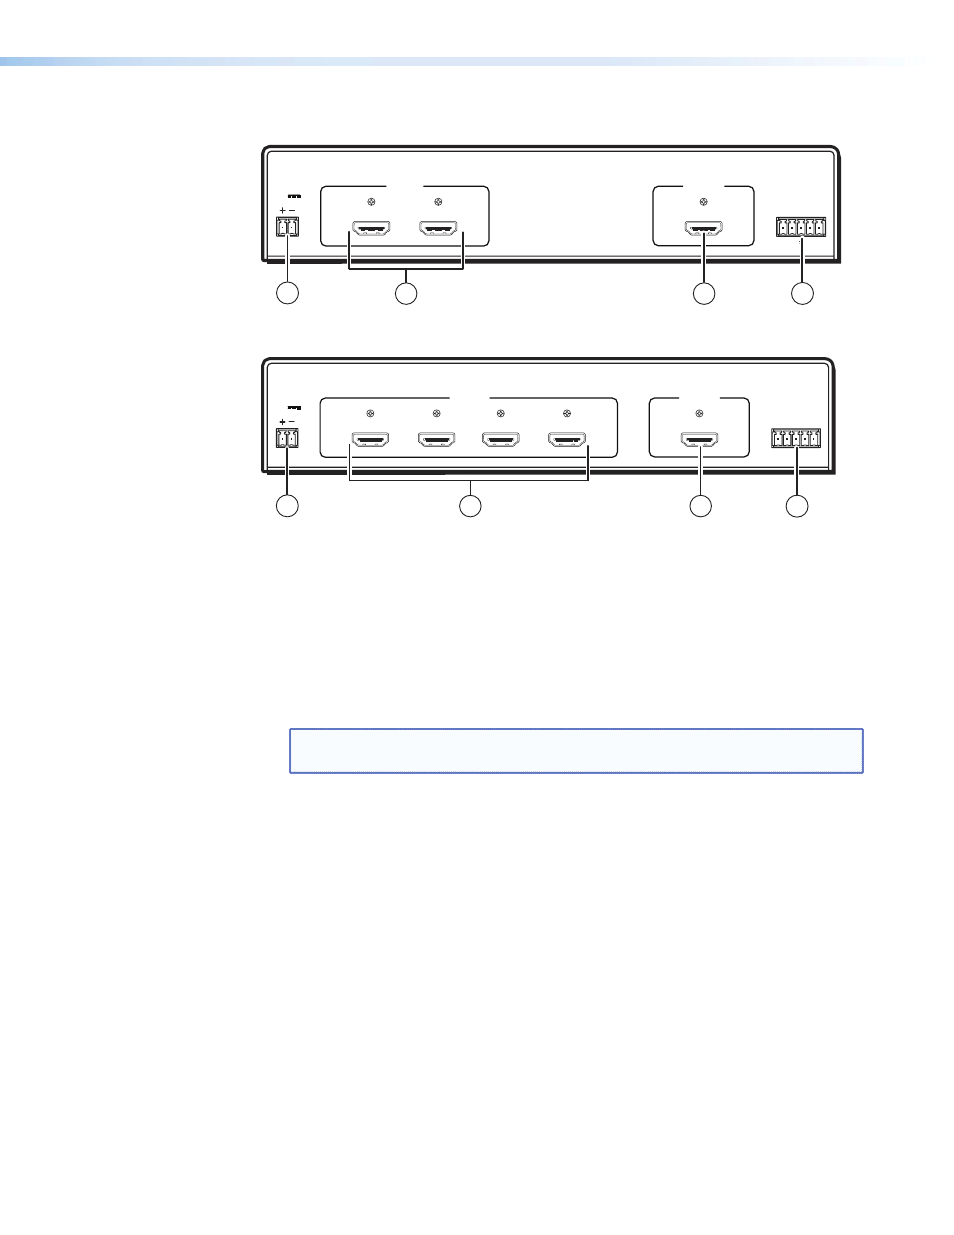
Figure 2.
SW2 HDMI LC Rear Panel
0.5A MAX
POWER
12V
INPUTS
1
2
OUTPUT
Tx Rx
A S
REMOTE/AUTO-SW
SW4 HDMI LC
3
4
3
2
1
4
Figure 3.
SW4 HDMI LC Rear Panel
a
Power connector — Plug the provided external 12 VDC power supply into this
2-pole, 3.5 mm captive screw connector.
b
Video input connectors — Connect HDMI video input sources to these Type A
female single-link HDMI connectors. Pixel clock rates of up to 225 MHz (2.25 Gbps
per channel) are supported.
c
Video output connector — Connect an HDMI display device to this female Type A
HDMI connector.
NOTE: DDC (Display Data Channel) communication (EDID and HDCP) is passed
directly from the selected input source to the output device.
d
Remote and auto-input switching connector — This 5-pole, 3.5 mm captive screw
connector (labeled “Remote/Auto-SW”) can be used for RS-232 communication with
the switcher, including firmware updates, and to enable auto-input switching.
z
z
To connect for RS-232 control connect the Tx (transmit), Rx (receive) and _
(ground) pins to your computer’s serial port. (See “
”
later in this section.)
z
z
To enable auto-input switching, short pins 4 and 5 of this connector together.
In auto-input switch mode, the switcher automatically switches to the highest
numbered active input. (See “
,” later in this
section.)