Extron Electronics PowerCage FOX SR HDMI User Guide User Manual
Page 28
PowerCage FOX SR HDMI Scaling Receiver • Remote Control
22
The Status area also shows the receiver model (multimode or singlemode), and the position
of the HDMI Audio (embedded audio) switch.
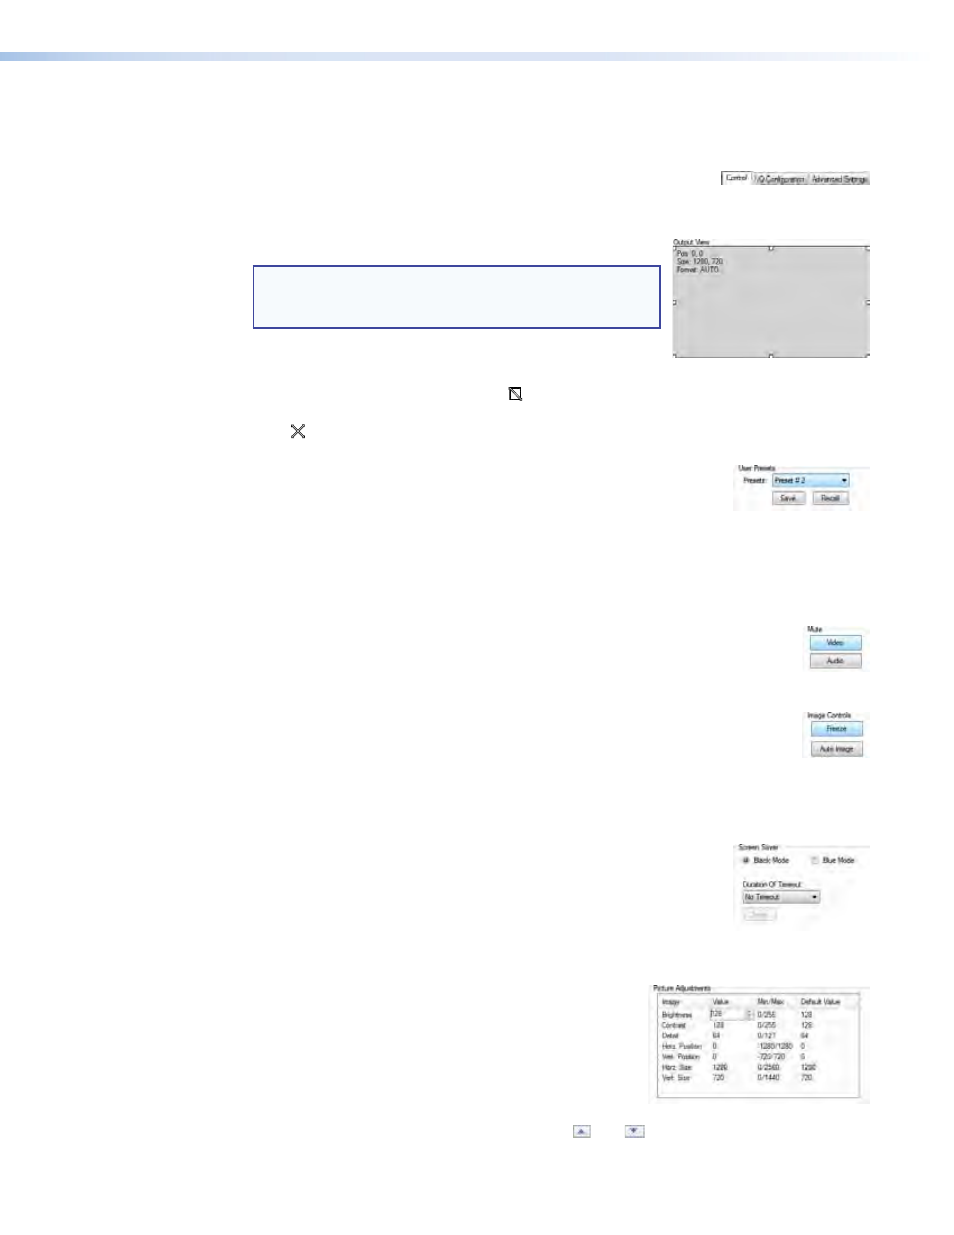
Control tab functions
Click the
Control
tab to access the functions described below.
Output View area
NOTE: The Output View area controls are available only
if the receiver is connected to a transmitter with
an active video input.
The Output View area provides controls that let you scale
and change the position of the displayed image. To scale the
image, use the mouse cursor to grab ( ) and drag one of the handles at the corner, top,
bottom, or side of the area. To change the position of the image, use the mouse cursor to
grab ( ) and drag inside the image area.
Memory Preset area
The Memory Preset area provides a means to save and recall memory
presets. Memory presets are stored values of the horizontal and
vertical position saved in nonvolatile memory. When the receiver is powered down and later
powered back up, the settings are available for selection using the
Recall
button. Saving
the settings to a preset using the
Save
button overwrites the settings previously written to
that preset.
Mute area
Click the
Video
button, the
Audio
button, or both in the Mute area to toggle the
video and audio mutes on and off.
Image Controls area
•
Click the
Freeze
button in the Image Controls area to toggle the image
freeze on and off.
•
Click the
Auto
Image
button to execute the Auto-Image function (automatically size
and center the input to fill the screen).
Screen Saver area
Select either the
Black
Mode
or the
Blue
Mode
radio button in the
Screen Saver area. Select from
1
Seconds
to
64
Seconds
in the
Duration
of
Timeout
drop-down menu to select how long to
wait before the screen saver replaces the video image (or select
No
Timeout
). Click the
Save
button to save the changes.
Picture Adjustments area
The Picture Adjustments area lists the variables available
in the receiver, with their minimum and maximum
settings (for the input resolution, where appropriate),
and the default value; and provides the tools to make
adjustments. To change a value, click in the Value
column for the desired variable and then either highlight
the variable and type in a new value or click the and
buttons.