Extron Electronics MLM-WB+ User Manual
Page 16
MLM-WB+ • Installation
10
FIG_Mounting hole locations
4.
MLM-WB+ mounting 4corners.eps
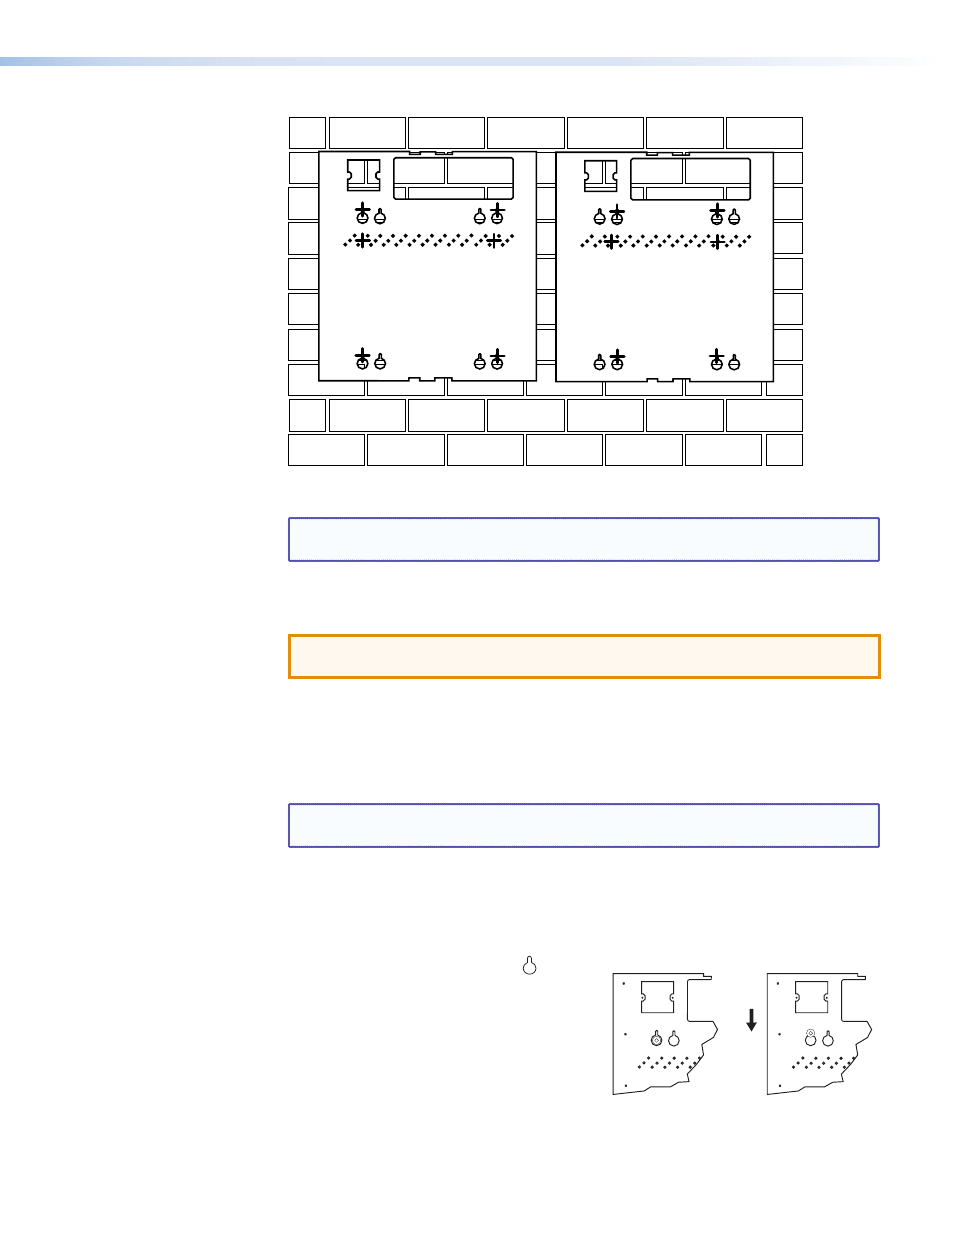
Figure 8.
MLM-WB+ Mounting Hole Locations (Viewed from the Front)
NOTE: To more clearly indicate where mounting holes should be marked, the rear
panel of the MLM-WB+ is shown.
5.
Using a masonry drill bit, drill pilot holes in the wall at the locations you marked in
step 2; make the holes 1.75 inches (4.4 cm) deep.
ATTENTION: Potential Damage to Property. If you make the pilot hole too
shallow, the screw head might break off while it is being fastened into the hole.
6.
Install masonry screws in slotted mounting hole locations as follows:
a.
Prepare the screw for installation by inserting it through a flat metal washer
(1 inch [2.5 cm] outer diameter and 0.25 inch [0.6 cm] inner diameter).
b.
Insert the screw and washer into one of the pilot holes on the wall.
NOTE: At this time, install only the masonry screws that line up with slotted
mounting holes on the MLM-WB+.
c.
Securely fasten the screw into the wall until a gap of 1/8 to 3/8 inch (3 to 9 mm)
remains between the wall and the metal washer.
d.
Repeat these steps until all masonry screws have been installed for slotted
mounting hole locations.
7.
Align the slotted mounting holes (
)
in the back of the MLM-WB+ with the
screws in the wall. Move the MLM-WB+
forward over the washers and down, as
shown at right.
8.
Insert a masonry screw and washer
through each round mounting hole on the
MLM-WB+ enclosure for which you drilled
a pilot hole.
9.
Tighten all masonry screws to secure the unit to the wall.
+
A
B
+