Starting the program – Extron Electronics FOX II T_R DP User Guide User Manual
Page 34
FOX II DP Transmitter and Receiver • Remote Control
28
4.
Enter the requested personal information;
TIP: Click
Remember
Me
to eliminate step 4 in future downloads.
5.
Click
Download
to copy the software or firmware to your computer.
6.
Cick
Run
to confirm that you want to run the installation.
7.
For a firmware download, exit this procedure and return to
on page 37.
8.
Follow the on-screen instructions. The installation creates a
C:
\
Program Files
\
Extron
\
Extron
PCS
directory, and it places the following four icons into a group folder named
“
Extron Electronics
\
Extron
Product
Configuration
Software:
”
NOTE:
C:
\
Program Files(x86)\
... for Windows 7 or Windows 8.
•
Check
for
Extron
PCS
Updates
•
Extron
PCS
Help
•
Extron
Product
Configuration
Software
•
Uninstall
Extron
Product
Configuration
Software
Starting the Program
Start the Extron Product Configuration Software as follows:
1.
Click
Start
>
Programs
>
Extron
Electronics
>
Extron
Product
Configuration
Software
>
Extron
Product
Configuration
Software
.
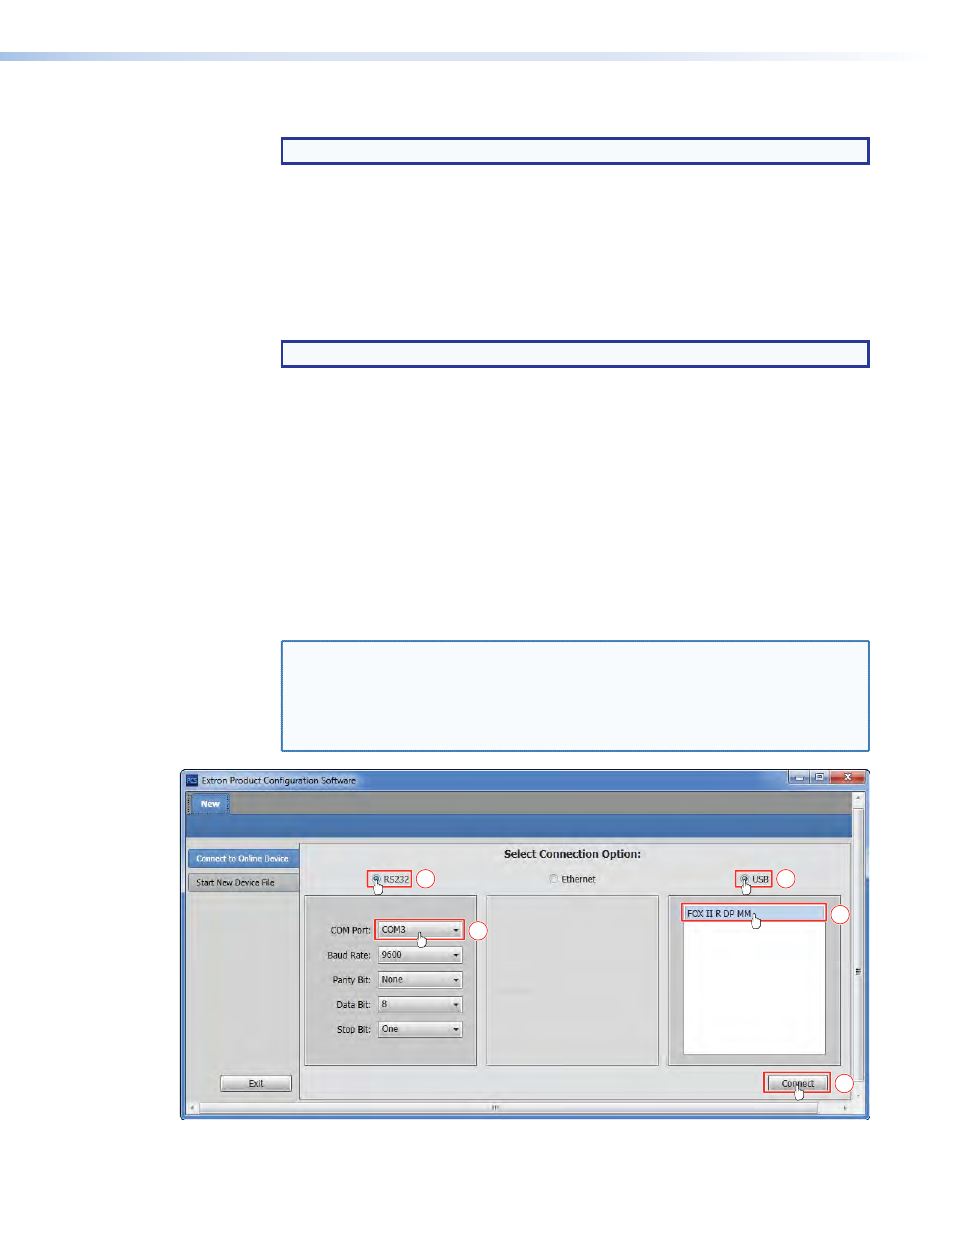
The Product Configuration Software opens to the Select Connection Options screen
(see figure 15).
NOTES:
•
Figure 15 shows the RS-232 and the USB radio buttons both selected. This is
for reference only; selecting one radio button deselects the other.
•
The transmitter and receiver do not have Ethernet connections; the Ethernet
connection cannot be selected for these products.
3
1
2
4
5
Figure 15.
Select Connection Options Screen