Installation and operation, Installation overview, Connections – Extron Electronics FOX II T_R DP User Guide User Manual
Page 12: Transmitter connections and controls, Installation overview connections, Rear panel, Displayport connector
FOX II DP Transmitter and Receiver • Installation and Operation
6
Installation and
Operation
This section details the installation of the FOX II DP transmitter and receiver system,
including:
•
•
•
Installation Overview
Follow these steps to install and set up an Extron FOX II DP transmitter and receiver system
for operation:
c
Turn off all of the equipment. Ensure that the video sources and the output display are
all turned off and disconnected from the power source.
NOTE: For proper equipment cooling, do not stack units in a rack.
c
Mount the transmitter and receiver (see
c
Connect the cables and configure the receivers (see “Connections,” below).
c
Plug in the power supplies, then turn on the display devices and the input devices.
Connections
Transmitter Connections and Controls
Rear panel
FOX II T DP
DISPLAYPORT
LOOP THRU
RS-232
RS-232
IR
ALARM
Tx Rx
Tx Rx
1 2
G
Tx Rx
G
POWER
12V
1.2 A MAX
OPTICAL
LINK
LINK
Rx
Tx
L
R
L
R
INPUTS
AUDIO
AUDIO
RETURN OUT
REMOTE
OVER FIBER
1
2
7
6
8
4
5
3
9
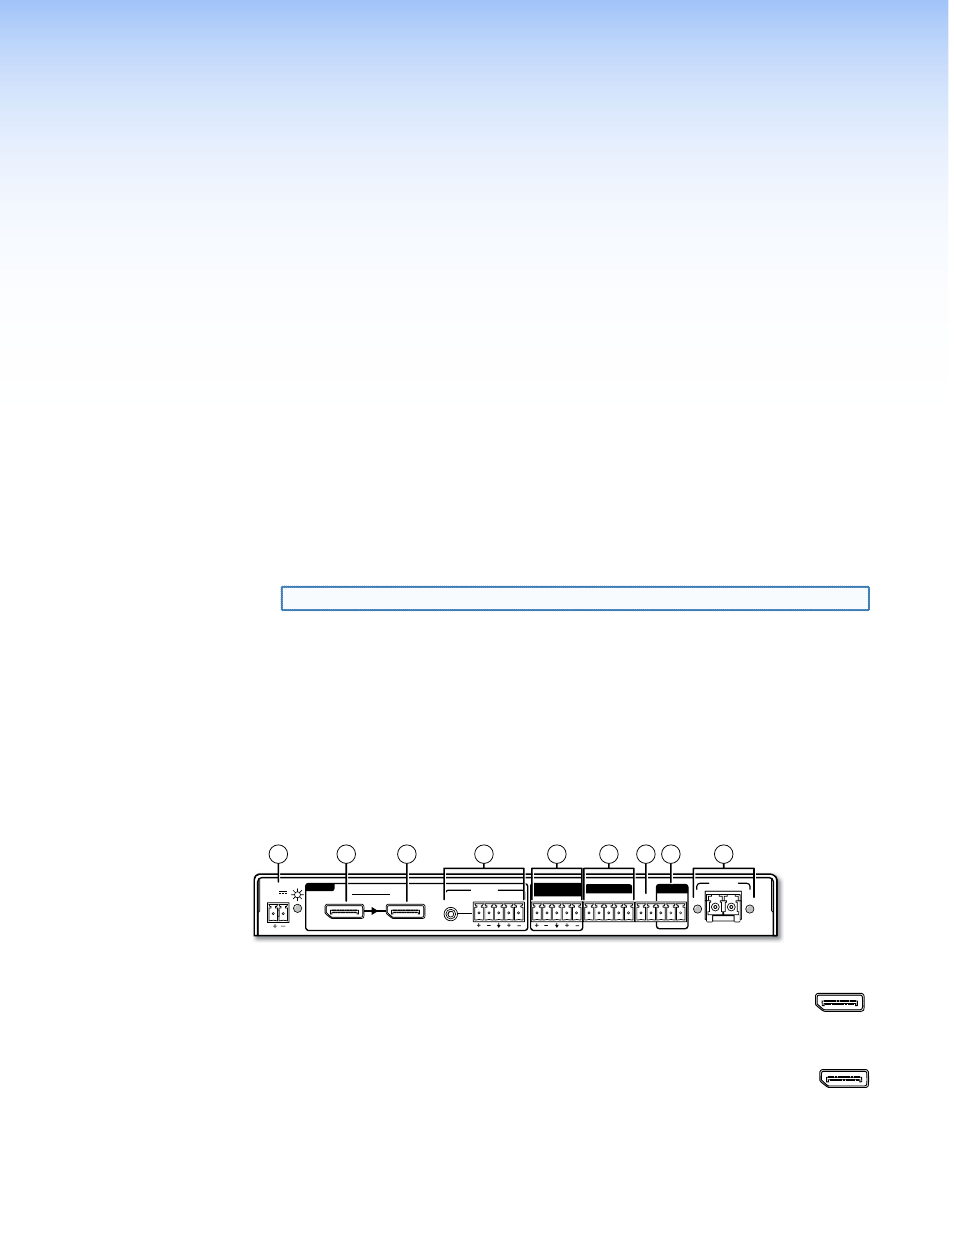
Figure 2.
FOX II DP Transmitter Rear Panel Connectors
a
DisplayPort input port — Connect a digital video input to this DisplayPort
DISPLAYPORT
connector.
The FOX II T DP also accepts embedded digital audio on this connector.
b
Loop-through output port — If desired, connect a local monitor to this
LOOP THRU
DisplayPort connector.