Step 12 – Extron Electronics CS 120P User Guide User Manual
Page 25
11.
Place the CS 120P into the ceiling grid — Place the CS 120P over the tile
grid so that the CS 120P is safely supported on the two short edges. If the ceiling
tile was installed, ensure that the hole in the tile is aligned with the hole in the
CS 120P (see figure 31).
Fig: Mounting the PRE
NOTE:
2' x 2' (600 mm x 600 mm)
grid mounting is the same as 2' x 4'
(600 mm x 1200 mm) grid mounting.
Figure 31.
Mounting the CS 120P in a 2' x 2' (600 mm x 600 mm) Ceiling Grid
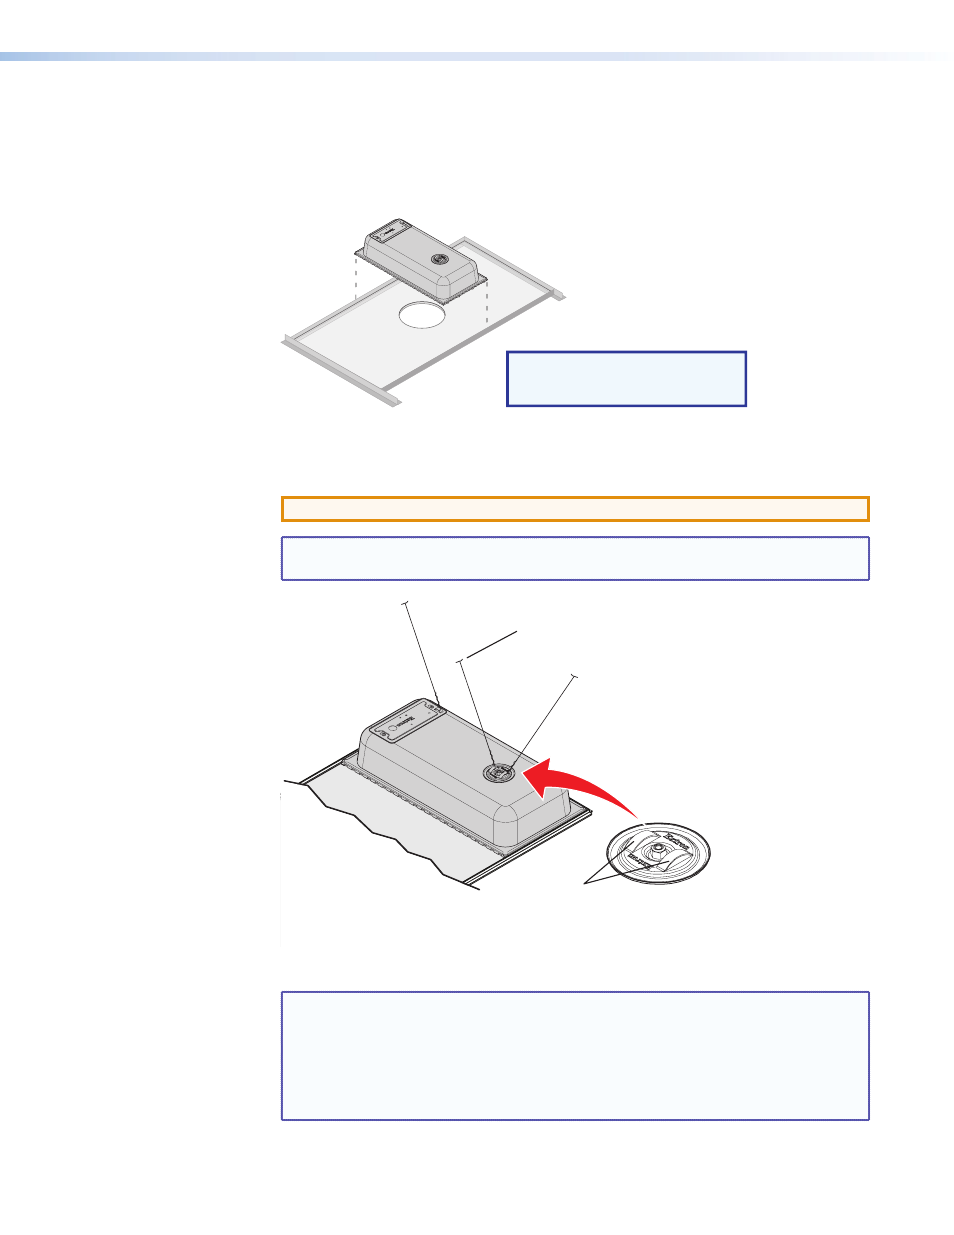
12.
Attach secondary support lines — If required, attach all of the secondary support
lines as shown in figure 32.
ATTENTION: Do not allow any slack in the support cables.
NOTE: If the CS 26T will be installed in the CS 120P, do not attach secondary
support cables to the speakers.
Secondary Support
Cables (3)
Attach cables here
and secure.
Anchor ends to suitable
solid secure points within the
permanent building structure.
SC 26T with PRE 120
Figure 32.
Attaching Secondary Support Lines
NOTE:
•
When placing the CS 120P on a tile grid with a grid face of less than 15/16
inch (24 mm) and no ceiling tile is installed, use the secondary attachment
points as hanger suspension points.
•
Observe all applicable building codes and local ordinances when installing the
speaker.
13.
Replace the adjacent tile — Reinstall the adjacent tile if one was removed in step 5.
CS 26T and CS 120P User Guide • Installation
19