Step 10 – Extron Electronics CS 120P User Guide User Manual
Page 24
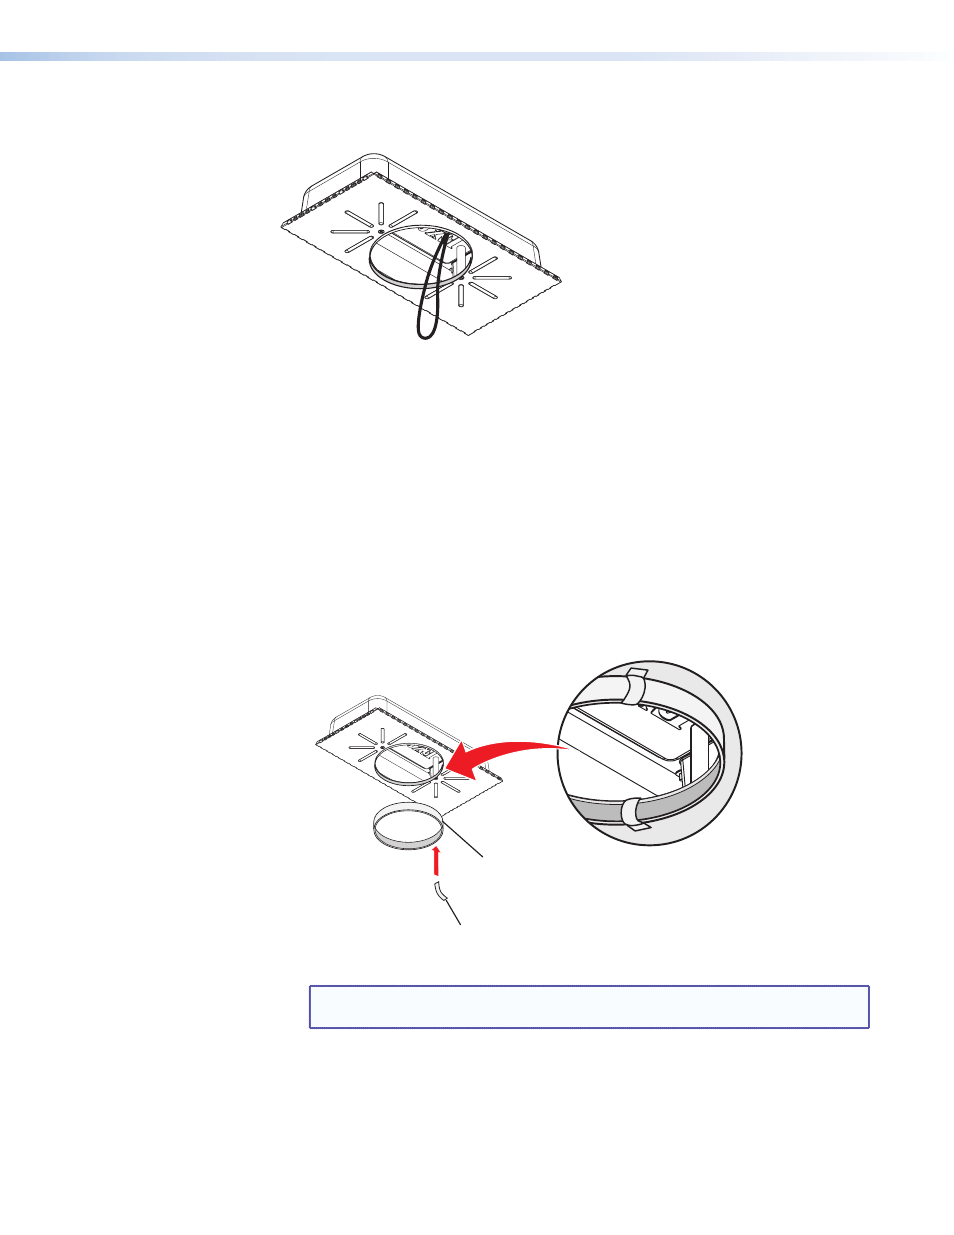
8.
Wire the CS 120P — Route the wires through the H-shaped opening in the CS 120P.
Be sure to leave sufficient slack.
Figure 29.
Route the Wires Through the H-shaped Opening
9.
Replace the terminal cover plate — Reinstall the terminal cover plate onto the
CS 120P and tighten the two screws that were previously loosened.
10.
If the CS 120P is NOT being installed in a 1-inch (0.25 cm) thick fiberglass
ceiling tile, discard the fiberglass tile adapter and proceed to
on the next
page.
If the CS 120P is being installed in a 1-inch (0.25 cm) thick fiberglass ceiling tile,
install the fiberglass ceiling tile adapter. Attach the fiberglass tile adapter to the
outer side of the lip of the port hole on the CS 120P as follows:
a.
Cut four strips of adhesive tape (such as duct tape) approximately 4 inches
(102 mm) long.
b.
Attach each tape strip starting from the outer side of the CS 120P metal baffle, up
and over the port ring adapter, then down to the inner surface of the CS 120P metal
baffle, as shown below.
Tape (x 4)
Fiberglass Tile Adapter
Figure 30.
Attach Four Tape Strips to the Baffle and Port Ring Adapter
NOTE: The tape strips must lie flat against all surfaces, with no ridges or raised
edges.
CS 26T and CS 120P User Guide • Installation
18