3 installing a dimm, 4 installing the motherboard – Asus Motherboard User Manual
Page 11
10
Chapter 1: Quick Start
English
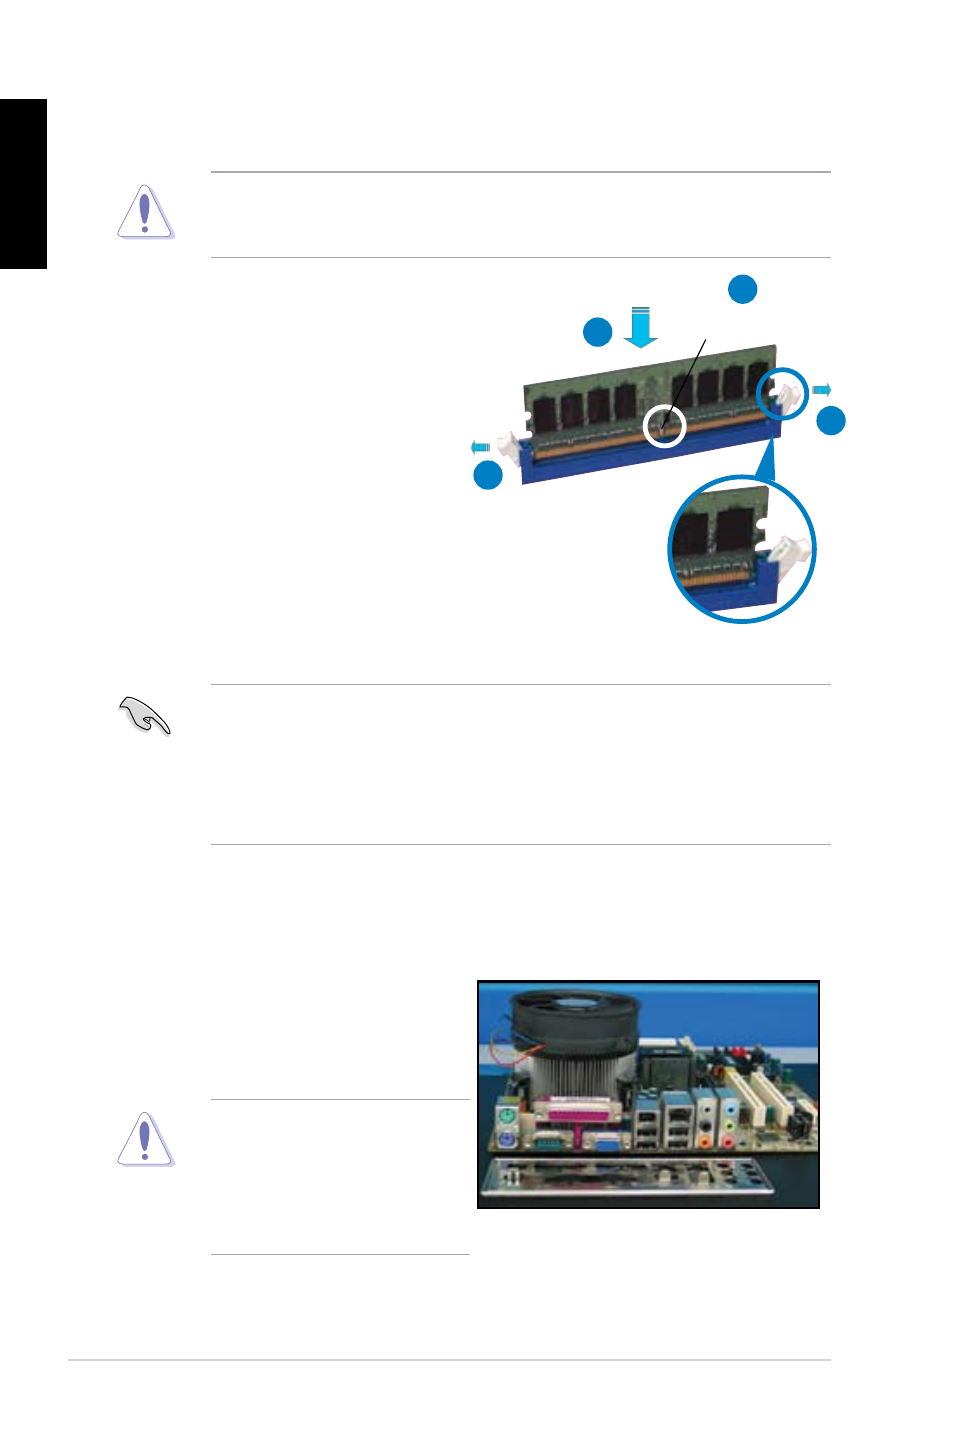
1.3
Installing a DIMM
Unplug the power supply before adding or removing DIMMs or other
system components. Failure to do so can cause severe damage to both the
motherboard and the components.
To install a DIMM:
1. Press the retaining clips outward
to unlock a DIMM socket by .
2. Align a DIMM on the socket
such that the notch on the DIMM
matches the break on the socket.
3. Firmly insert the DIMM into the
socket until the retaining clips
snap back in place and the DIMM
is properly seated.
• A DDR2 DIMM is keyed with a notch so that it fits in only one direction. DO
NOT force a DIMM into a socket to avoid damaging the DIMM.
• To install two or more DIMMs, refer to the user guide bundled in the
motherboard package.
• Refer to the user guide for qualified vendor lists of the memory modules.
Unlocked retaining clip
DDR2 DIMM notch
1
2
3
1
1.4
Installing the motherboard
1. I/O ports differ with motherboards.
Use and install the rear I/O shield
that comes with the motherboard
package only.
Some sharp edges and points
might cause physical injury. We
recommend you put on cut or
puncture resistant gloves before
motherboard and I/O shield
installation.