Controlling objects with a switch – case 1, Controlling objects with a switch – case 2 – GE Industrial Solutions A Series Lighting Control Panelboards Remote Switch Expansion Module ASRGLCDSK User Manual
Page 5
5
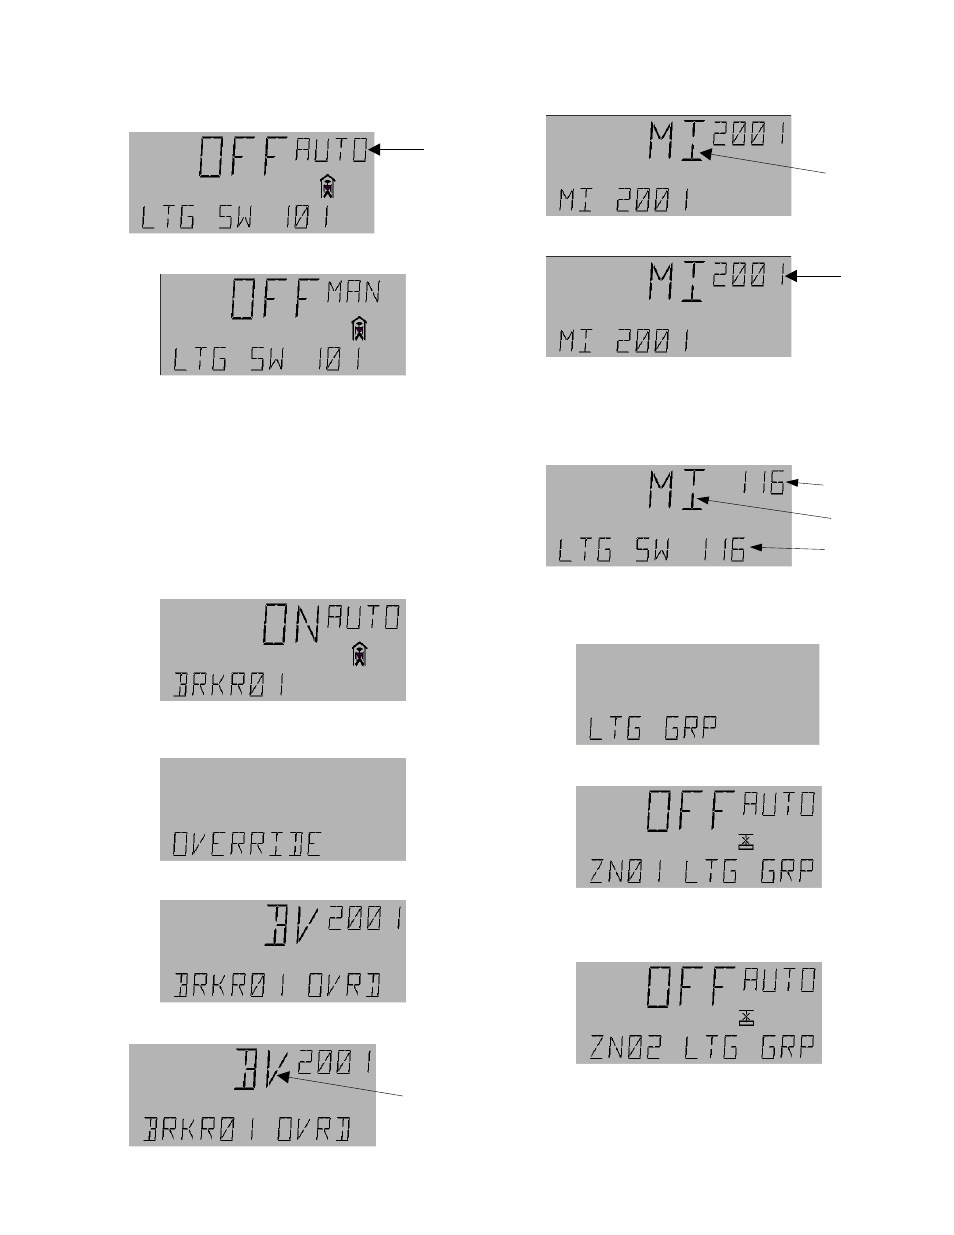
To put the switch in manual mode, press the
OK
key. The
word AUTO in the display will begin to flash.
Press the A/M key to change the display to the following:
The arrow keys can be used to change the switch to the
ON
,
OFF
, or
N/A
conditions.
Controlling Objects with a Switch – Case 1
To set a switch to control a particular object, first use the
arrow keys to the I/O menu, then press
OK
to display the
odd breakers menu, as illustrated in the previous example.
If an odd-numbered breaker is desired, press
OK
;
otherwise use the down arrow to display the even breakers
menu and then press
OK
. A screen similar to the following
appears:
Press
OK
to start AUTO flashing, then press
Fn
, then press
OK
two more times. This displays the Override screen:
Press
OK
for the following display:
Press the
OK
key; BV will start flashing:
Press the down arrow key to display the following:
Press
OK
and 2001 will begin flashing.
To select the object for the switch to control, enter the
appropriate number with the numeric keypad, then press
OK
. For instance, to link MI switch 116 (lighting switch
116 in Table 2), enter
1 - 1 - 6 - OK
. The following display
appears:
Controlling Objects with a Switch – Case 2
Use the arrow keys to scroll to the lighting group menu:
Press
OK
for the following display:
Press
OK
for lighting group 1 or press the arrow keys to
scroll to a different group. For example to access lighting
group 2, press the down arrow to get to the display
The cross symbol indicates that the group is in fault mode,
which we will ignore for this discussion. Press
OK
and the
word AUTO begins flashing:
Flashing
Flashing
Flashing
Flashing
Object Number
(flashing)
Object Type
Object Name