Installation instructions (continued), Related items for your purchase – S&B Filters Cold Air Intake Kit (Cleanable Cotton Filter) 75-5047 User Manual
Page 2
15461 Slover Ave., Fontana, CA 92337 - Phone: (909) 947-0015 - Fax: (909) 947-0603 -
INSTALLATION INSTRUCTIONS (continued)
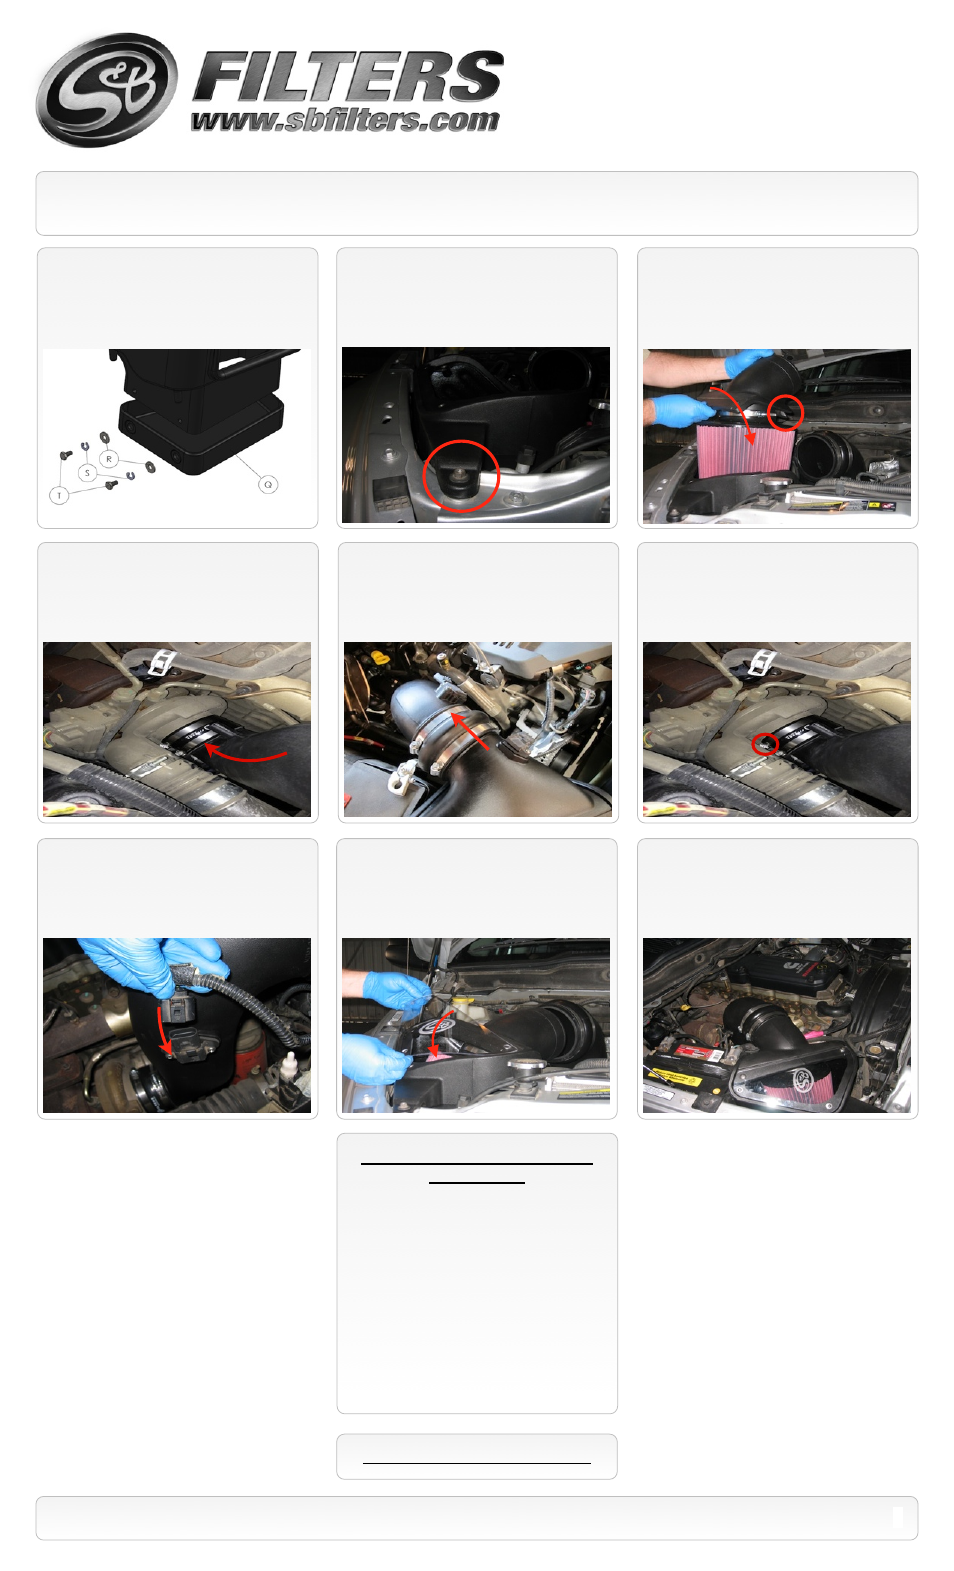
17.
Install the Clear Lid
(N)
using the
supplied 5/16” S.S. Screws
(K)
and Rubber
Washers
(J)
along with the 10-24 Screws
(L)
and SS Sealing Washers
(M)
. This will secure
the Filter Adapter to the Air Box as well.
11.
Install the Air Box
(P)
by pushing the
prongs on the bottom into the OE grommets.
Then using the stock nut removed in Step #4.
SEE EXPLODED VIEW ON PAGE 4
2
P/N: 75-5047 / 75-5047D
10.
For those concerned about minimal engine
heat; install the Box Plug
(Q)
onto the bottom of
the Air Box
(P)
using the 1/4-20 hardware. For
those seeking additional air flow, set the Box
Plug aside.
12.
Carefully place the filter assembly into
the Air Box trying not to ding or gouge the
wire mesh. Rotate the Filter Adapter
assembly into position and hook into the
groove Air Box.
13.
Install the Intake tube assembly by
pushing the silicone adapter over the turbo
inlet. Leave loose for now.
18.
Reconnect both batteries. Inspect your
installation, make sure the kit is properly
positioned and all fasteners are secure. Affix
the CARB sticker near the intake kit. The
installation is now complete.
16.
Reconnect the IAT Sensor.
15.
Make sure the Intake tube
(C)
and
Adapter tube
(I)
are aligned up top and
tighten the hose clamp at the turbo
connection. Then tighten the #72 Clamps
(F)
on the Hump Adapter.
14.
Slide the Hump Adapter
(G)
over the
Intake tube
(C)
.
RELATED ITEMS FOR YOUR
PURCHASE
• Air Scoop Assembly (S&B P/N: AS-5049)
• Air Filter Wrap (S&B P/N: WF-1023)
• Water Protection Scoop Wrap
(S&B P/N: WF-1028)
• Snow Scoop Plug and Mounting Bracket kit
(S&B P/N: 75-5051)
(See page 3 for more info)