Installation instructions, Continued) – S&B Filters Cold Air Intake Kit - Cotton Filter 75-3025-1 User Manual
Page 2
12/11/2006
PERFORMANCE TESTING
∗
Engage parking brake and start your
engine. To ensure that the system was
installed properly, listen for abnormal
noises. If an air leak is detected, re-
inspect hoses and connections as they
may need to be tightened.
∗
S&B FILTERS RECOMMENDS THAT
YOU KEEP YOUR OEM INTAKE SYS-
TEM IN THE EVENT IT IS REQURIED
IN THE FUTURE.
∗
In order to maintain proper warranty, all
connections and components must be
checked periodically for realignment
and to tighten all connections. Failure
to do so will void your warranty.
∗
Use only S&B cleaning and oil products
to service your filter. Using other com-
pany’s oil and cleaner products may
void your warranty.
Please call (909) 947-0015 should you
have any questions or comments.
(909) 947-0015 Telephone - (909) 947-0603 Fax
www.sbfilters.com
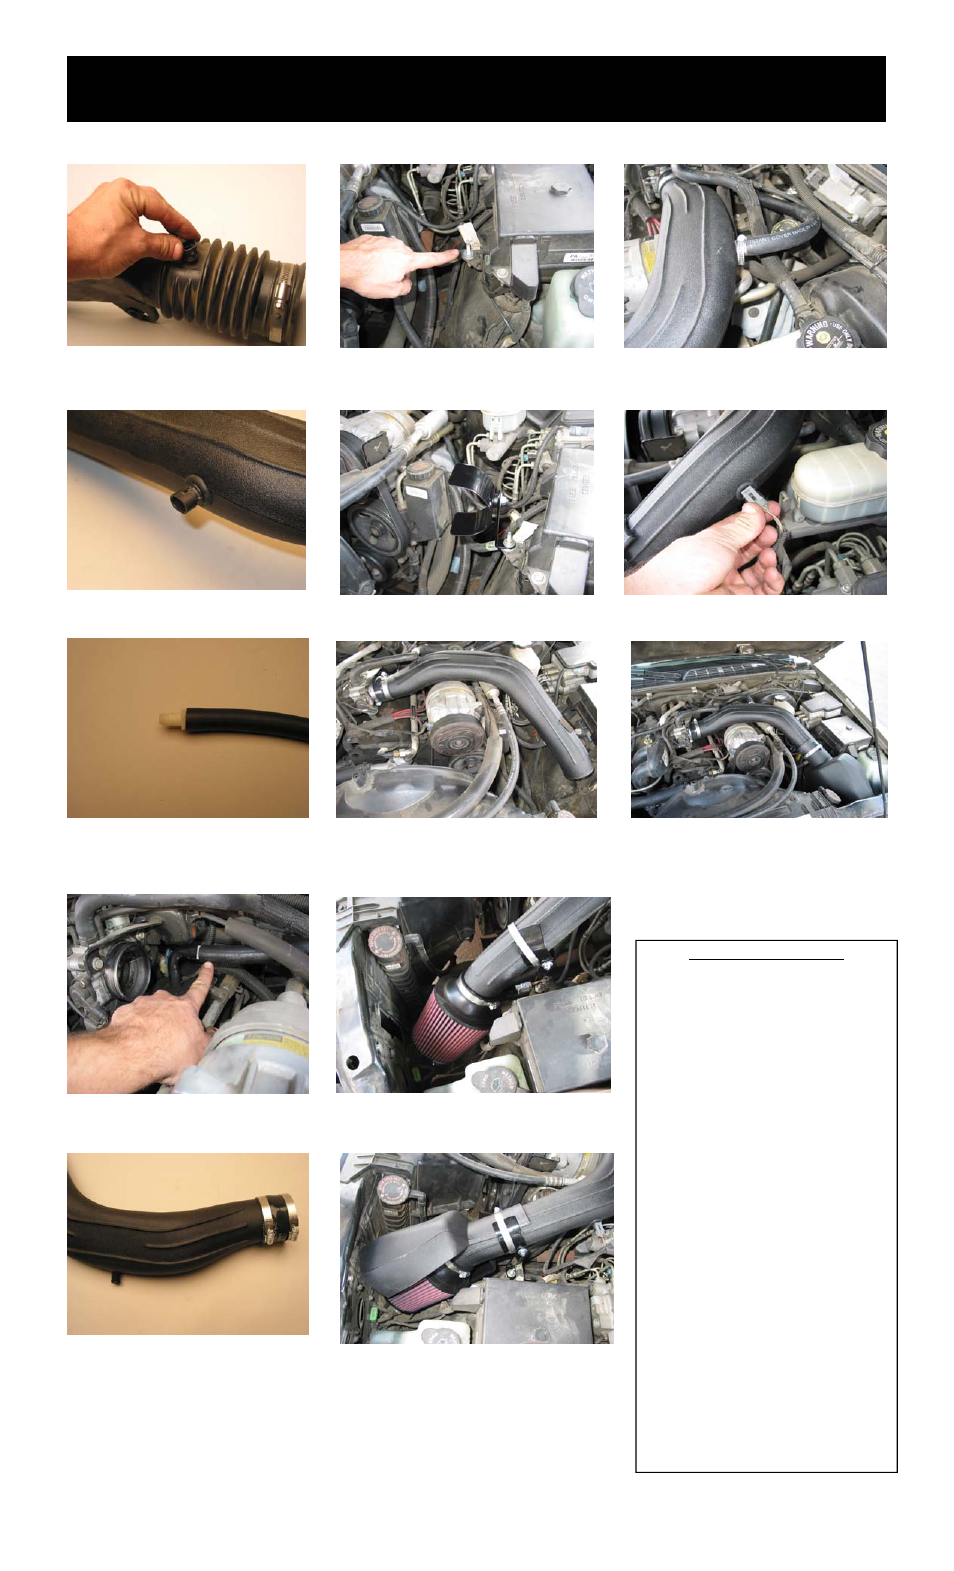
INSTALLATION INSTRUCTIONS
(continued)
13. Install the air temperature sensor into
the S&B cold air intake tube
14. Install the air temperature sensor into the
S&B cold air intake tube
15. Push the 1/2x1/2 plastic hose mender
into the 1/2 vacuum tube.
16. Remove the crank case vent hose from
the resonator and attach it to the 1/2 hose
mender .Reconnect to the valve cover stem
17. Install the 2 3/4x2 adaptor sleeve on the
S&B cold air intake tube. Tighten the hose
clamps
18. Locate the air box mounting stub. Slide the
1/4 washer down
19. Assemble the “saddle bracket” assembly and
attach the bracket to the air box mount stud.
Tighten the bracket “semi tight” for adjustment
20. Install the S&B cold air intake tube to the throt-
tle body. Tighten the hose clamps “semi-tight”
21. Slide on the hose clamps up onto the S&B
cold air intake tube and saddle bracket. Install the
S&B high performance air filter onto the S&B cold
air intake tube
22. Install the air filter heat shield. Tighten all the
hose clamps, and saddle bracket assembly
23. Connect the 1/2 crank case vent hose to the
S&B cold air intake
24. Connect the air temperature sensor electrical
connection
25. Installation complete. Reconnect the negative
side of the battery