Installation instructions (continued), Performance testing, Related items for your purchase – S&B Filters Cold Air Intake Kit - Cotton Filter 75-5019 User Manual
Page 2
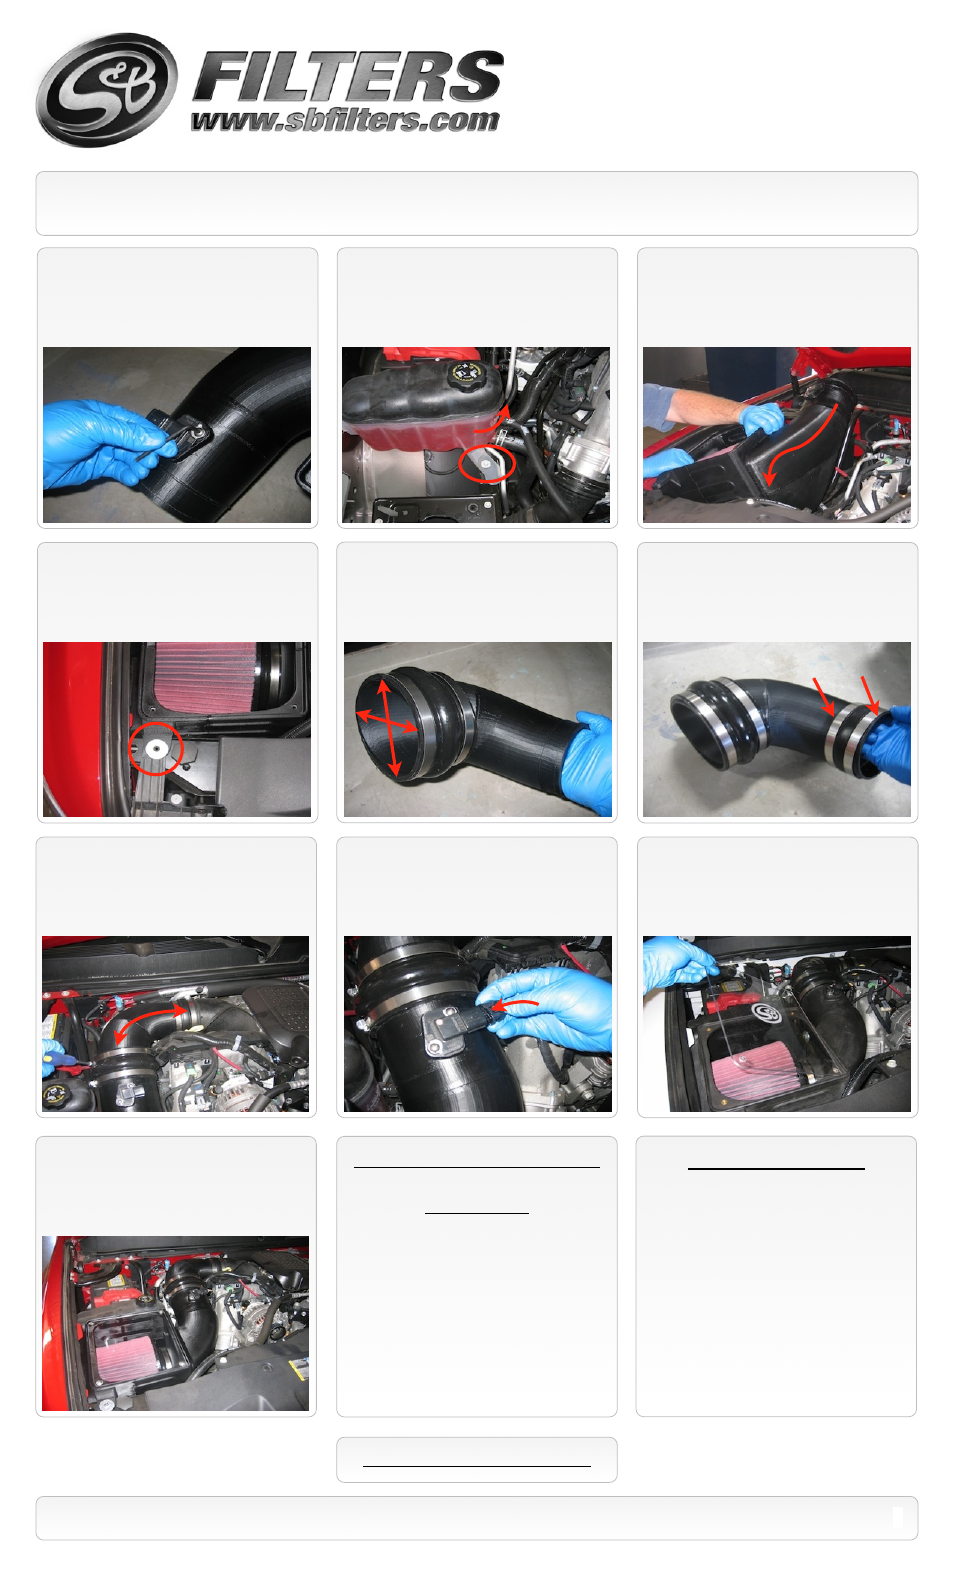
13.
Secure the front of the box using the
supplied 6mm Allen Head Bolt
(S)
and the
thin SS Washer
(R)
.
15461 Slover Ave, Fontana, CA 92337 - Phone: (909) 947-0015 - Fax: (909) 947-0603 -
INSTALLATION INSTRUCTIONS (continued)
11.
Test fit the Air box assembly. If there is
a clearance issue with the Air Box
(A)
it may
be necessary to loosen the bolt at the base of
the coolant overflow/ reservoir then slide the
reservoir back and retighten the bolt.
14.
Install the Hump Coupler
(M)
along with
the #80 Hose Clamps
(D)
over the Intake
Tube
(L)
. Slide on until it is just about flush
with the end of the tube.
19.
Reconnect both batteries. Inspect your
installation, make sure the kit is properly
positioned and all fasteners are secure. Affix
the CARB sticker near the intake kit. The
installation is now complete.
12.
Place the Air box assembly in the
vehicle aligning the prongs into the OE
grommets.
15.
With a #64 Hose Clamp
(E)
and a #72
Hose Clamp
(F)
installed on the Straight
Coupler
(N)
, secure the smaller end to the
Intake tube
(L)
.
16.
Connect the Intake tube assembly to
the turbo inlet and secure the #72 Hose
Clamp
(F)
. Center the Hump Coupler
(M)
over
the gap between the tube ends and secure
both #80 Hose Clamps
(D)
.
17.
Reconnect the MAF sensor electrical
connection.
18.
Install the Clear Lid
(H)
and secure with
the 10/24 screws
(K)
and SS Sealing
Washers
(J)
. Do not over tighten!
SEE EXPLODED VIEW ON PAGE 3
2
P/N: 75-5019 / 75-5019D
#64
#72
Performance Testing
• Engage parking brake and start your engine.
Listen for abnormal noises. If an air leak is
detected, re-inspect hoses and connections as
they may need to be repositioned and tightened.
• S&B FILTERS recommends that you keep your
OE intake system in the event it is required in the
future.
• In order to maintain your warranty, all connections
and components must be checked periodically for
alignment and for proper tension on all
connections. Failure to do so may void your
warranty.
• Use only S&B FILTERS cleaning and oil products
to service your filter. Using any other brand oil
and or cleaners on your S&B air filter may void
your warranty.
10.
With the rubber seal in place, insert the
MAF sensor into the Filter Adapter
(B)
.
Secure the MAF sensor using the supplied
M4 screws
(P)
. Do not over tighten!
The screws may require a Phillips
head screwdriver and not a Torx.
Related Items for your Purchase
• Precision II Cleaning and Re-oiling Kit
(S&B P/N: 88-0008)
• Replacement Air Filter (Oiled)
(S&B P/N: KF-1035)
• Replacement Air Filter (Dry)
(S&B P/N: KF-1035D)
• Air Filter Wrap
(S&B P/N: WF-1023)