Installation instructions (continued) – S&B Filters Cold Air Intake Kit - Cotton Filter 75-5021 User Manual
Page 2
15461 Slover Ave., Fontana, CA 92337 - Phone: (909) 947-0015 - Fax: (909) 947-0603 -
Installation Instructions (continued)
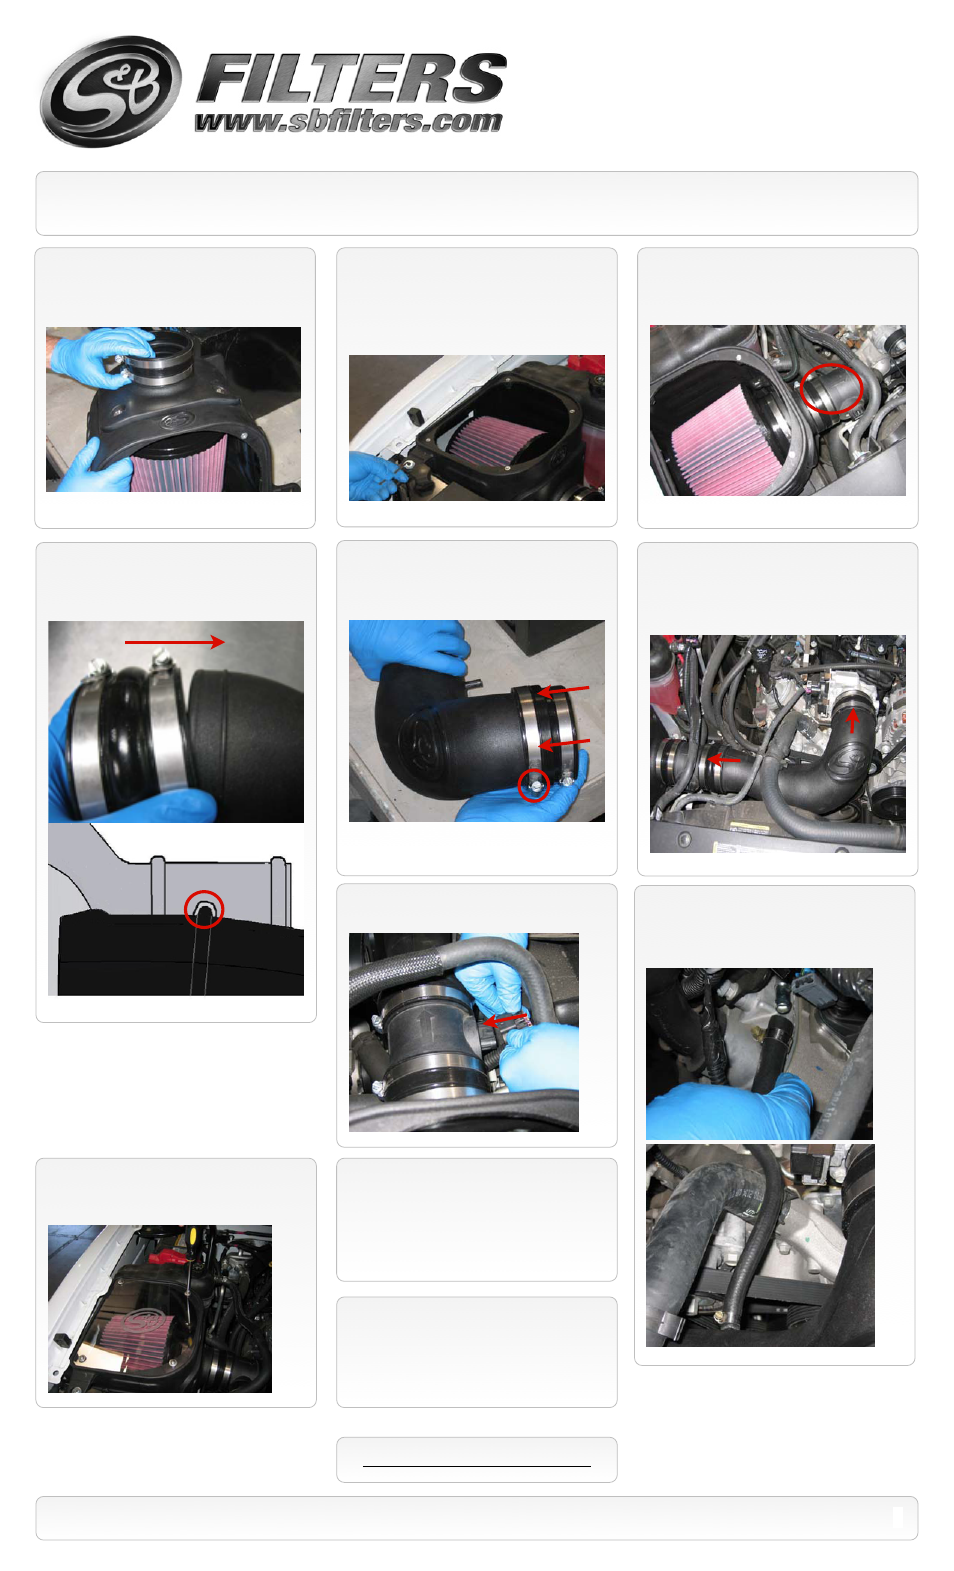
10.
Place the S&B straight adapter (L) over
the filter adapter (I) and secure the #60 hose
clamp (K) also secure the #80 hose clamp (E)
on the filter.
14.
Install the S&B step adapter (P) to S&B
tube (O) as shown, secure the #72 hose
clamp (R).
11.
Remove the OE bolt located on top of
the core support between the fender and
hood bumper, Install the S&B air box (H) align
prongs to OE grommets and secure the box
using the Tapered Allen Head Bolt (F) & Thin
SS washer (G) supplied.
15.
Install the S&B tube (O). Place the hump
adapter end over the MAF and secure the
#60 hose clamp. Then place the other end
with the step adapter (P) over the throttle
body and secure the #64 hose clamp (S).
12.
Attach the MAF sensor to the S&B filter
adapter (I), secure with #60 hose clamp (K).
Note: Direction of the air flow.
19.
Reconnect the battery. Inspect your
installation, make sure kit is properly
positioned and all fasteners are secure.
13.
Place the S&B hump adapter (M) over
the S&B tube (O), slide on until rib on tube is
captured by the groove in the adapter. Then
secure with #60 hose clamp (K).
16.
Reconnect the MAF sensor electrical
connection.
SEE EXPLODED VIEW ON PAGE 4
2
P/N: 75-5021 / 75-5021D
17
. Install the 3/8” crankcase vent hose (Q)
from the engine over the radiator hose to
the S&B Intake tube (O), secure both ends
with the #4 hose clamps (N).
Hump Adapter
Intake Tube
18.
Install the S&B clear lid (C), secure with
10/24 screws (A) and sealing washers (B).
Do not over tighten.
20.
Adhere the C.A.R.B. exemption sticker
in plain sight under the hood.