Installing the usb-to-serial adapter, Installing under windows xp, Figure 1 - windows xp found new hardware prompt – B&B Electronics ESU2-400 - Manual User Manual
Page 7
USB-to-Serial Adapter User’s Manual
Installing the software
Rev 1.01 (February 2007)
Page 3
Installing the USB-to-Serial Adapter
This section explains how to install the USB-to-Serial adapter under
different operating systems. Please locate and follow the procedure
for your computer’s operating system.
The USB-to-Serial adapter includes Windows device drivers that
enable the serial ports to appear to Windows as standard COM ports.
Installing under Windows XP
Follow these steps to install the adapter under Windows XP.
Step
Procedure
Description
Step 1
Turn on the power to your computer
system.
This is the system in which the device is to
be installed.
Step 2
Plug the wide flat end of the USB cable
into the downstream connector.
This is the connector located on the back of
the computer or USB hub.
Step 3
Plug the square end of the USB cable into
the back of the USB-to-Serial adapter.
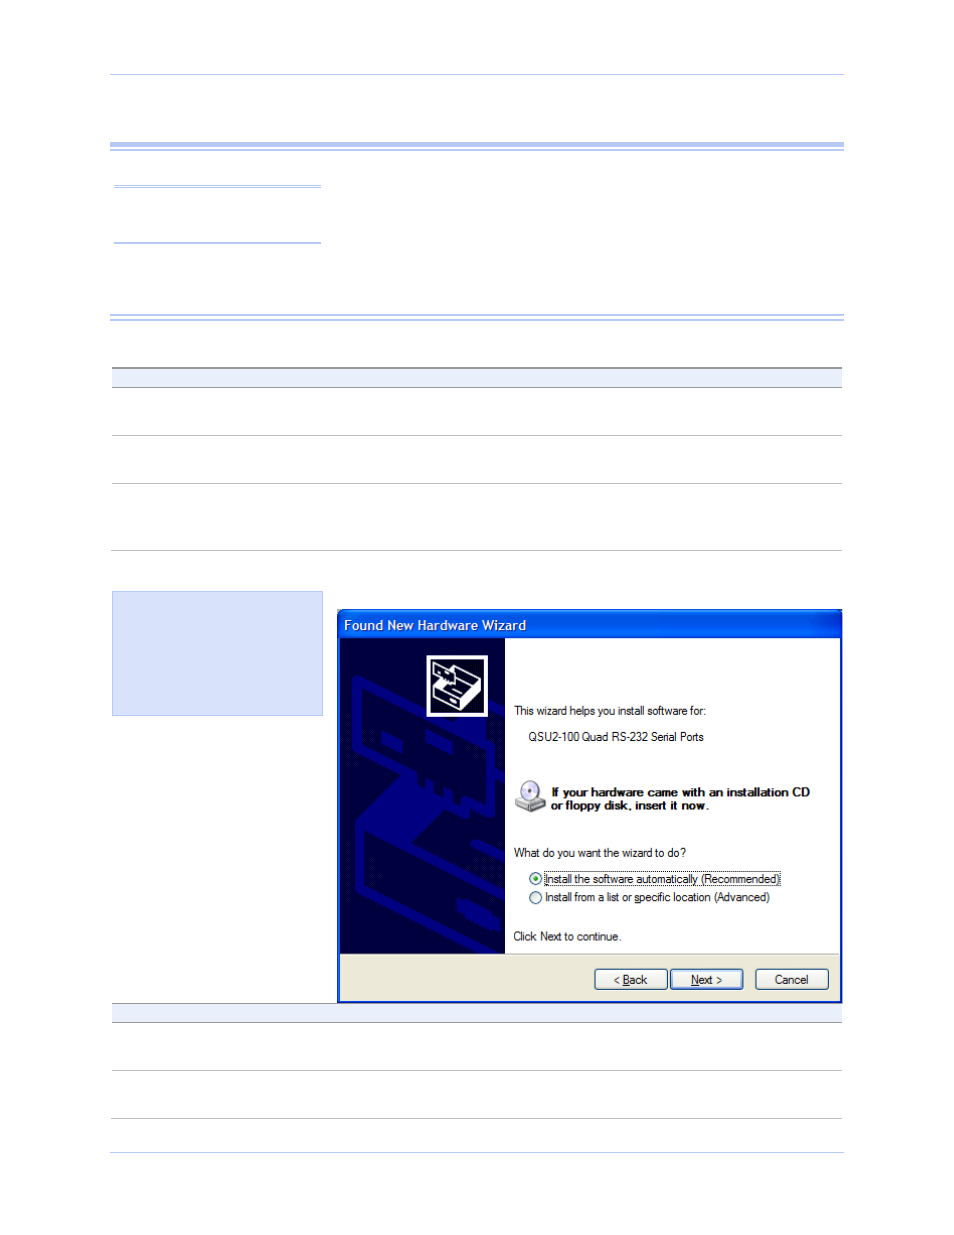
Windows tells you that it has found new
hardware and launches the Found New
Hardware Wizard.
Figure 1 - Windows XP Found new hardware prompt
Step
Procedure
Description
Step 4
Insert the installation CD into your CD-
ROM drive.
This is the CD that shipped with the
product.
Step 5
Select the “Advanced” option. Click the
Next button.
The Choose your search and installation
options prompt displays.
Figure 1 illustrates the
Windows XP Found new
hardware prompt. The Found
New Hardware Wizard
launches automatically when
you first plug in the USB-to-
Serial adapter.
Caution! Be sure to allow
the installation process to
finish without interruption.