Rough Country 875.20 User Manual
Page 8
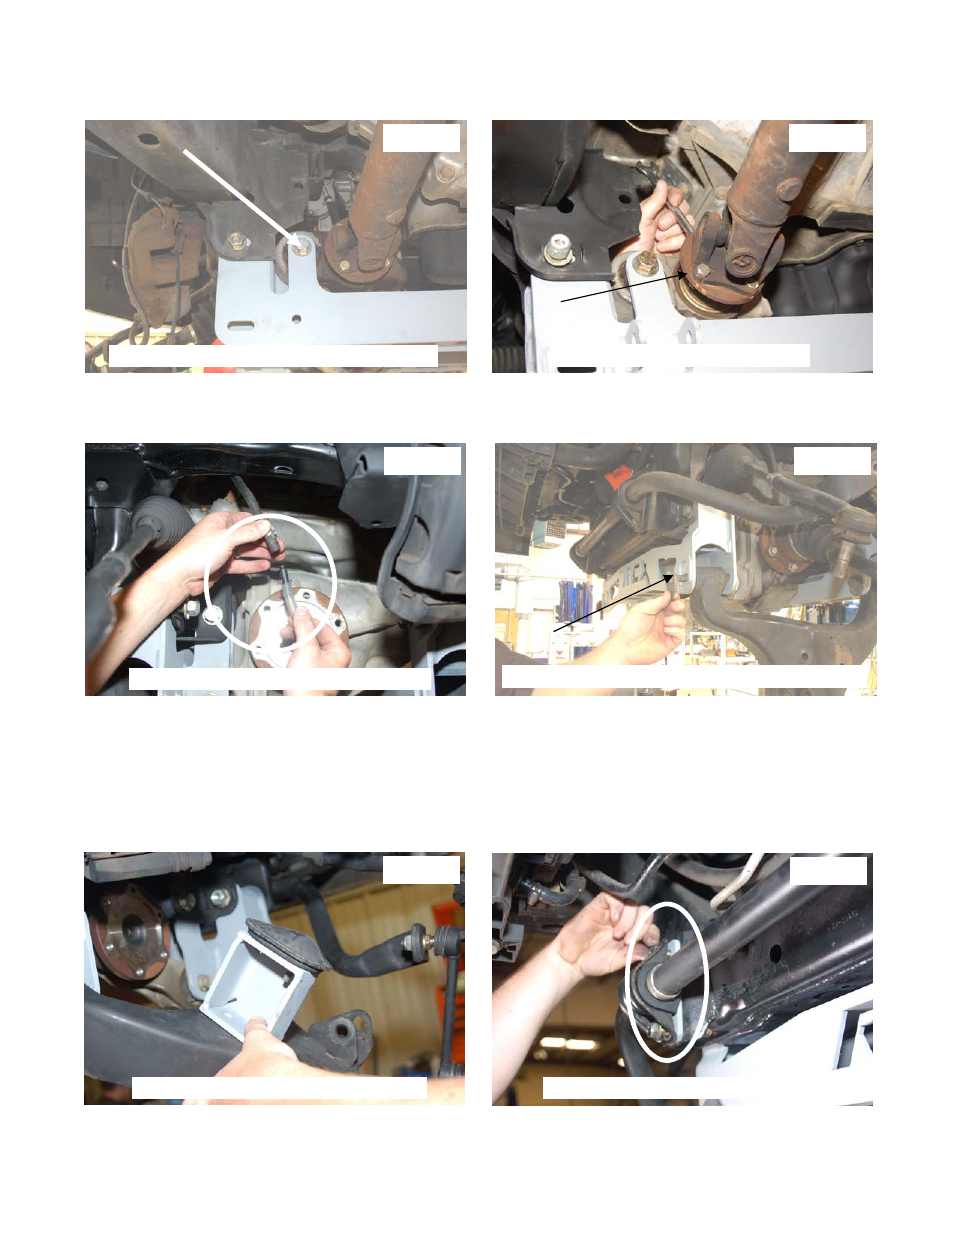
26. Install supplied 9/16 x 4 “bolts/washers/nuts for rear differential as shown in Photo 26. (4WD ONLY)
27. Aligning to marks made during disassembly reinstall driveshaft using a 14mm wrench to tighten. See Photo 27.
(4WD ONLY)
28. Install supplied hose and coupler on the stock diff hose and install on the differential. See Photo 28. (4WD ONLY)
29. Install control arm on truck using supplied cam bolts. Make sure all cam blocks off plates are installed with the notch
in same direction. See Photo 29.
30. Remove bump-stop off of control arm using 12mm wrench. Install bump-stop to the new bump-stop ext. (note there
is a left and right bump-stop). Then install to control arm using supplied 5/16 x1” bolts/washers & nuts. Tighten
using13mm wrench. Passenger side shown in Photo 30.
31. At this time tighten all cross-member bolts and differential bolt (4WD ONLY) using 21mm, 22mm and 19mm wrench
per torque specs for bolt size.
32. Remove the stock bolts from the sway bar mount on the frame on the driver and passenger side. Retain the stock
hardware for reuse. Install the supplied sway bar spacers as shown in Photo 31 between the sway bar and the
frame using the factory hardware. Passenger side shown.
Photo 26
Photo 27
Photo 28
Photo 29
Photo 30
Rear Cross Member Driver Diff Installation
Re-Install Drive Shaft
Re-Install Diff Vent Hose with Extension
Install Lower Control Arm with Supplied Cam Bolts
Install Bump Stop Extensions
Photo 31
Install Front Sway Bar Spacer