Rough Country 875.20 User Manual
Page 5
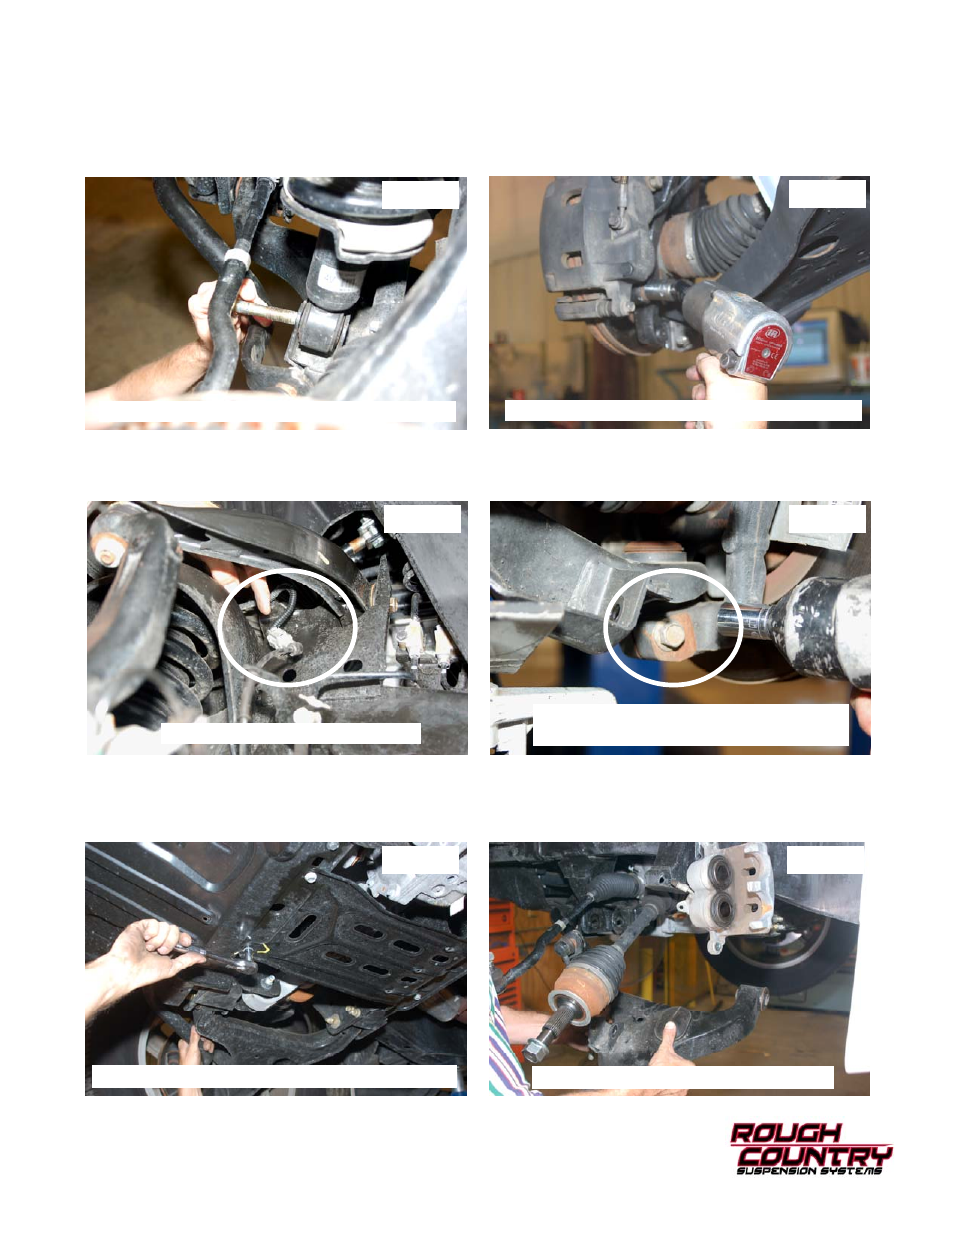
9. Using a 19mm socket and wrench, remove the strut bolt from the lower control arm and remove the strut assembly
from the vehicle. Retain the factory lower bolt for reassembly. Note the direction of the bolt for reassembly. See
Photo 7.
10. Using a 21mm socket remove the brake caliper assembly from the knuckle/rotor. See Photo 8. Secure the caliper.
Place an alignment mark on CV and Dif Flange for reinstallation. Do not let the caliper hang. Retain the hardware
for reuse.
11. Unplug the ABS wire as shown in Photo 9.
12. Using a 17mm socket, remove the bolt securing the knuckle to the lower ball joint as shown in Photo 10 and remove
the knuckle from the vehicle.
13. Remove the factory front skid plate and the lower skid plate from the frame as shown in Photo 11 using a 12mm
wrench. The skid plates will not be reused. The front skid plate must be removed for access to the oil filter or altered
to allow access to oil filter.
14. Remove the lower control arm as shown in Photo 12 using a 19mm socket/wrench.
Photo 7
Photo 8
Photo 9
Photo 10
Photo 11
Photo 12
Remove Lower Strut Nut and Strut Assembly
Remove Lower Strut Nut and Strut Assembly
Disconnect ABS Wire
Remove Clinch Bolt on Lower Ball Joint
to Remove Knuckle
Remove Front and Lower Skid Plate—if Equipped
Remove Lower Control Arms