Rough Country 875.20 User Manual
Page 4
FRONT INSTALLATION INSTRUCTIONS
1. Jack up the front of the vehicle and support the vehicle with jack stands, so that the front wheels are off the ground
2. Using 13/16” socket remove the front tires/wheels.
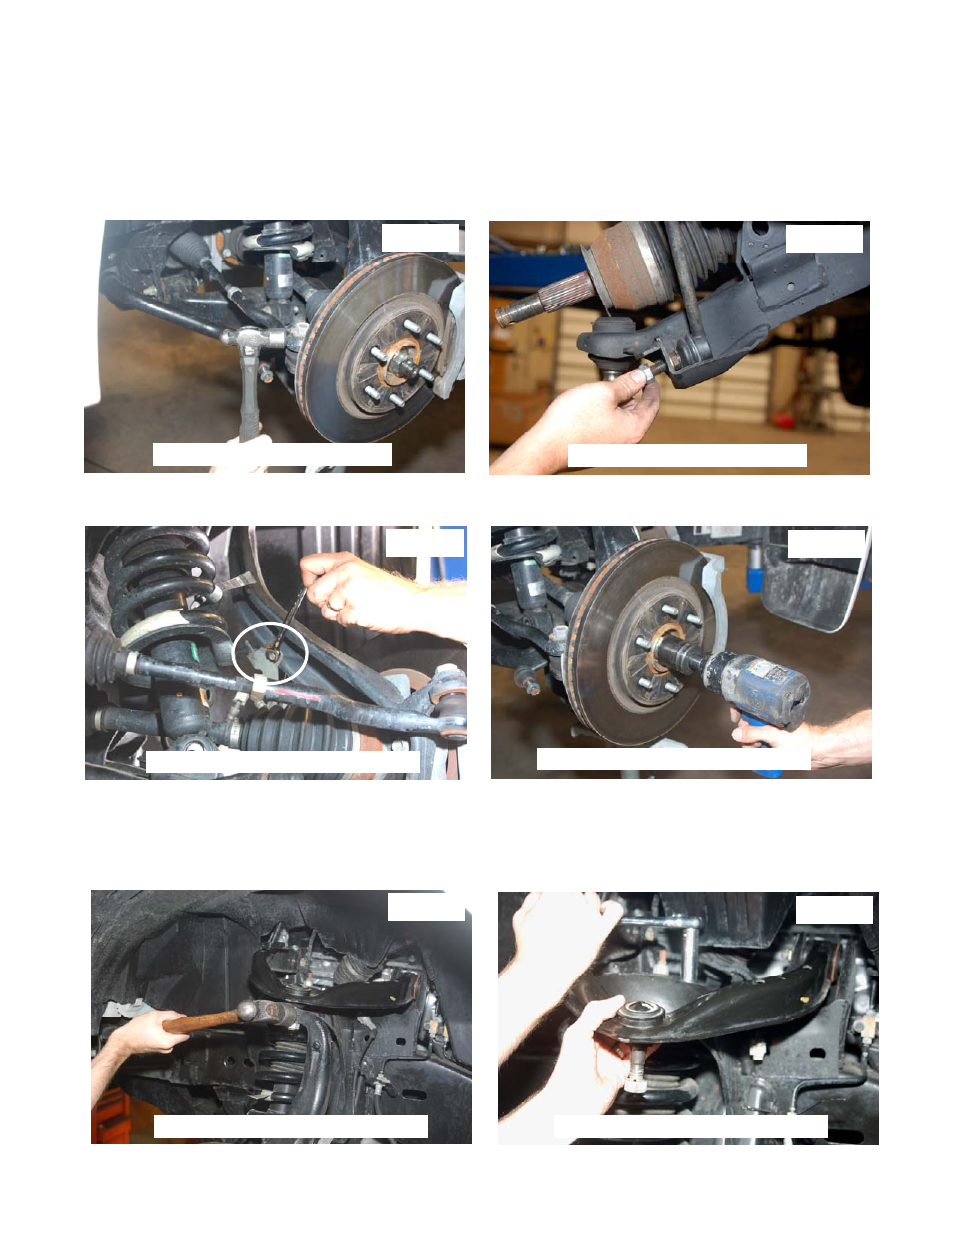
3. Using 22mm socket remove the nut from the steering linkage. Using a hammer hit on the side of the knuckle as
shown, and remove the linkage from the knuckle. Push linkage forward to make room for installation. Retain factory
hardware See Photo 1.
4. Using a 17mm wrench, remove the stock sway bar link from the sway bar and the lower control arm, allowing the
sway bar to drop. See Photo 2.
5. Using a 10mm wrench remove the brake line bracket from the back side of the knuckle. See Photo 3.
6. Remove the axle nut using a 30mm socket as shown in Photo 4. (4WD ONLY)
7. Remove cotter pin from the upper control arm ball joint nut. Place jack stand under the knuckle for support. Using 22
mm socket remove nut. Using a hammer hit the knuckle as shown to allow the ball joint to separate from the upper
control arm See Photo 5. Do not allow the knuckle to pull out far enough that it pulls the shaft out of the differential.
8. Using a 14mm socket, remove the strut nuts on the upper strut tower that holds the assembly in place. See Photo 6.
One nut can be left on the upper bolts to hold the strut in place.
Photo 1
Photo 3
Photo 6
Photo 4
Photo 5
Photo 2
Remove Steering Linkage
Remove Sway Bar Link
Remove Brake Line Brkt From Knuckle
Remove Brake Line Brkt From Knuckle
Separate Ball Joint From Knuckle
Remove Strut Nuts from Tower