Installation guide, Installation, Px series – Veris Industries PX SERIES Install User Manual
Page 2: Screw hole mounting, Duct installa- tions
Z205213-0D
PAGE 2
©2012 Veris Industries USA 800.354.8556 or +1.503.598.4564 / [email protected]
07122
Alta Labs, Enercept, Enspector, Hawkeye, Trustat, Veris, and the Veris ‘V’ logo are trademarks or registered trademarks of Veris Industries, L.L.C. in the USA and/or other countries.
TM
PX SEriES
inStallation GUiDE
installation
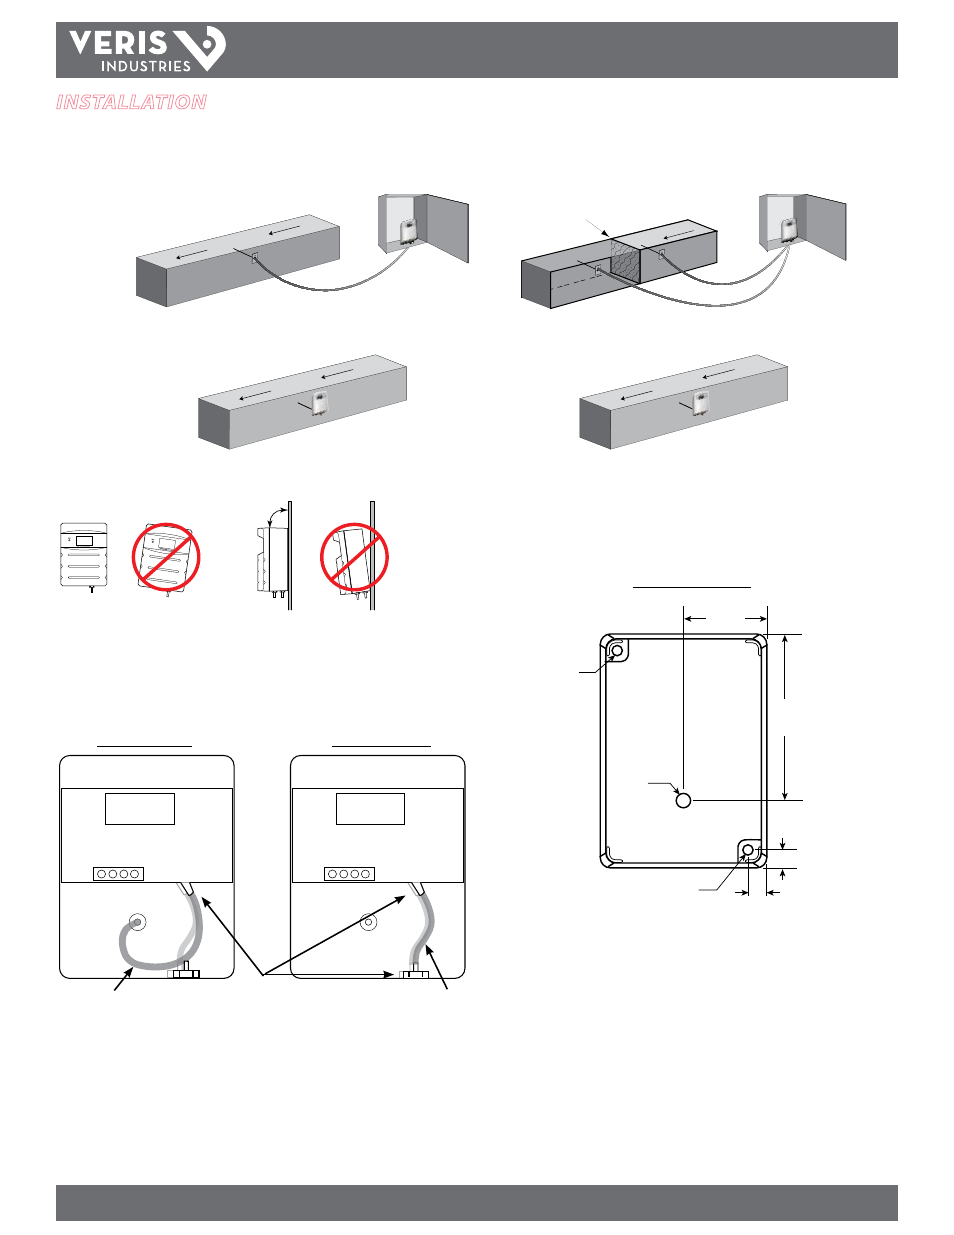
1. Plan the installation. Panel or duct mount?
2. For duct mount applications, thread the probe into the back of the device housing.
3. Configure the internal tubing for the selected installation method as shown below.
Use the larger diameter tubing for the duct mount configuration.
Ø 0.15 “
(3.7 mm)
Ø 0.38 “
(9.7 mm)
Ø 0.15 “
(3.7 mm)
Ø 3.3 “
(83 mm)
Ø 0.2 “
(5.2 mm)
Ø 1.6 “
(40 mm)
+
+
Ø 0.38 “
(9.7 mm)
Screw Hole Mounting
Z103591-0A
Differential Pressure
Transmitter
Inch H2O
Z103591-0A
Differential Pressure
Transmitter
Inch H
2O
90˚
YES!
YES!
Tubing for Duct Mount
Tubing for Panel Mount
Use the
front barb
Larger diameter tube
for duct configuration
Smaller diameter tube
for panel configuration
4. Mount the transducer (see the screw hole diagram). Position the transducer
vertically.
5. Determine the length of pilot tubing needed.
Static Pressure
Differential Pressure
Panel
Installa-
tions
AIR FL
OW
FILTER
LOW
HIGH
AIR FLOW
Duct
Installa-
tions
AIR FLO
W
AIR FLO
W