Dimm installation guide, Page 21 of 22 – TROY Group Hewlett-Packard LaserJet 9000 Font DIMM Kit Installation Guide User Manual
Page 21
DIMM Installation Guide
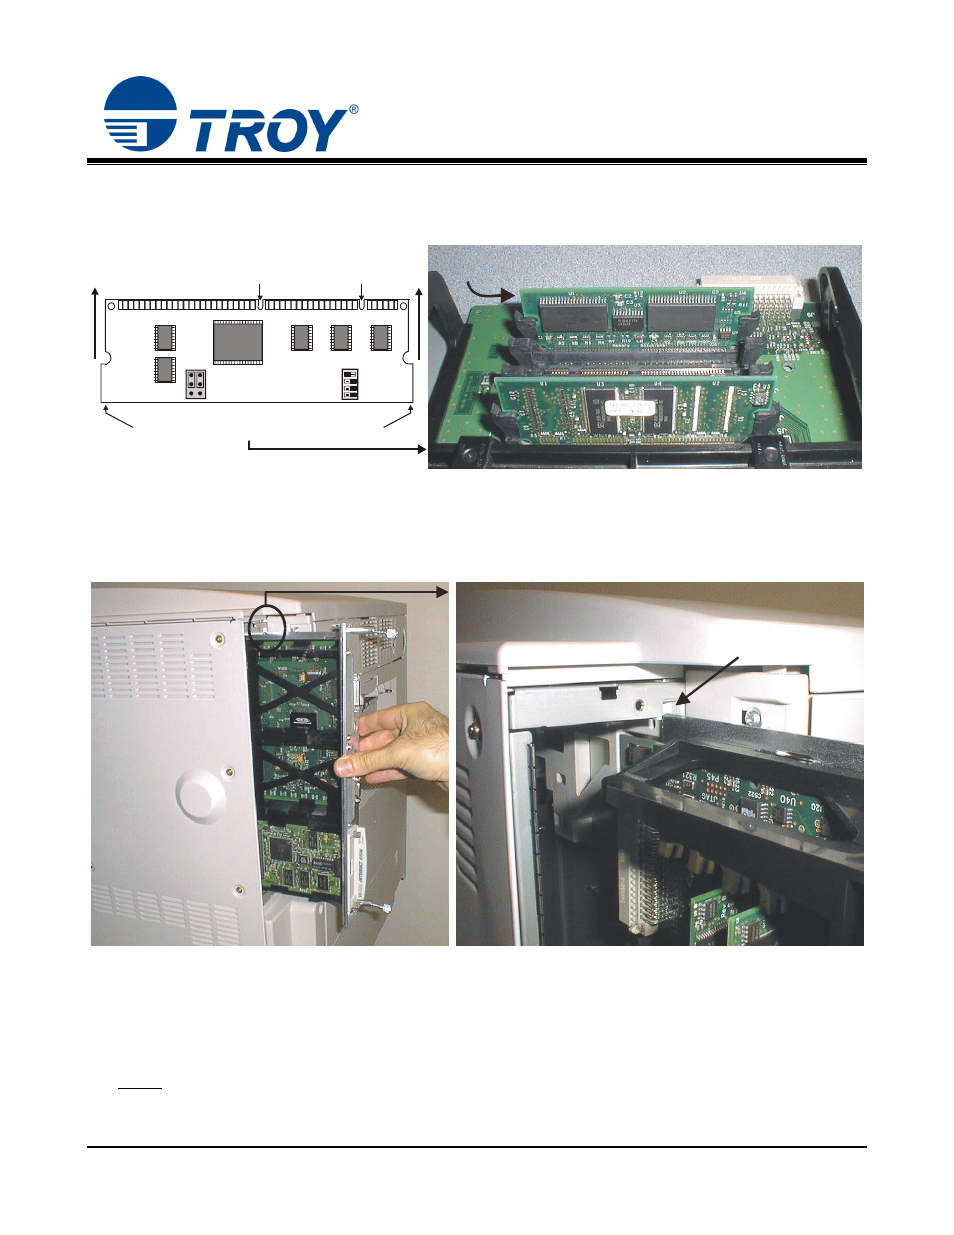
4. Ensure the DIMM is positioned correctly, and then fully insert the DIMM into the DIMM slot until the
DIMM snaps firmly into place (Figure 6). The retaining clips will close automatically. Verify the DIMM
retaining clips are fully closed.
Figure 6
5. Align the top and bottom edges of the formatter board with top and bottom track guides inside the printer
(Figure 7 and Figure 8), and carefully slide the formatter board into the printer. Hand-tighten the two
thumbscrews (turn clockwise) on the formatter board.
Figure 7 Figure 8
6. Reconnect the printer data cable and power cable. The font DIMM installation is complete.
7. Refer to the TROY Quick-Start Guide (provided with your TROY DIMM Solution) for instructions on
installing the required TROY software and support files.
NOTE
Correct installation of the font DIMM
with the retaining clips pushed closed.
The DIMM is keyed and can only be inserted when the
two notches are aligned with the tabs in the DIMM slot.
Place DIMM into the DIMM slot, then push firmly
at each corner until the DIMM snaps into place.
TROY DIMM
Align the edge of the formatter board with the
track guides, and push the board into the printer.
:
If assistance is required for removing or installing the DIMM, please call TROY Technical
Support at (800) 332-6427. Customers outside the United States, please call (304) 232-0899.
Document #50-70395-001 Rev. D
Page 21 of 22
Document #50-70395-001 Rev. D
Page 21 of 22