8150 dimm installation guide, Hewlett-packard 8100 / 8150 series printers, Hp 8100 / 8150 printer – TROY Group Hewlett-Packard LaserJet 9000 Font DIMM Kit Installation Guide User Manual
Page 18: Dimm installation guide, Page 18 of 22
DIMM Installation Guide
Hewlett-Packard 8100 / 8150 Series Printers:
IMPORTANT:
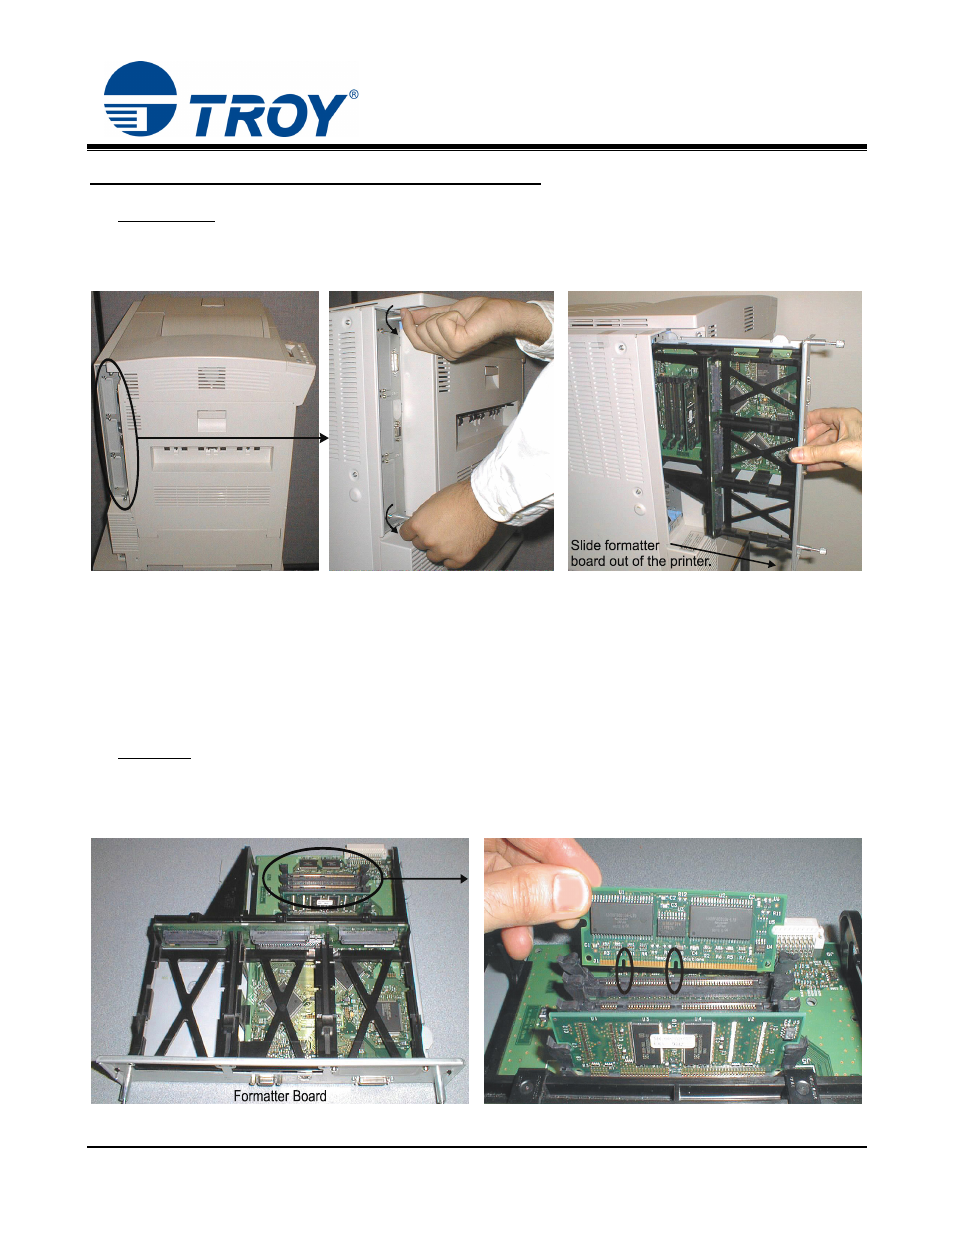
Ensure the printer power is switched OFF, and then disconnect the printer power cord
from the AC wall outlet.
1. Loosen the thumbscrews (turn counter-clockwise) at rear of the printer (Figure 1 and Figure 2), and then
carefully slide the formatter board out of printer (Figure 3).
Figure 1
e 3
the cutouts in
CAUTION
Figure 2
Figur
2. Set the formatter board on a clean flat surface. Ensure the retaining clips for one of the empty DIMM slots
are pushed out to the side to allow installation of the TROY DIMM. Do NOT remove or change the slot
location of any currently installed DIMM. Use one of the currently empty DIMM slots only.
Install the DIMM into one of the available DIMM slots in the correct orientation, matching
3.
the DIMM with the tabs at the bottom of the DIMM slot (Figure 4 and Figure 5).
: The DIMM is a static-sensitive device and can be permanently damaged if handled improperly.
c-bag,
Handle the DIMM by the edges only. Avoid touching the components on the DIMM or the
metal contacts along the edge of the DIMM. Before removing the DIMM from the anti-stati
ground yourself by touching the metal portion of the printer chassis to dissipate any static charge.
Document #50-70395-001 Rev. D
Page 18 of 22
Figure 4 Figure 5
Align notches in the font DIMM with
the tabs at the bottom of DIMM slot.