4100 dimm installation guide, Hewlett-packard 4100 series printers, Hp 4100 printer – TROY Group Hewlett-Packard LaserJet 9000 Font DIMM Kit Installation Guide User Manual
Page 14: Dimm installation guide, Page 14 of 22
DIMM Installation Guide
Hewlett-Packard 4100 Series Printers:
IMPORTANT:
Ensure the printer power is switched OFF, and then disconnect the printer power cord
from the AC wall outlet.
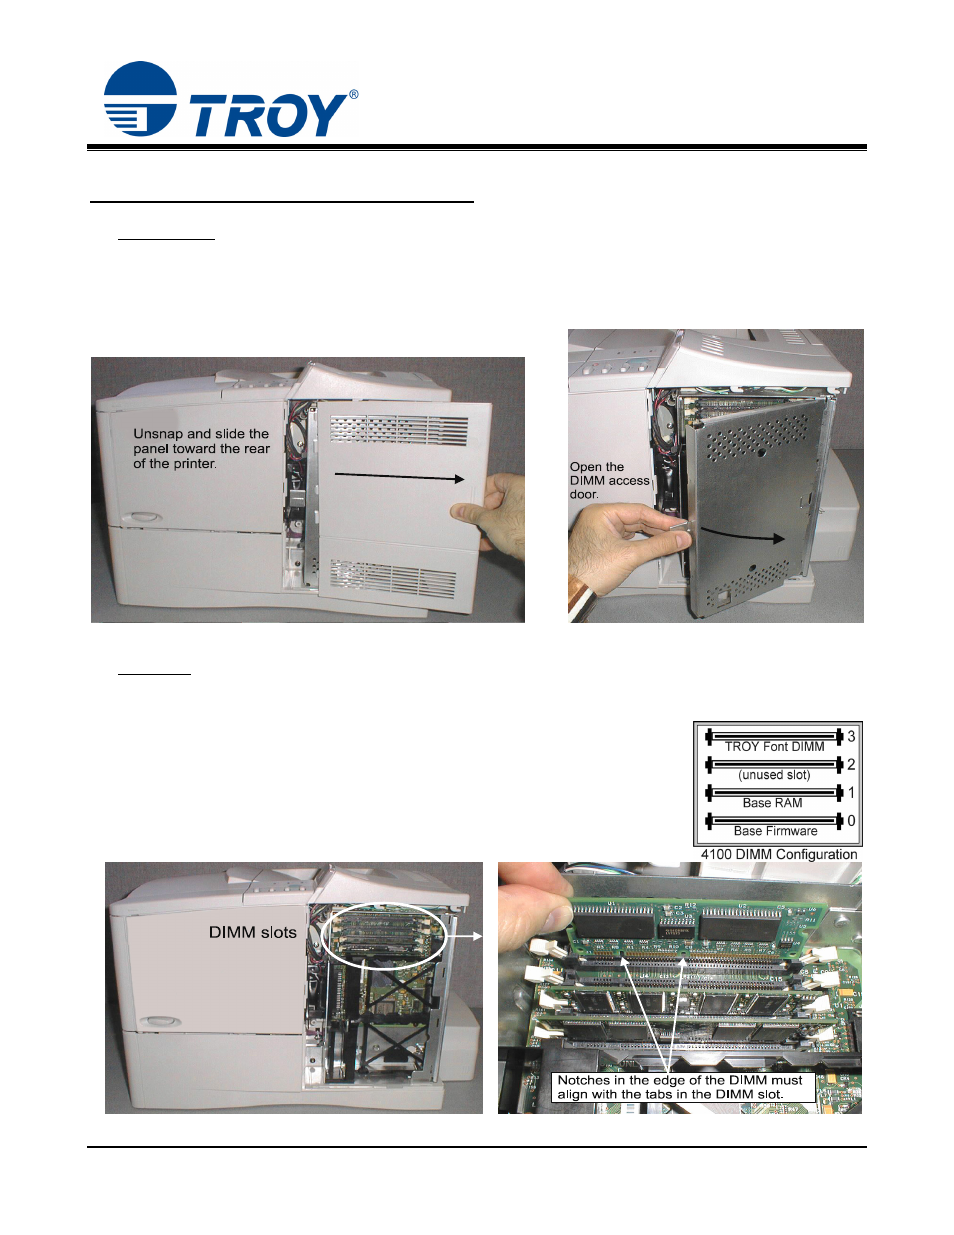
1. Unsnap and slide the right-rear panel toward the rear of the printer (Figure 1).
2. Open the DIMM access door (Figure 2). For easier access, the metal door can easily be removed by lifting
the door off the hinge slots.
Figure 1
CAUTION
Figure 2
Document #50-70395-001 Rev. D
Page 14 of 22
: The DIMM is a static-sensitive device and can be permanently damaged if handled improperly.
of
. Verify the DIMM slot retaining clips are pushed out to the side to allow
Avoid touching any components or the metal contacts along the edge of the DIMM. Before
removing the DIMM from the anti-static bag, ground yourself by touching the metal portion
the printer chassis to dissipate any static charge.
3
installation of the DIMM. Ensure the DIMM is positioned correctly (Figures 3
and 4), and then fully insert it into either DIMM slot #2 or #3 until it snaps into
place (the retaining clips will close automatically). Do not remove or change the
position of any DIMMs installed in DIMM slots #0 or #1.
Figure 4 Figure 5