Dimm installation guide, Page 17 of 22 – TROY Group Hewlett-Packard LaserJet 9000 Font DIMM Kit Installation Guide User Manual
Page 17
DIMM Installation Guide
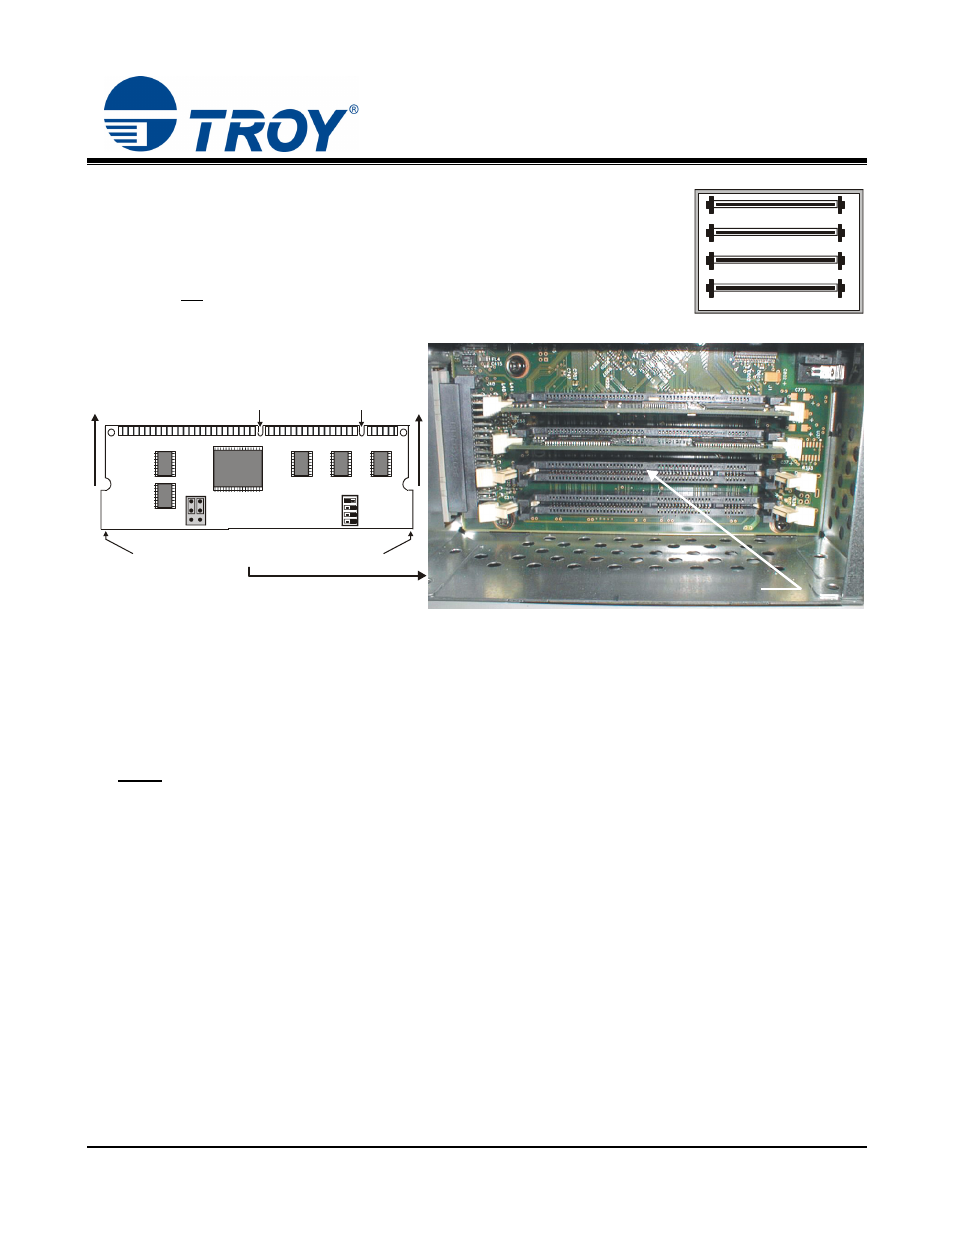
4. Ensure the TROY Font DIMM is oriented correctly (Figure 5), fully insert the
DIMM into DIMM slot #2 (Figure 6), and then push firmly on each corner of the
DIMM until the DIMM snaps into place. The retaining clips will close
automatically. Verify the DIMM retaining clips are closed (retaining clips
pressed against the DIMM) to ensure the DIMM is properly seated in the DIMM
slot. Do not
Document #50-70395-001 Rev. D
Page 17 of 22
remove or change the slot location of any existing DIMMs.
Figure 5 Figure 6
5. Close the DIMM access door, and replace the printer panels.
6. Reconnect the printer power cord and printer data cable.
7. Refer to the TROY Quick-Start Guide (provided with your TROY DIMM Solution) for instructions on
installing the required TROY software and support files.
NOTE
1
2
3
0
Base RAM
Base Firmware
TROY DIMM
(unused slot)
4200/4300 DIMM Configuration
Insert the TROY Font DIMM in this slot.
The DIMM is keyed and can only be inserted when the
two notches are aligned with the tabs in the DIMM slot.
Place DIMM into the DIMM slot, then push firmly
at each corner until the DIMM snaps into place.
TROY DIMM
:
If assistance is required for installing the TROY DIMM, please call TROY Technical Support
at (800) 332-6427. Customers outside the United States, please call (304) 232-0899.