General settings - fax/internet fax/server fax – Xerox 5222 User Manual
Page 94
4 Fax
94
1.
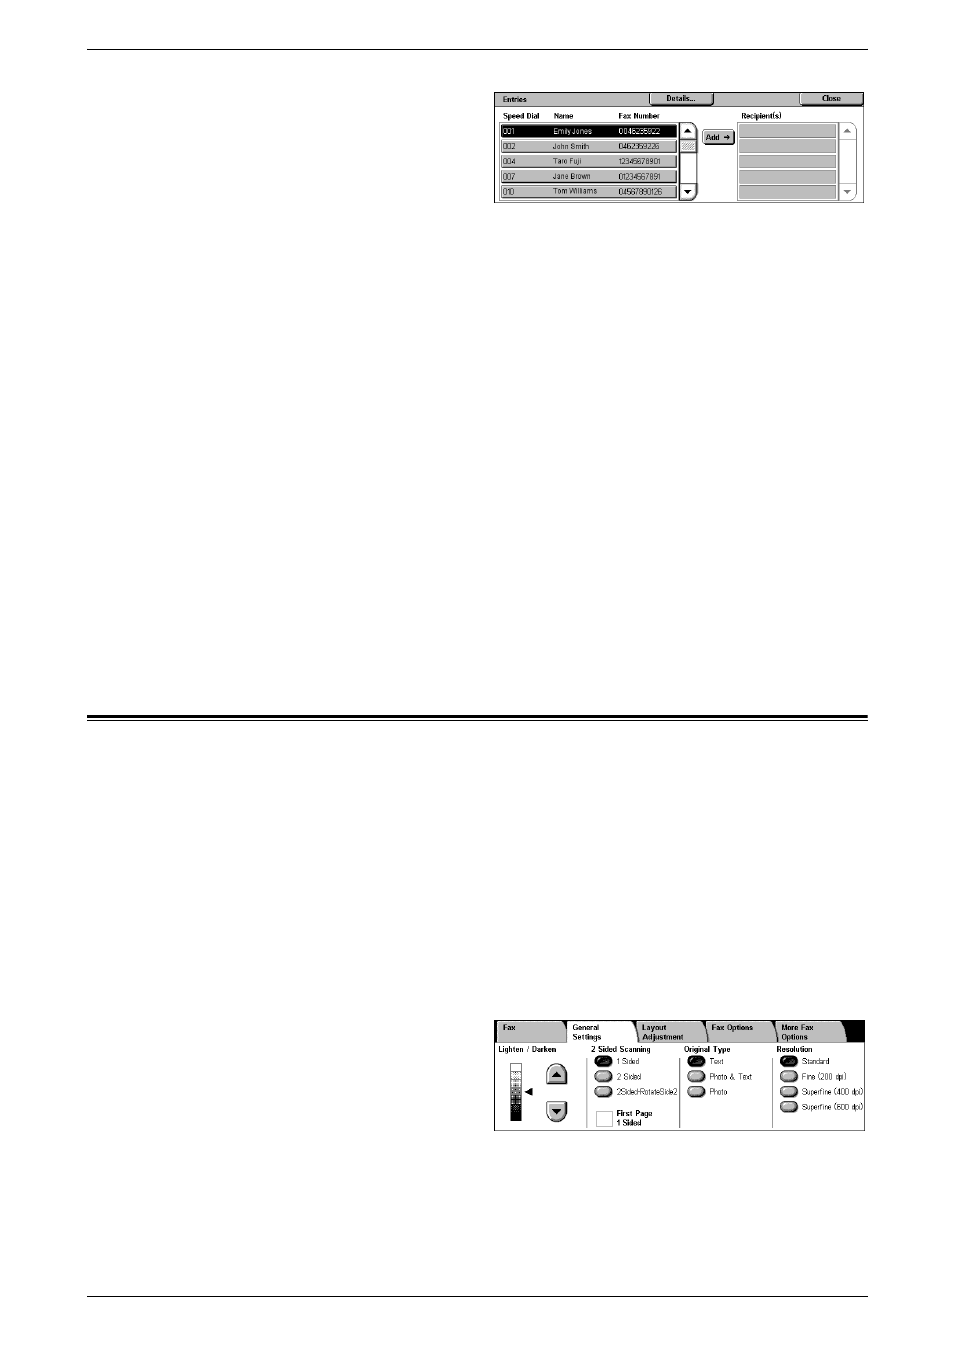
Select [Address Book] on the
[Fax] screen.
2.
Select the required destination,
and then select [Add J] to add it
to the [Recipient(s)] field.
Repeat this step to select all the
required destinations.
3.
Select [Close].
Details
Displays the screen that shows the details of a selected recipient.
Speed Dial/Name/Fax Number
Lists the fax recipient information registered in the Address Book.
NOTE: Server Fax supports group dialing. Server Fax, however, supports only group
numbers registered on the Server Fax server, not those registered on the machine.
Add J
Adds a selected fax recipient to the [Recipient(s)] field.
Recipient(s)
Lists the selected fax recipients. Touching a selected fax recipient pops up a menu
allowing you to remove the recipient or view its details.
General Settings - Fax/Internet Fax/Server Fax
This section describes the general image control features for a Fax/Internet Fax job.
For information on the features available, refer to the following:
Lighten/Darken – page 95
2 Sided Scanning – page 95
Original Type – page 95
Resolution – page 96
NOTE: The following default scan settings under [System Settings] > [Scan/Fax
Service Settings] > [Scan Defaults] apply to faxes sent via the Server Fax service:
[Lighten/Darken] and [Background Suppression].
1.
Make sure that the desired fax service is enabled.
2.
Press the
on the control panel.
3.
Select [Fax] or [Internet Fax] on
the All Services screen.
4.
Select the [General Settings]
tab.
5.
Select the required feature.