2 remote management limitations, Figure 155 menu 24.11 remote management control, Table 70 menu 24.11 remote management control – ZyXEL Communications ADSL2+ Ethernet/USB Gateway 660RU-Tx Series User Manual
Page 226
Prestige 660RU-Tx Series User’s Guide
225
Chapter 27 Remote Management
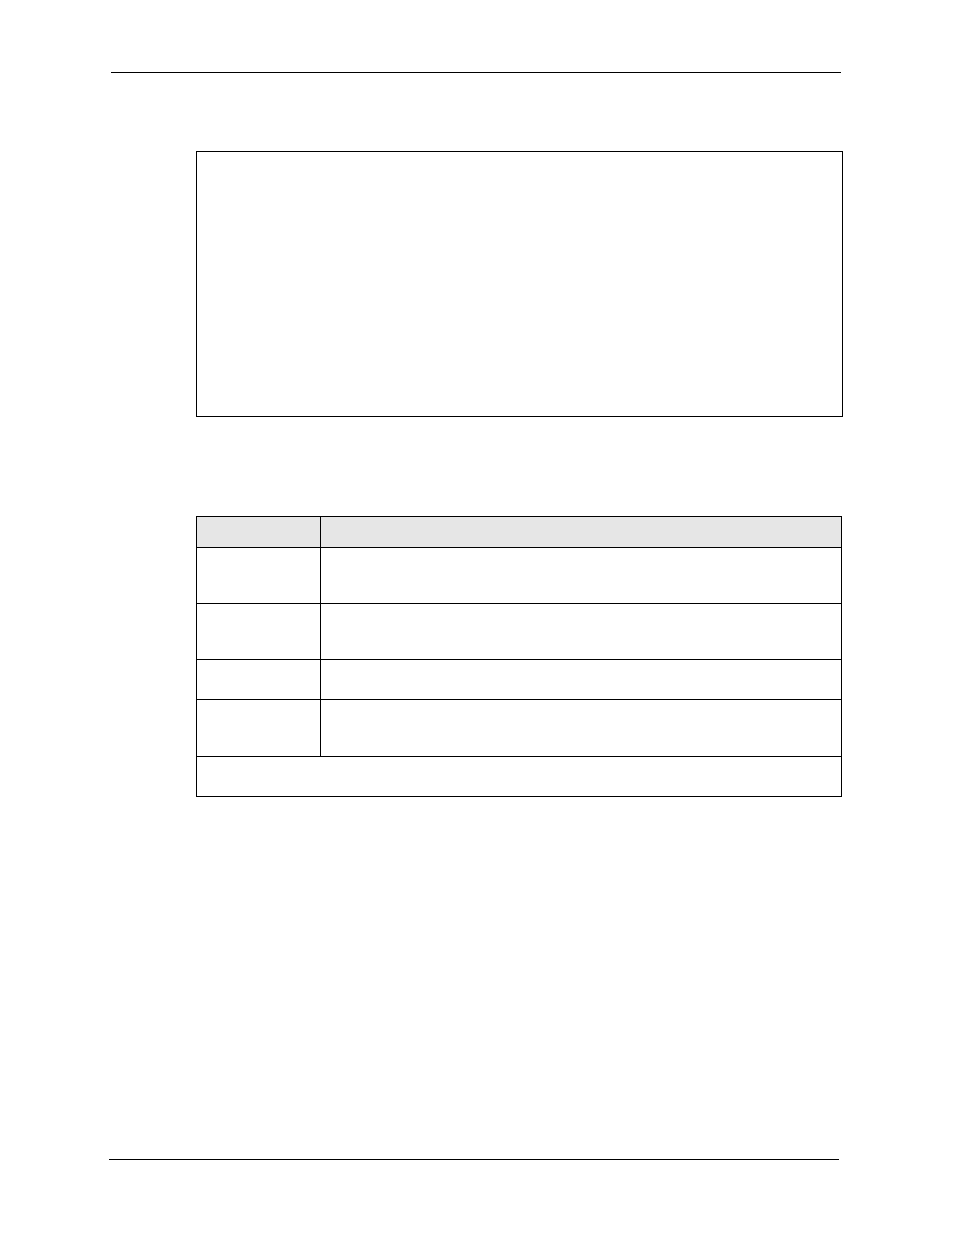
Figure 155 Menu 24.11 Remote Management Control
The following table describes the fields in this menu.
27.2.2 Remote Management Limitations
Remote management over LAN or WAN will not work when:
• A filter in menu 3.1 (LAN) or in menu 11.5 (WAN) is applied to block a Telnet, FTP or
Web service.
• You have disabled that service in menu 24.11.
• The IP address in the Secured Client IP field (menu 24.11) does not match the client IP
address. If it does not match, the Prestige will disconnect the session immediately.
• There is already another remote management session with an equal or higher priority
running. You may only have one remote management session running at one time.
Menu 24.11 - Remote Management Control
TELNET Server:
Server Port = 23 Server Access = LAN only
Secured Client IP = 0.0.0.0
FTP Server:
Server Port = 21 Server Access = LAN only
Secured Client IP = 0.0.0.0
Web Server:
Server Port = 80 Server Access = LAN only
Secured Client IP = 0.0.0.0
Press ENTER to Confirm or ESC to Cancel:
Table 70 Menu 24.11 Remote Management Control
FIELD
DESCRIPTION
Telnet Server
FTP Server
Web Server
Each of these read-only labels denotes a service or protocol.
Port
This field shows the port number for the service or protocol. You may change the
port number if needed, but you must use the same port number to access the
Prestige.
Access
Select the access interface (if any) by pressing the [SPACE BAR]. Choices are:
LAN only, WAN only, All or Disable. The default is LAN only.
Secured Client IP The default 0.0.0.0 allows any client to use this service or protocol to access the
Prestige. Enter an IP address to restrict access to a client with a matching IP
address.
When you have completed this menu, press [ENTER] at the prompt “
Press ENTER to Confirm
or ESC to Cancel:
” to save your configuration, or press [ESC] at any time to cancel.