Toshiba 255 User Manual
Page 79
2.PRINTING FROM WINDOWS
Printing with the Best Functions for Your Needs 77
2 PRINTING FROM WINDOWS
3
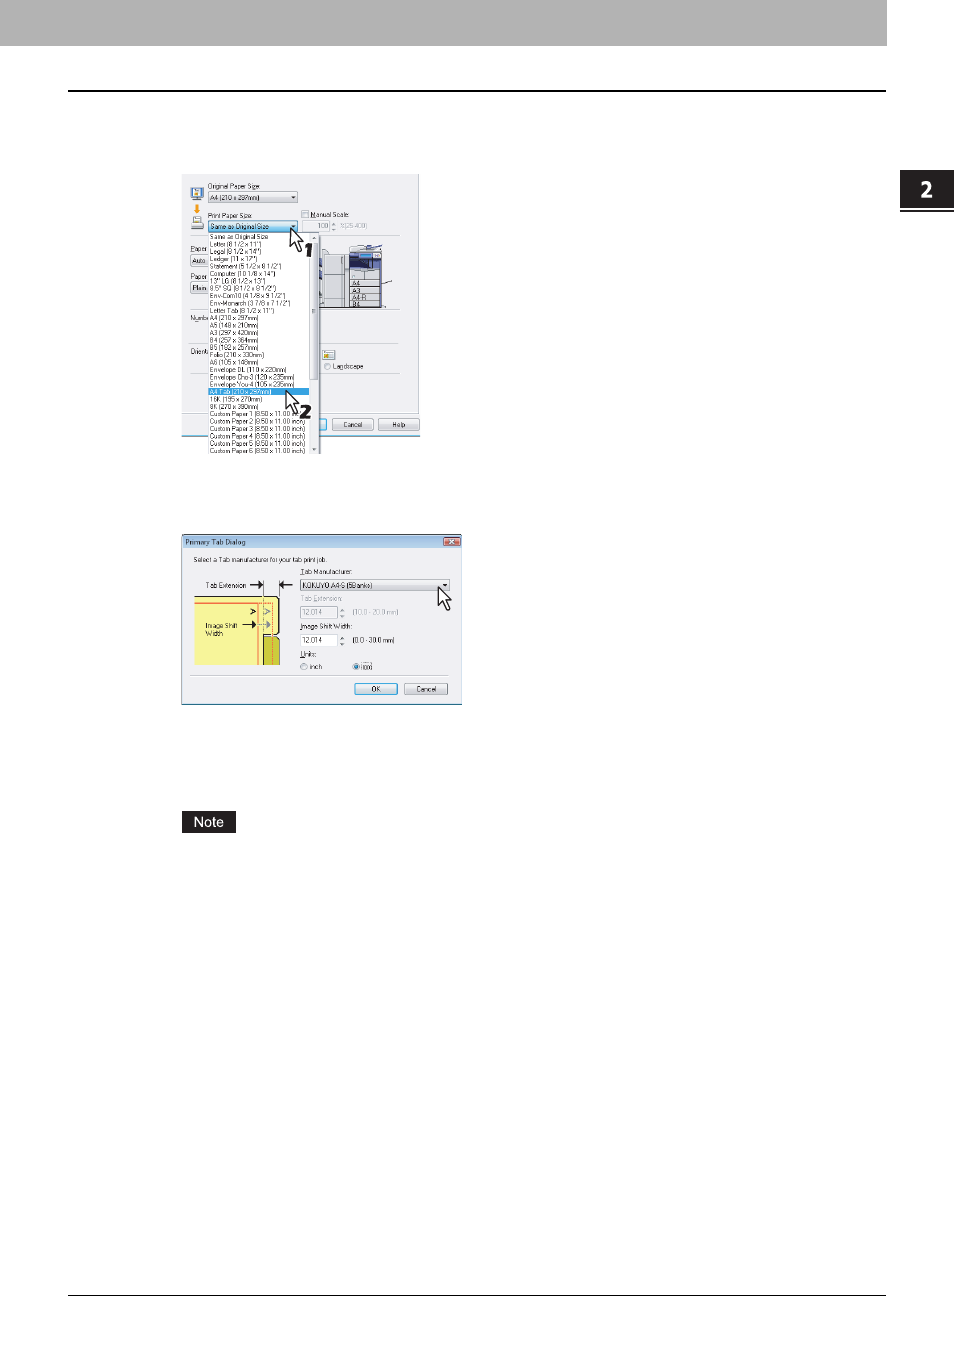
When printing a document, display the [Basic] tab menu of the printer driver
properties, select document size in the [Original Paper Size] box, and select either
[Letter Tab] or [A4 Tab] (according to the document size) in the [Print Paper Size] box.
The [Primary Tab Dialog] dialog box appears.
4
In the [Tab Manufacturer] box, select the product name of the tab paper that you use, or
select [Custom] when you use other manufactured tab paper.
5
When you select [Custom] in the [Tab Manufacturer] box, enter the width of the tab
extension in the [Tab Extension] box.
6
Enter the width to shift the printed image in the [Image Shift Width] box.
The 0.08 inches or 2.0 mm margin on the right side of the paper is not a printable area. Therefore, be sure to
enter the image shift margin so that an image will be printed within the printable area.
7
Click [OK].
8
Set any other print options as required and click [OK].
9
Click [OK] or [Print] to send the print job.
10
Press [JOB STATUS] on the touch panel.
The print job list appears.
11
Select the desired job in the print job list and then press the [START] button on the
control panel.
y
The print job is printed on the tab paper.
y
For the detailed instructions on how to use the control panel, see the following page: