Connecting the av receiver/av amplifier —continued, Connecting onkyo components – Onkyo TX-SR605 User Manual
Page 39
39
Connecting the AV Receiver/AV Amplifier—Continued
With
(Remote Interactive), you can use the follow-
ing special functions:
■ Auto Power On/Standby
When you start playback on a component connected
via
, if the AV receiver/AV amplifier is on
Standby, it will automatically turn on and select that
component as the input source. Similarly, when the
AV receiver/AV amplifier is set to Standby, all com-
ponents connected via
will also go on Standby.
■ Direct Change
When playback is started on a component connected
via
, the AV receiver/AV amplifier automatically
selects that component as the input source. If your
DVD player is connected to the AV receiver/AV
amplifier’s multichannel DVD input, you’ll need to
press the [MULTI CH] button to hear all channels
(see page 55), as the Direct Change
function
only selects the FRONT DVD IN jacks.
■ Remote Control
You can use the AV receiver/AV amplifier’s remote
controller to control your other
-capable Onkyo
components, pointing the remote controller at the
AV receiver/AV amplifier’s remote control sensor
instead of the component. You must enter the appro-
priate remote control code first (see page 91).
Notes:
• Use only
cables for
connections.
cables
are supplied with Onkyo players (DVD, CD, etc.).
• Some components have two
jacks. You can con-
nect either one to the AV receiver/AV amplifier. The
other jack is for connecting additional
-capable
components.
• Connect only Onkyo components to
jacks. Con-
necting other manufacturer’s components may cause a
malfunction.
• Some components may not support all
functions.
Refer to the manuals supplied with your other Onkyo
components.
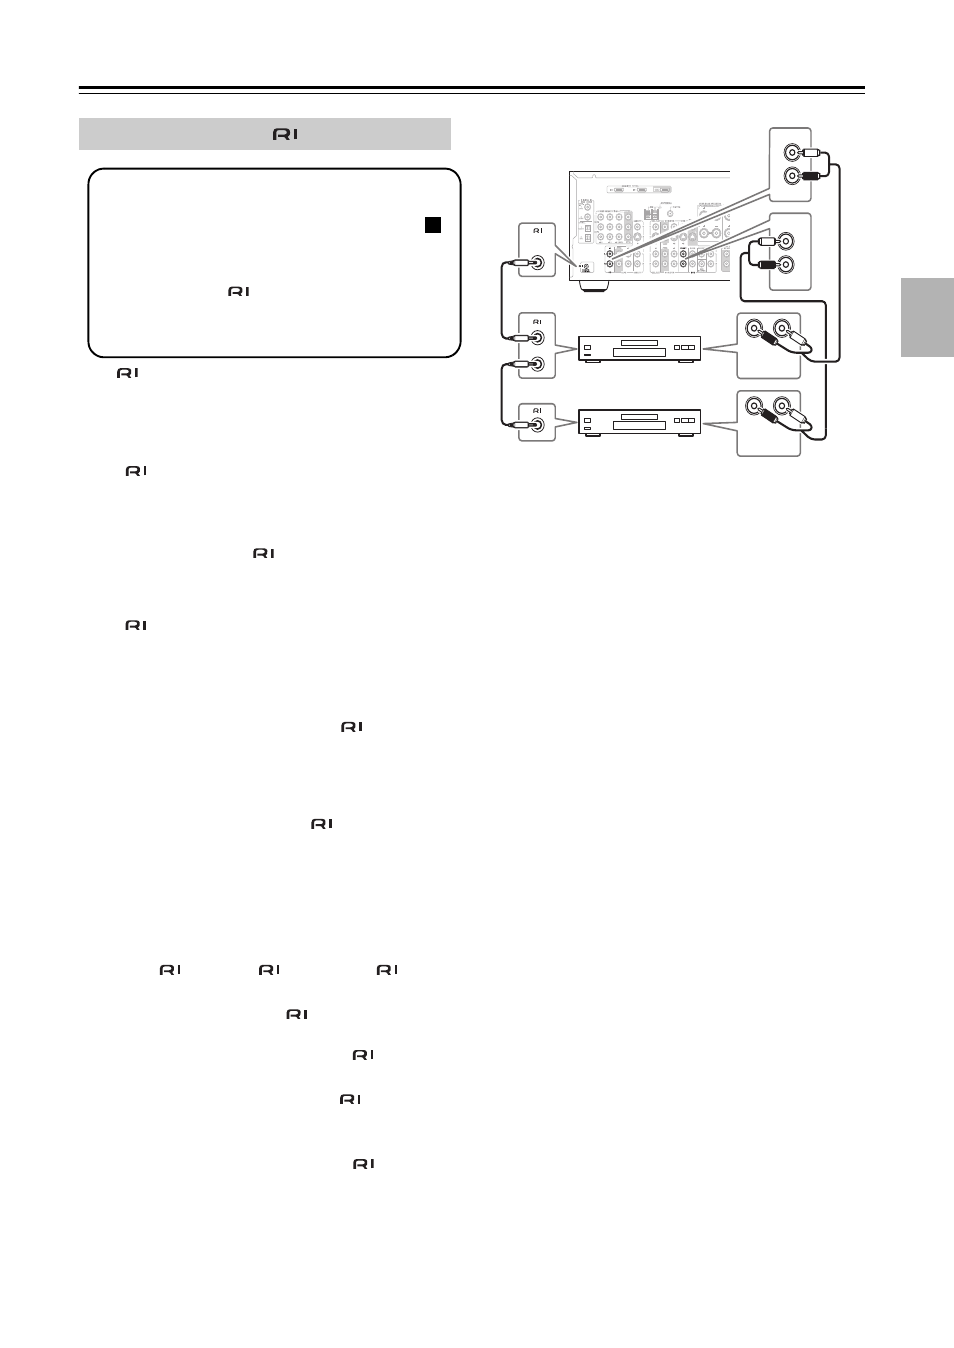
Connecting Onkyo
Components
Step 1: Make sure that each Onkyo component is
connected to the AV receiver/AV amplifier
with an analog audio cable (connection
in the hookup examples) (see pages 26 to
38).
Step 2: Make the
connection.
Step 3: If you’re using an MD, CDR, or RI Dock,
change the input display (see page 51).
a
L
R
FRONT
DVD
L
R
IN
CD
L
R
REMOTE
CONTROL
ANALOG
AUDIO OUT
L
R
ANALOG
AUDIO OUT
e.g., CD player
e.g., DVD player