4 upgrading drivers and adapters, Driver update – Raymarine Pathfinder User Manual
Page 11
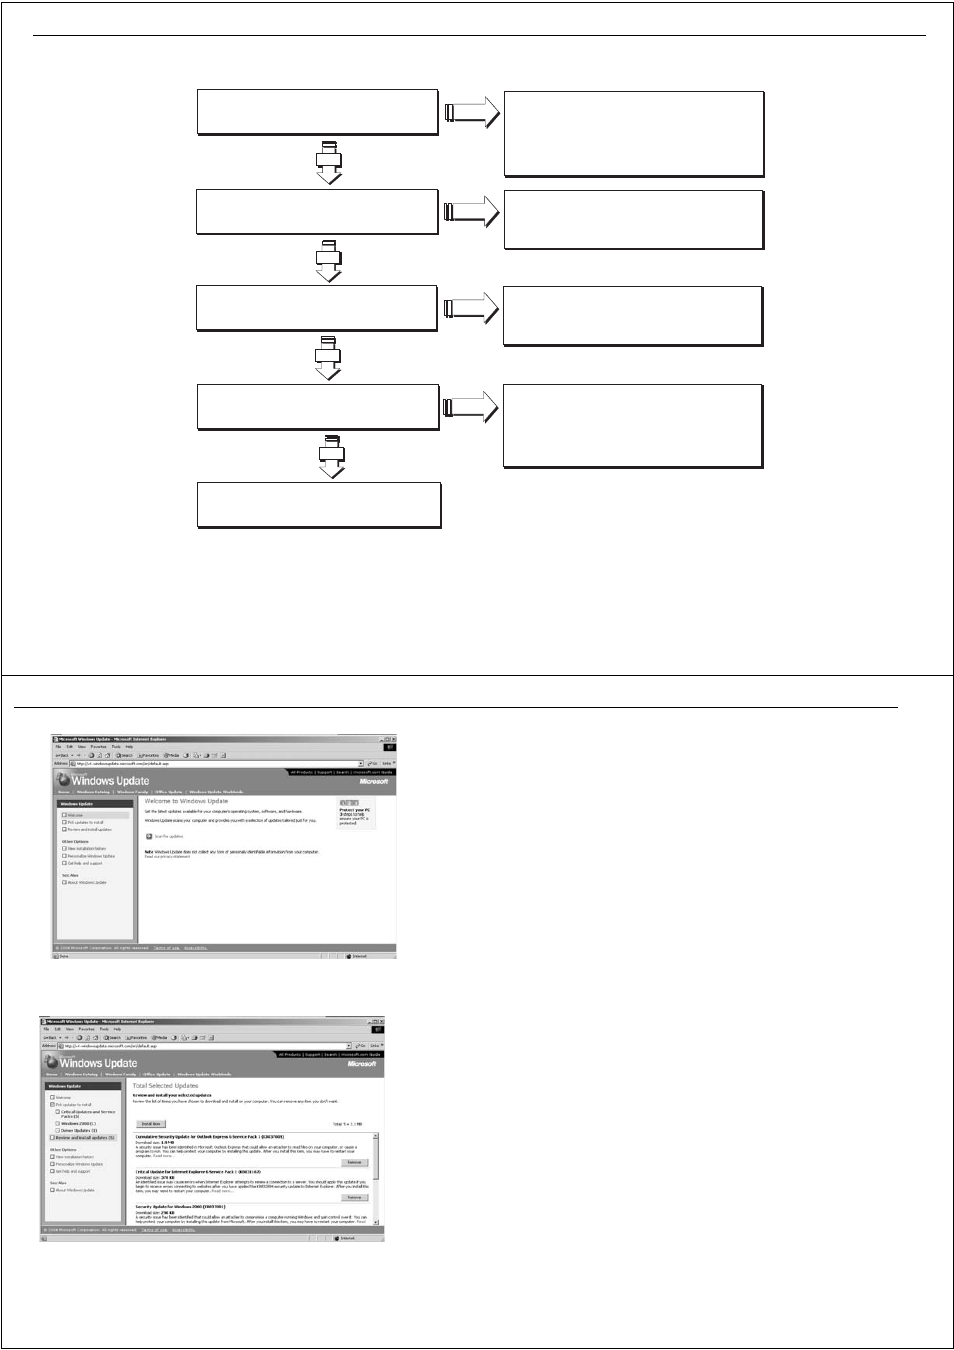
Chapter 2: System requirements
11
Note: *If you are not planning to buy the Pathfinder PC kit, or you are not intending to use RayTech’s hsb
2
networking capability for chart, radar, sonar
sharing, you can skip this check.
YES
Is the PC a laptop?*
You will need a PCI-PCMCIA adaptor if
connecting to hsb display via an hsb PC kit.
Visit www.raymarine.com for
details of recommended PCs and adapters
NO
NO
Is the PC's software up-to-date?
Get the latest software updates for your PC from
http://windowsupdate.microsoft.com
and the manufacturer of your graphics adapter
(e.g. http://www.nvidia.com) or PC.
NO
Your PC is now ready for RayTech RNS
D8821_1
YES
YES
Does the PC have an available Ethernet port
You will need an Ethernet port for interfacing
SeaTalk
NO
NO
hs
2
2
YES
Does the PC have an USB 2.0 port?
You will need a USB 2.0 port if connecting to an
hsb display using the hsb to USB 2.0 interface
NO
NO
2
2
12
RayTech RNS V6.0 - Users Guide
Figure 2-1: Welcome to Windows Update.
Figure 2-2: Review Updates screen.
2.4 Upgrading drivers and adapters
Prior to installing RayTech, Raymarine strongly recommend updating your
PC display drivers and verifying that you have the latest versions of
Microsoft DirectX and your Display adapter driver installed.
Note: It will be necessary to have the PC connected to the internet for
these checks and updates to be carried out.
Driver update
To ensure that your PC is current with regard to Windows operating system
patches you should execute the Windows Update utility.
To run the Windows Update utility:
1. On the computer taskbar, click
Start
. The pop-up menu is displayed.
2. Select and click
Windows Update
. The PC will connect to the Microsoft
Windows Update site.
3. The Welcome screen is displayed. See Figure 2-1
4. Click
Scan for Updates
.
5. Your computer is scanned to find which update patches are required.
The screen updates to show the progress of the scan. When the scan is
complete the Review Updates screen is displayed. See Figure 2-2
6. Click
Review and Install Updates.
The available updates are displayed.
7. Click
Install Now
. Installation of the updates starts, with progress
being shown on screen.
8. Upon completion of the installation a dialog box appears. This will tell
you that installation is complete and that you need to restart your
computer for the updates to be activated.
9. Check Restart Now. Click
OK
. Your computer will restart and Windows
will be updated.
10. Repeat Steps 1-9 until all applicable updates have been installed.
D6966_1
D6968_1