Copying selected measures of a pattern, Clearing a pattern, Clearing selected measures of a pattern – Roland TD-10 User Manual
Page 105
■
Copying selected measures of
a pattern
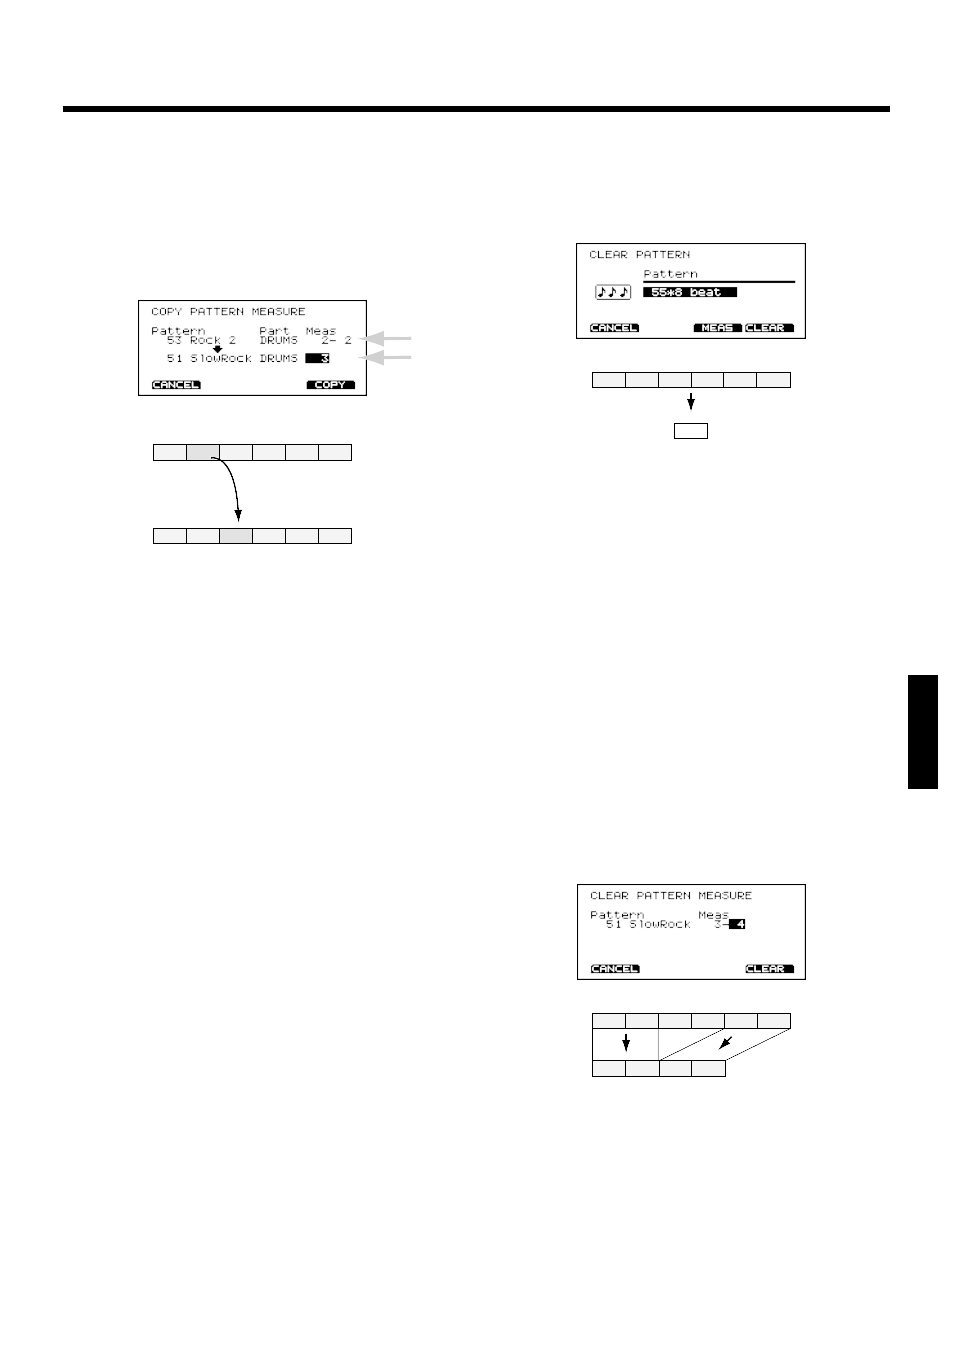
You can copy selected measures of a part or pattern. Unlike
copying an entire pattern, settings such as instrument and
part volume etc. will not be copied; only the performance
data will be copied.
fig.07-15
Procedure
1.
Press [PATTERN]-[F3 (EDIT)]-[F2 (COPY)]-[F3 (MEAS)].
The “COPY PATTERN MEASURE” page will appear.
2.
In location “A” of the screen, select the data you wish to
copy. Use [CURSOR] to move the cursor to the various
settings.
From the left, the display will indicate the pattern, part, first
measure, and last measure.
3.
Use [INC/DEC] or the VALUE dial to make the settings.
4.
In location “B” of the screen, select the copy destination.
Use [CURSOR] to move to the various settings.
The display indicates the pattern number, track, and starting
measure.
* Beginning at the first measure which you specify here, the num-
ber of measures that the copy source occupies will be overwrit-
ten.
5.
Use [INC/DEC] or the VALUE dial to make the settings.
6.
Press [F4 (COPY)]
A confirmation display will appear.
7.
Press [F4 (EXEC)] and the specified portion of perfor-
mance data will be copied. (Press [F1 (CANCEL)] to
return to the previous page without executing the opera-
tion.)
■
Clearing a pattern
This operation deletes ALL data from a pattern, returning all
parameters (time signature,length, tempo) to their default
values.
fig.07-15ae
Procedure
1.
Press [PATTERN]-[F3 (EDIT)]-[F3 (CLEAR)].
The “CLEAR PATTERN” page will appear.
2.
Use [INC/DEC] or the VALUE dial to select the pattern
number that you wish to clear.
3.
Press [F4 (CLEAR)]
A confirmation display will appear.
4.
Press [F4 (EXEC)] and the contents of the selected pat-
tern will be erased. (Press [F1 (CANCEL)] to return to the
previous page without executing the operation.)
■
Clearing selected measures of
a pattern
This operation lets you clear (delete) selected measures in a
pattern. After executing CLEAR, the length of the pattern
will become shorter.
fig.07-15b
Procedure
1.
Press [PATTERN]-[F3 (EDIT)]-[F3 (CLEAR)]-[F3 (MEAS)].
The “CLEAR PATTERN MEASURE” page will appear.
2.
Select the pattern and measures that you wish to clear.
Use [CURSOR] to move the cursor to the various set-
tings.
From the left, the display indicates the pattern, the first mea-
sure, and the last measure.
1
2
3
4
5
6
1
2
3
4
5
6
Src
Dst
A
B
1
2
3
4
5
6
1
(Part settings to their default values.)
1
2
3
4
5
6
1
2
3
4
Chapter 6. Sequencer
105
Chapter 1
Chapter 2
Chapter 3
Chapter 4
Chapter 5
Chapter 6
Chapter 7
Chapter 8
Chapter 9
Chapter 10