Ip address: byte 1= 11, Ip address: byte 2= 22, Network setup: network boot – Ricoh Aficio AP3200 User Manual
Page 81: Network boot: *none
Configuring the Printer for the Network with the Operation Panel
65
3
B Press {{{{Enter #}}}}.
Byte 1 of the IP address appears
on the panel display.
IP Address:
Byte 1= 11
C Use {{{{U
U
U
U}}}} or {{{{T
T
T
T}}}} to edit the val-
ue.
D Press {{{{Enter #}}}}.
Byte 2 of the IP address appears.
IP Address:
Byte 2= 22
E Use {{{{U
U
U
U}}}} or {{{{T
T
T
T}}}} to edit the val-
ue.
Repeat steps
C and D to speci-
fy the remaining bytes.
F Press {{{{Enter #}}}} to register the IP
address you specified.
F
If you use TCP/IP, you should as-
sign the “Subnet Mask” and
“Gateway Address” using the
same procedure for specifying the
IP address.
G
If you use TCP/IP, set the “Access
Control” and “Access Mask” us-
ing the same procedure for speci-
fying the IP address, if necessary.
H
If you use TCP/IP, you can make
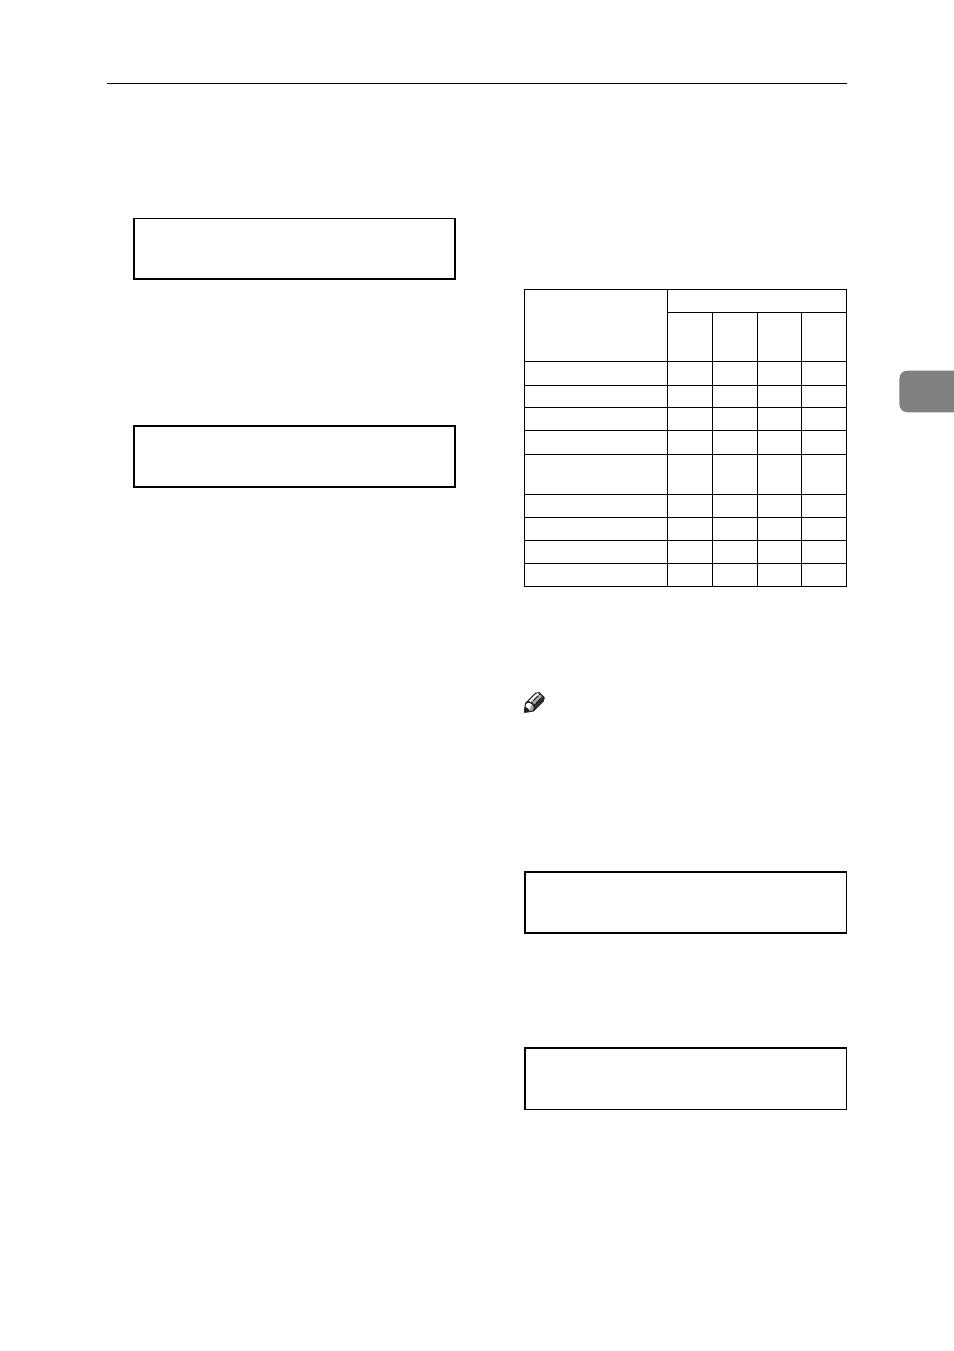
settings for “Network Boot”.
Choose how to obtain the printer's
IP address from a server on the
network. The following methods
are available.
*1
ARP + PING
*2
RARP + TFTP
*3
BOOTP
*4
DHCP
Note
❒ You must have configured the
server in order to use “RARP +
TFTP”, “BOOTP”, or “DHCP”.
A Press {{{{T
T
T
T}}}} or {{{{U
U
U
U}}}} until the fol-
lowing message appears.
Network Setup:
Network Boot
B Press {{{{Enter #}}}}.
The current setting appears on
the panel display.
Network Boot:
*None
C Use {{{{T
T
T
T}}}} or {{{{U
U
U
U}}}} until the meth-
od you want to use appears.
D Press {{{{Enter #}}}}.
Menu item on the
panel display
Available methods
RA
BO
DH
ARP + PING
'
ARP & RARP
'
'
ARP & BOOTP
'
'
ARP&RARP&BOOTP
'
'
'
None
(Default Setting)
RARP + TFTP
'
BOOTP
'
RARP & BOOTP
'
'
DHCP
'