NETGEAR ADSL Firewall Router DG834 User Manual
Page 104
Reference Manual for the ADSL Firewall Router DG834
7-14
Virtual Private Networking (Advanced Feature)
202-10005-05, June 2005
•
In this example, type 192.168.3.1 in the Subnet field as the network address of the DG834.
•
Enter 255.255.255.0 in the Mask field as the LAN Subnet Mask of the DG834.
•
Select All in the Protocol menu to allow all traffic through the VPN tunnel.
•
Select the Connect using Secure Gateway Tunnel check box.
•
Select IP Address in the ID Type menu below the check box.
•
Enter the public WAN IP Address of the DG834 in the field directly below the ID Type
menu. In this example,
22.23.24.25
would be used.
•
The resulting Connection Settings are shown in
.
3.
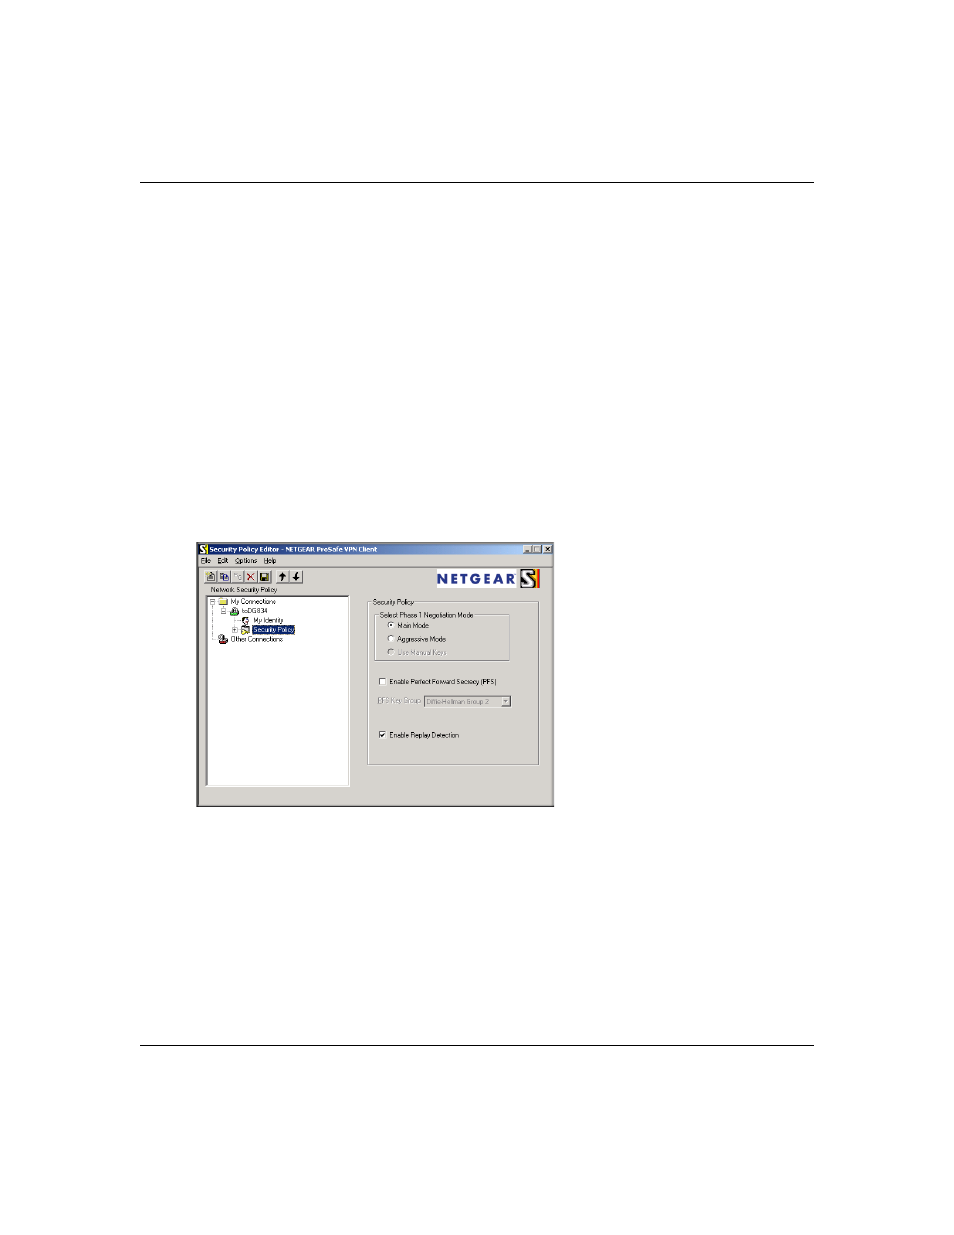
Configure the Security Policy in the NETGEAR ProSafe VPN Client software.
•
In the Network Security Policy list, expand the new connection by double clicking its
name or clicking on the “+” symbol. My Identity and Security Policy subheadings appear
below the connection name.
•
Click on the Security Policy subheading to show the Security Policy menu.
Figure 7-11: Security Policy Editor Security Policy
•
Select the Main Mode in the Select Phase 1 Negotiation Mode check box.
4.
Configure the VPN Client Identity.
In this step, you will provide information about the remote VPN client PC. You will need to
provide:
— The Pre-Shared Key that you configured in the DG834.
— Either a fixed IP address or a “fixed virtual” IP address of the VPN client PC.