Connecting cables to the rmx 4000, Connecting cables to the rmx 4000 -17 – Polycom DOC2560C User Manual
Page 49
Polycom RMX 1500/2000/4000 Getting Started Guide
2-17
with an appropriate antioxidant compound before crimp connections
are made. Tinned, solder-plated or silver plated connectors do not
have to be prepared in this manner.
6
Replace the transparent plastic caps on the terminal block.
7
Turn ON the Main that supplies power to the RMX.
8
Turn ON the circuit breaker on each of the DC Power Rail Modules.
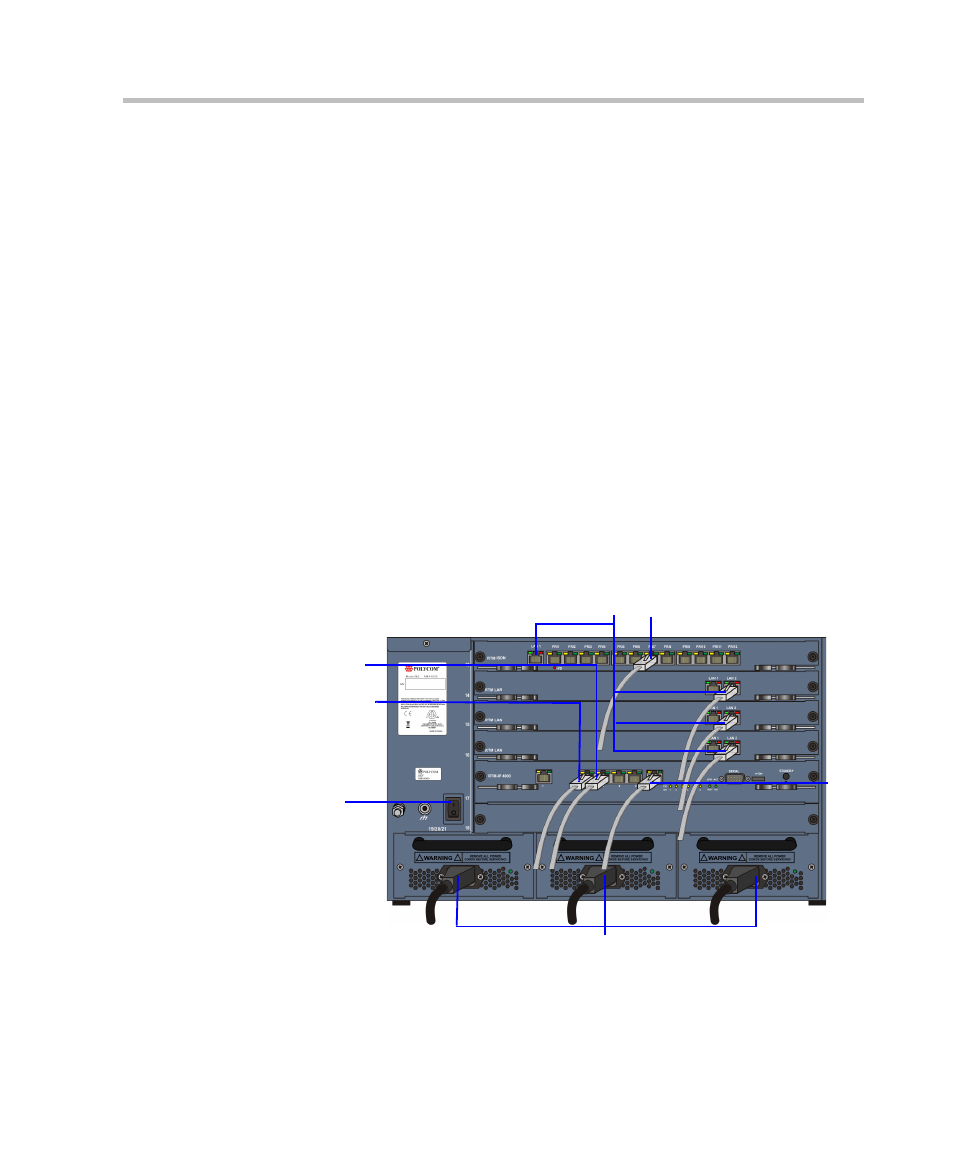
Connecting Cables to the RMX 4000
To connect the cables (AC and DC systems):
•
RTM-IP 4000:
—
Connect the Management Network cable to LAN 2.
—
Connect the Signalling cable to LAN 3.
—
Connect the Shelf Management cable to LAN 6.
•
For each installed RTM LAN - Connect the LAN cable to LAN 2.
•
For each installed RTM ISDN:
—
Connect the E1/T1 cables to their PRI Ports.
—
Connect the LAN cable to LAN 1.
Figure 2-3
RMX 4000 Rear Panel View with AC Power and Communication
Cables
LAN Connections to RTM LAN
Power Cables
Off/On
switch
E1/T1 Connection to RTM ISDN
Shelf
Manage-
ment
Management
Network
Signalling
Network